


Oasis Panel for Phantom Fridge – Napoleon

Price range: 229,00 € through 599,00 € (VAT inc.)

✅Clean integration of the refrigerator in OASIS islands (intermediate or end).

✅Options for 1 or 2 doors depending on capacity.

✅Respect of ventilation and technical access for stable performance.

✅Compatibility with IM-FMP / IM-FEP and double kits.

✅Non-combustible countertop mounting with recommended overhang.

✅Fine levelling by means of adjustable system feet.

✅Professional end termination with 2″ panel (optional).

Configure it to your liking

Clear selection

Complete your set

See more

Your selections

Total price

SKU: IM-XXFXX-MK Categories: , ,
Métodos de pago

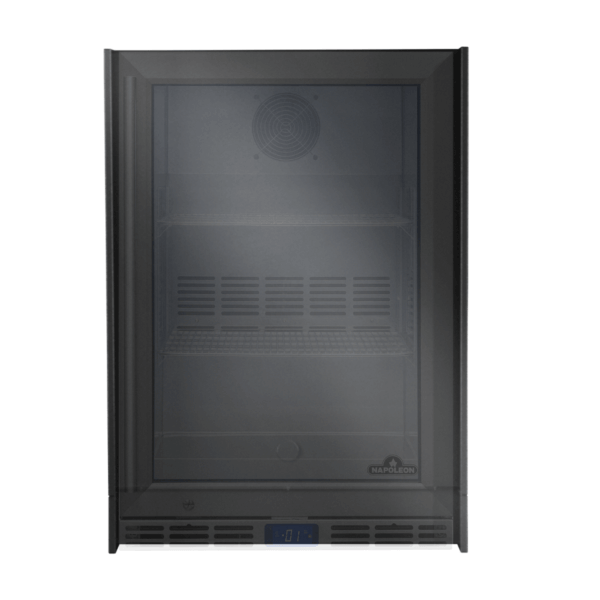
Imagine a perfectly aligned outdoor kitchen, where the refrigerator fits flush with the OASIS modules and the whole looks professional from any angle. The Oasis Panel for Phantom Fridge is designed to close and finish off the fridge opening with specific pieces depending on its position in the island, intermediate or final, and depending on the type of fridge, one or two doors, preserving the structural and visual continuity of the system.

The result is not only aesthetic, the piece guides the installation so that wiring, ventilation and service accesses are where they should be, avoiding improvised cut-outs or unstable gaps that end up affecting the performance of the equipment.

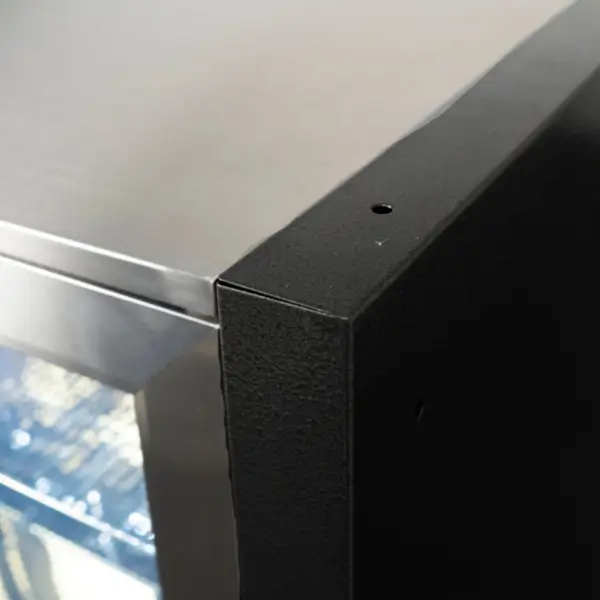
More than a trim, this panel acts as a technical component of the OASIS ecosystem, defining the edge, protecting the exposed side, routing the electrical path and stabilising the front so that everything is coplanar with the worktop. In open designs, this trim also acts as a shield against side impact, splashes or side wind, extending the life of the refrigerator unit and island finishes.

🧱 Materials and construction

The panel is part of a modular system designed for quick assembly, controlled tolerances and fine levelling by means of adjustable feet per module. This base makes it possible to absorb small unevennesses in the floor without losing alignment, which is critical when the refrigerator is integrated between modules with very pronounced handles and lines.

The construction withstands the usual stresses of an outdoor kitchen, such as tray supports, contact with tools and micro-shocks when entering and exiting, and does so by protecting edges and corners, which are the areas that are most affected by the weather or intensive use.

In a refrigerator environment, the panel works in conjunction with the system-specific cabinet, allowing for the required rear ventilation and does not interfere with service registers. The geometry is designed so that, when removed, the technician can access the rear control of the refrigerator without major dismantling of the rest of the island.

At the same time, it acts as a mechanical backing so that the worktop does not transmit loads to the appliance or creak under torsional stress when the island expands or contracts with temperature changes. The finish is designed to withstand frequent cleaning and exterior exposure so that the front remains uniform with the rest of the Phantom line.

⚙️ Outstanding features

The primary function is to achieve a clean, repeatable finish in any configuration. If the refrigerator is between modules, the intermediate panel solves the rear closure while respecting the air flow and cable routing. If the refrigerator is at the end, the end panel adds the finishing side to protect and give visual continuity. This differentiation avoids on-site customised work, reduces the margin of error and speeds up assembly, especially when several trades are involved.

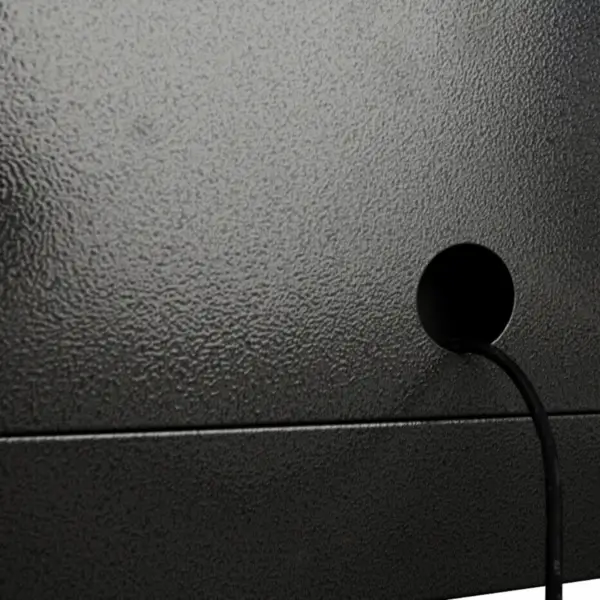
In addition to the end cap, the panel organises the technical installation. Knockouts allow the power cable to be routed with bushings that prevent the vibration of the compressor from cutting the sheathing at a sharp edge. The part also helps to position the appliance inside the niche, maintains the rear clearance indicated by the manufacturer and ensures the correct plane at the front, so that the refrigerator doors protrude as far as necessary to open without rubbing. In the two-door versions, this control of the front plane is particularly important, because the handles tend to have greater projection and any misalignment is immediately noticeable.

🚀 Performance and efficiency

The performance of a built-in refrigerator depends on its ability to expel heat without restriction. The panel helps to keep that airflow unrestricted, leaves the rear inlet and outlet channel clear and establishes a perimeter that discourages plugging the gap with inadequate lining or sealants.

When the island breathes as it should, the compressor works for less time and effort, which translates into lower consumption, less noise and greater longevity of the equipment. If the hot air is confined, the temperature rises inside the niche, the compressor cycles more frequently and the appliance stops sustaining cooling during hot hours, just when it is needed most.

The part also influences the thermal consistency of the assembly. By stabilising the front plane and avoiding interference with hinges, the fridge seals better and loses less cold at each opening.

In real cooking, that translates into more stable marinades and mise en place, beverages on point and less temperature drift when working in shifts or with doors opening often. In windy environments, the lateral end variation finial also helps to prevent the air jet from invading the niche, avoiding turbulence that hinders subsequent convection.

🎨 Design and aesthetics

The Phantom line is based on coplanar lines, a continuous front and a finish that conceals joints and screws. The panel is integrated so that the island has a single visual gesture, without patches or strange shadows when changing modules. At the end, the side trim turns a potentially weak side into a clean and robust plane, raising the visual reading of the whole.

This control of detail is particularly noticeable in kitchens with monolithic worktops and tight overhangs, where any step is perceived as a flaw.

The design also has daily use in mind. The panel reduces areas where grease or dust accumulates and leaves radii and edges suitable for frequent cleaning without easy scratching. The continuity of the front is not only aesthetic, it also avoids trapping with clothes or accidental bumps when moving around the work area.

In configurations with bar or peninsula, the homogeneous finish towards the outside allows the service area and the dining area to coexist without technical elements being visible.

🔗 Compatibilities and ecosystem

This panel is designed to fit in with OASIS refrigerator cabinets and with the panel fixing kits provided by the manufacturer, in both single and double door formats. This compatibility reduces the number of on-site decisions, as the installer does not need to imagine where to run the cable or where to leave the ventilation window, the system already suggests and protects it.

The piece coexists with non-combustible worktops and with the overhangs recommended by the manufacturer, maintaining the correct relationship between the front, the overhang and the breathing space.

In complex kitchens, the panel is understood with cooking, storage, corner and sink modules. The choice between middle and end allows, for example, the refrigerator to be placed between the grill and sink to minimise runs, with mise en place on the left, grilling in the centre and washing up on the right, or to be placed at the end to create a drinks station that does not interfere with the hot zone.

When the fridge is a two-door fridge, the double panel resolves the greater width and the greater leverage of the leaves, maintaining opening margin and a step-free façade.

🍳 Benefits for different cooking styles

In direct grill and quick menu, the panel facilitates a fluid island, you open the fridge, take protein or side dish and return to the grill without crossing paths with other users. In low & slow, stable refrigeration is key to brining, marinating and glazing with continuity, the top prevents the niche from overheating and keeps sauces and rubs in range.

On a griddle or teppan, having chopped vegetables, fish and rubs to hand reduces downtime, and closing the niche prevents suspended fat from colonising the technical area.

If you work with stone-baked pizzas, the well-integrated fridge keeps doughs, cheeses and cold meats at the ready, and the panel keeps ventilation free even if you place bases or shovels nearby.

In cocktail and beverage service, the final version allows you to create a bar with a clean transition to the dining area, separating the cold flow from the hot zone. For grilled desserts or pastry mise en place, the appliance preserves creams, creams and fruits, and the finial prevents the heat radiated by the grill from invading the niche when you approach with trays.

🛡️ Safety and ease of use

Safety starts with correct spacing and materials. The panel helps to ensure that the rear clearance required for the refrigerator is not reduced and that the worktop does not block the air path.

Placing the appliance away from the grill head reduces heat transfer and thus compressor cycles. On a day-to-day basis, the end cap protects the exposed side from bumps and avoids exposed edges, which is key when there are children, pets or heavy traffic around the island.

In terms of ease of use, the piece helps to position the appliance so that the doors open without interfering with the handles of adjacent units. This full opening allows large trays to be removed without turning them, reduces tip-over accidents and improves ergonomics when loading and unloading. In addition, by guiding the cable routing and access to the rear control panel, maintenance work is simplified. If it needs to be serviced, there is no need to dismantle half the kitchen, just release the panel and take action.

📊 Panel comparison table

Configuration Position in kitchen Panel dimensions (H×W×D, cm) Overall dimensions of the refrigerator (H×W×D, cm) Recommended compatibilities
Single door Middle 89 × 63.5 × 5 cm 86.36 × 60.50 × 65.50 cm Napoleon NFR055OUSS-1 1-door outdoor refrigerator.
Single door End 89 × 68.6 × 61 cm 86.36 × 60.50 × 60.50 × 65.50 cm Napoleon NFR055OUSS-1 1-door outdoor refrigerator.
Double door Intermediate 90 × 94 × 8.9 cm 86.5 × 90 × 54 cm 210 L Napoleon NFR210ODGL 210 L double-door outdoor refrigerator.
Double door End 88.9 × 95.9 × 95.9 × 60.3 cm 86.5 x 90 x 90 x 54 cm Outdoor double door refrigerator 210 L Napoleon NFR210ODGL.

Assembly and location

The aim is to achieve coplanar integration with the other OASIS modules, maintaining ventilation and safety distances that preserve the performance of the refrigerator and the durability of the assembly. Key points to consider
  • Plan the layout: define the location of the refrigerator in an intermediate position (between modules) or end position (side finish) before fixing anything.
  • Check the level of the floor and adjust the adjustable feet of the modules to align the fronts and joints.
  • Maintain a minimum rear ventilation of 150 mm in the refrigerator cabinet and do not obstruct the grilles.
  • Avoid placing the refrigerator close to the top of the grill; leave a functional gap to reduce heat transfer.
  • Non-combustible worktop and overhang in accordance with the manufacturer's instructions; avoid supports that block rear ventilation.
  • Dry fit the panels before screwing them in place to check coplanarity and continuity of lines.

Grommets and safety

Correct and protected wiring prevents cuts, vibrations and overheating. Use the steps provided and comply with electrical and gas regulations. Key points to consider
  • Use the knockouts/wall bushings provided by the system; install bushings/hubs to protect the wiring from sharp edges.
  • Route electrical and gas lines separately; do not share wall bushings or make unnecessary crossings.
  • Leave slack in the cable for service removal without pulling on the connectors.
  • All gas or electrical work must be carried out by qualified personnel in accordance with local regulations.
  • Do not seal grilles or ventilation gaps with silicone/foam; only use perimeter seals where appropriate.

Installation differences depending on variation

All share the same assembly philosophy; the finish and effective width vary depending on the type of refrigerator (1 or 2 doors) and position (intermediate or end). Key points to consider
  • IM-1DFMP-MK (1 door · intermediate): Check the alignment between adjacent modules; the rear panel must be parallel to the front to maintain the ‘line’ of the island.
  • IM-1DFEP-MK (1 door · end): Includes side panel trim; ensure it is vertical so that the outer edge is perfectly plumb and protected.
  • IM-2DFMP-MK (2 doors · intermediate): Check the opening clearance of both doors without interfering with adjacent module handles.
  • IM-2DFEP-MK (2 doors · end): The end panel is more exposed; reinforce fixings and check that there is no vibration on the side.

Cleaning and care

Gentle, regular maintenance preserves the paintwork and “Phantom” appearance, preventing abrasion and surface corrosion. Key points to note
  • Clean with a soft cloth and mild detergent; rinse and dry.
  • Avoid abrasives, metal scourers, bleach or chlorinated products.
  • Remove dust or saltpetre in coastal environments with a light rinse and subsequent drying.
  • Inspect screw areas (heads and edges) and touch up if necessary with a suitable protective coating.
  • Keep the rear grilles and access to the refrigerator's control panel clear.

Preventive maintenance (recommended frequencies)

Small periodic checks prevent future dismantling and extend the life of the unit. Key points to consider
  • Monthly:
    • Check that there are no objects leaning against the back that could reduce ventilation.
    • Check the level of the island and retighten any screws if you notice any looseness.
  • Quarterly:
    • Check the integrity of wall bushings and cable protective covers.
    • Check that the refrigerator doors open to 90° without rubbing against fronts or handles.
  • High/low season:
    • Deep cleaning of surfaces and review of perimeter seals.
    • Check the distance to heat sources (grill/griddle) and possible relocation of hot accessories.

Performance and ventilation

Heat dissipation is critical for the refrigerator to maintain cold temperatures without overloading. A beautiful island that does not breathe will fail. Key points to consider
  • Leave at least 150 mm of space behind the refrigerator cabinet.
  • Do not cover vents or air passages with furniture, accessories or sealants.
  • Ensure fresh air enters from below and exits from the top/rear of the niche.
  • If you notice overheating or abnormal compressor noise, free up the airflow and check that the panel is not pressing on the wiring.

Safety and regulations

Outdoor kitchens combine electricity, heat and humidity. Safety depends on installing according to regulations and using the correct materials. Key points to consider
  • Use non-combustible worktops and fittings suitable for outdoor use.
  • Use electrical sockets that are protected and suitable for outdoor use in accordance with local regulations.
  • Maintain safe distances from heat sources and avoid crossing cables near hot areas.
  • Do not modify perforations or make additional cuts that compromise the structure or ventilation of the cabinet.

Assembly and location

The aim is to achieve coplanar integration with the other OASIS modules, maintaining ventilation and safety distances that preserve the performance of the refrigerator and the durability of the assembly.

Key points to consider

  • Plan the layout: decide where to place the refrigerator in an intermediate position (between units) or end position (side finish) before fixing anything in place.
  • Check the level of the floor and adjust the adjustable feet of the units to align the fronts and joints.

  • Maintain a minimum rear ventilation of 150 mm in the refrigerator cabinet and do not obstruct the vents.

  • Avoid placing the refrigerator close to the top of the grill; leave a functional gap to reduce heat transfer.

  • Non-combustible worktop and overhang in accordance with the manufacturer's instructions; avoid supports that block rear ventilation.

  • Dry fit the panels before screwing them in place to check coplanarity and line continuity.

Grommets and safety

Correct and protected wiring prevents cuts, vibrations and overheating. Use the steps provided and comply with electrical and gas regulations.

Key points to consider

  • Use the knockouts/grommets provided by the system; install bushings/grommets to protect the wiring from sharp edges.

  • Route electricity and gas lines separately; do not share cable glands or make unnecessary crossings.

  • Leave slack in the cable for service removal without pulling on connectors.

  • All gas or electrical work must be carried out by qualified personnel in accordance with local regulations.

  • Do not seal grilles or ventilation openings with silicone/foam; only use perimeter seals where appropriate.

Installation differences according to variation

All share the same assembly philosophy; the finish and effective width change depending on the type of refrigerator (1 or 2 doors) and position (intermediate or end).

Key points to consider

  • IM-1DFMP-MK (1 door · intermediate): Check alignment between adjacent modules; the rear panel must be parallel to the front to maintain the ’line‘ of the island.

  • IM-1DFEP-MK (1 door · end): Includes side panel for finishing; ensure verticality so that the outer edge is perfectly plumb and protected.

  • IM-2DFMP-MK (2 doors · intermediate): Check the opening clearance of both doors without interfering with the handles of adjacent modules.

IM-2DFEP-MK (2 doors · end): The end panel is more exposed; reinforce fixings and check that there is no vibration on the side. ul>

Cleaning and care

Gentle, regular maintenance preserves the paintwork and ‘Phantom’ appearance, preventing abrasion and surface corrosion.

Key points to consider

  • Clean with a soft cloth and neutral detergent; rinse and dry.

  • Avoid abrasives, metal scourers, bleach or chlorinated products.

  • Remove dust or saltpetre in coastal environments with a light rinse and subsequent drying.

  • Inspect areas where screws are used (heads and edges) and touch up if necessary with a suitable protective coating.

  • Keep the rear grilles and access to the control panel of the refrigerator.

Preventive maintenance (recommended frequencies)

Small periodic checks prevent future dismantling and extend the life of the unit.

Key points to consider

  • Monthly:
    • Check that there are no objects leaning against the back that reduce ventilation.
    • Check the level of the island and retighten any screws if you notice any looseness.
  • Quarterly:
    • Check the integrity of wall bushings and cable protective sheath.
    • Check that the doors of the refrigerator open to 90° without rubbing against fronts or handles. -start=‘4196’>High/low season:
    • Deep cleaning of surfaces and checking of perimeter seals.
    • Checking the distance from heat sources (grill/hotplate) and possible relocation of hot accessories.

Performance and ventilation

Heat dissipation is critical for the refrigerator to maintain cold temperatures without overloading. A beautiful island that doesn't breathe will fail.

Key points to consider

  • Leave at least 150 mm of space behind the refrigerator cabinet.

  • Do not cover vents or air passages with furniture, accessories or sealants.

  • Ensure fresh air enters from below and exits from the top/back of the niche.

  • If you notice overheating or abnormal noise from the compressor, free up the air flow and check that the panel is not pressing on the wiring.

Safety and regulations

Outdoor cooking combines electricity, heat and humidity. Safety depends on installing according to regulations and using the correct materials.

Key points to consider

  • Use non-combustible worktops and outdoor-suitable fittings.
  • Use electrical outlets that are protected and suitable for outdoor use in accordance with local regulations.
  • Maintain safe distances from heat sources and avoid crossing cables near hot areas.
  • Do not modify perforations or make additional cuts that compromise the structure or ventilation of the cabinet.

Assembly and location

The aim is to achieve coplanar integration with the other OASIS modules, maintaining ventilation and safety distances that preserve the performance of the refrigerator and the durability of the assembly.

Key points to consider

  • Plan the layout: decide where to place the refrigerator in an intermediate position (between units) or end position (side finish) before fixing anything in place.

  • Check the level of the floor and adjust the adjustable legs of the modules to align fronts and joints.

  • Maintain a minimum rear ventilation of 150 mm in the refrigerator cabinet and do not obstruct the vents.

  • Avoid placing the refrigerator close to the top of the grill; leave a functional gap to reduce heat transfer.

  • Non-combustible worktop and overhang in accordance with the manufacturer's instructions; avoid supports that block rear ventilation.

  • Lay the panels dry before screwing them down to check coplanarity and line continuity.

Grommets and safety

Correct and protected wiring prevents cuts, vibrations and overheating. Use the designated passages and comply with electrical and gas regulations.

Key points to consider

  • Use the knockouts/grommets provided by the system; fit bushings/ bushings to protect the wiring from sharp edges.

  • Route electricity and gas lines separately; do not share bushings or unnecessary crossings.

  • Leave slack in the cable for service removal without pulling on connectors.

  • All gas or electrical work must be carried out by qualified personnel in accordance with local regulations.

Do not seal grilles or ventilation openings with silicone/foam; only use perimeter seals where appropriate.

Installation differences depending on variation

They all share the same installation philosophy; the finish and effective width vary depending on the type of refrigerator (1 or 2 doors) and position (intermediate or end).

Key points to consider

  • IM-1DFMP-MK (1 door · intermediate): Check alignment between adjacent modules; the rear panel must be parallel to the front to maintain the ‘line’ of the island.

  • IM-1DFEP-MK (1 door · end): Includes side panel for finishing; ensure verticality so that the outer edge is perfectly plumb and protected.

  • IM-2DFMP-MK (2 doors · intermediate): Check the opening clearance of both doors without interfering with the handles of adjacent modules.

  • IM-2DFEP-MK (2 doors · end): The end panel is more exposed; reinforces fixings and ensures there is no vibration on the side.

Cleaning and care

Gentle, regular maintenance preserves the paintwork and ‘Phantom’ appearance, preventing abrasion and surface corrosion.

Key points to consider

  • Clean with a soft cloth and neutral detergent; rinse and dry.

  • Avoid abrasives, metal scouring pads, bleach or chlorinated products.

  • Remove dust or saltpetre in coastal environments with a light rinse and subsequent drying.

  • Inspect areas where screws are used (heads and edges) and, if necessary, treat with a suitable protective agent.

  • Keep the rear grilles and access to the control panel of the refrigerator clear.

Preventive maintenance (recommended frequencies)

Small periodic checks prevent future dismantling and extend the life of the unit.

Key points to consider

  • Monthly:

    • Check that there are no objects leaning against the back that reduce ventilation.

    • Check the level of the island and tighten any screws if you notice any looseness.

  • Quarterly:

    • Check the integrity of wall bushings and cable protective sheaths.

    • Check that the refrigerator doors open to 90° without rubbing against the front or handles.

  • High/low season:

    • Deep cleaning of surfaces and checking of perimeter joints.

    • Checking the distance from heat sources (grill/hotplate) and possible relocation of hot accessories.

Performance and ventilation

Heat dissipation is critical for the refrigerator to stay cool without overloading. A beautiful island that doesn't breathe will fail.

Key points to consider

  • Leave at least 150 mm of space behind the refrigerator cabinet.

  • Do not cover vents or air passages with furniture, accessories or sealants.

  • Ensure fresh air can enter at the bottom and exit at the top/back of the recess.

  • If you notice overheating or abnormal noise from the compressor, free up the air flow and check that the panel is not pressing on the wiring.

Safety and regulations

Outdoor cooking combines electricity, heat and humidity. Safety depends on installing according to regulations and using the correct materials.

Key points to consider

  • Use non-combustible countertops and outdoor-rated hardware.
  • Use electrical outlets that are protected and suitable for outdoor use in accordance with local regulations.
  • Maintain safe distances from heat sources and avoid crossing cables near hot areas.
  • Do not modify perforations or make additional cuts that compromise the structure or ventilation of the cabinet.

Assembly and location

The aim is to achieve coplanar integration with the other OASIS modules, maintaining ventilation and safety distances that preserve the performance of the refrigerator and the durability of the assembly.

Key points to consider

  • Plan the layout: define the location of the refrigerator in an intermediate position (between modules) or end (side finish) before fixing anything in place.

  • Check the level of the floor and adjust the adjustable legs of the modules to align fronts and joints.

  • Maintain a minimum rear ventilation of 150 mm in the refrigerator cabinet and do not obstruct the vents.

  • Avoid placing the refrigerator close to the top of the grill; leave a functional gap to reduce heat transfer.

  • Non-combustible worktop and overhang in accordance with the manufacturer's instructions; avoid supports that block rear ventilation.

  • Lay the panels dry before screwing them down to check coplanarity and continuity of lines.

Grommets and safety

Correct and protected wiring prevents cuts, vibrations and overheating. Use the designated passages and comply with electrical and gas regulations.

Key points to consider

  • Use the knockouts/grommets provided by the system; fit bushings/ bushings to protect the wiring from sharp edges.

  • Route electricity and gas lines separately; do not share bushings or unnecessary crossings.

  • Leave slack in the cable for service removal without pulling on connectors.

  • All gas or electrical work must be carried out by qualified personnel in accordance with local regulations.

  • Do not seal grilles or ventilation openings with silicone/foam; only use perimeter seals where appropriate.

Installation differences depending on variation

They all share the same installation philosophy; the finish and effective width vary depending on the type of refrigerator (1 or 2 doors) and position (intermediate or final).

Key points to consider

  • IM-1DFMP-MK (1 door · intermediate): Check alignment between adjacent modules; the rear panel must be parallel to the front to maintain the ’line" of the island.

  • IM-1DFEP-MK (1 door · end): Includes side panel for finishing; ensure verticality so that the outer edge is perfectly plumb and protected.

  • IM-2DFMP-MK (2 doors · intermediate): Check the opening clearance of both doors without interfering with the handles of adjacent modules.

  • IM-2DFEP-MK (2 doors · end): The end panel is more exposed; reinforce fixings and check that there is no vibration on the side.

Cleaning and care

Gentle, regular maintenance preserves the paintwork and ‘Phantom’ appearance, preventing abrasion and surface corrosion.

Key points to consider

  • Clean with a soft cloth and neutral detergent; rinse and dry.

  • Avoid abrasives, metal scouring pads, bleach or chlorinated products.

  • Remove dust or saltpetre in coastal environments with a light rinse and subsequent drying.

  • Inspect areas where screws are used (heads and edges) and, if necessary, treat them with a suitable protective product.

  • Keep the rear grilles and access to the control panel of the refrigerator clear.

Preventive maintenance (recommended frequencies)

Small periodic checks prevent future dismantling and extend the life of the unit.

Key points to consider

  • Monthly:

    • Check that there are no objects leaning against the rear that reduce ventilation.

    • Check the level of the island and retighten any screws if you notice any looseness.

  • Quarterly:

    • Check the integrity of wall bushings and cable protective sheaths.

    • Check that the refrigerator doors open to 90° without rubbing against the front or handles.

  • High/low season:

    • Deep cleaning of surfaces and checking of perimeter seals.

    • Checking the distance from heat sources (grill/hotplate) and possible relocation of hot accessories.

Performance and ventilation

Heat dissipation is critical for the refrigerator to stay cool without overloading. A beautiful island that doesn't breathe will fail.

Key points to consider

  • Leave at least 150 mm of space behind the refrigerator cabinet.

  • Do not cover vents or air passages with furniture, accessories or sealants.

  • Ensure inflow of fresh air from below and outflow from the top/back of the niche.

  • If you notice overheating or abnormal noise from the compressor, free up the air flow and check that the panel is not pressing on the wiring.

Safety and regulations

Outdoor cooking combines electricity, heat and humidity. Safety depends on installing according to regulations and using the correct materials.

Key points to consider
  • Use non-combustible countertops and outdoor-grade hardware.
  • Use electrical outlets that are protected and suitable for outdoor use in accordance with local regulations.
  • Maintain safety distances from heat sources and avoid crossing cables near hot areas.
  • Do not modify perforations or make additional cuts that compromise the structure or ventilation of the cabinet.

Assembly and location

The aim is to achieve coplanar integration with the other OASIS modules, maintaining ventilation and safety distances that preserve the performance of the refrigerator and the durability of the assembly.

Key points to consider

  • Plan the layout: define the location of the refrigerator in an intermediate position (between modules) or end (side finish) before fixing anything in place.

  • Check the level of the floor and adjust the adjustable legs of the modules to align the fronts and joints.

  • Maintain a minimum rear ventilation of 150 mm in the refrigerator cabinet and do not obstruct the vents.

  • Avoid placing the refrigerator close to the top of the grill; leave a functional gap to reduce heat transfer.

  • Non-combustible worktop and overhang in accordance with the manufacturer's instructions; avoid supports that block rear ventilation.

  • Lay the panels dry before screwing them down to check coplanarity and continuity of lines.

Grommets and safety

Correct and protected wiring prevents cuts, vibrations and overheating. Use the designated passages and comply with electrical and gas regulations.

Key points to consider

  • Use the knockouts/grommets provided by the system; place grommets/bushings to protect the wiring from sharp edges.

  • Route electricity and gas lines separately; do not share wall bushings or make unnecessary crossings.

  • Leave slack in the cable for service removal without pulling on connectors.

  • All gas or electrical work must be carried out by qualified personnel in accordance with local regulations.
  • Do not seal grilles or ventilation openings with silicone/foam; only use perimeter seals where appropriate.

Installation differences depending on variation

They all share the same installation philosophy; the finish and effective width vary depending on the type of refrigerator (1 or 2 doors) and position (intermediate or end).

Key points to consider

  • IM-1DFMP-MK (1 door · intermediate): Check alignment between adjacent modules; the rear panel must be parallel to the front to maintain the ‘line’ of the island.

  • IM-1DFEP-MK (1 door · end): Includes side panel for finishing; ensure verticality so that the outer edge is perfectly plumb and protected.

  • IM-2DFMP-MK (2 doors · intermediate): Check the opening clearance of both doors without interfering with adjacent module handles.

  • IM-2DFEP-MK (2 doors · end): The end panel is more exposed; reinforces fixings and ensures there is no vibration on the side.

Cleaning and care

Gentle, regular maintenance preserves the paintwork and ‘Phantom’ appearance, preventing abrasion and surface corrosion.

Key points to consider

  • Clean with a soft cloth and neutral detergent; rinse and dry.

  • Avoid abrasives, metal scouring pads, bleach or chlorinated products.

  • Remove dust or saltpetre in coastal environments with a light rinse and subsequent drying.

  • Inspect screw areas (heads and edges) and reapply with a suitable protector if necessary.

  • Keep the rear vents and access to the control panel of the refrigerator clear.

Preventive maintenance (recommended frequencies)

Small periodic checks prevent future dismantling and extend the life of the unit.

Key points to consider

  • Monthly:
    • Check that there are no objects leaning against the back that reduce ventilation.
    • Check the level of the island and retighten any screws if you notice any looseness.
  • Quarterly:
    • Check the integrity of wall penetrations and cable protective sheaths.
    • Check that the refrigerator doors open to 90° without rubbing against the fronts or handles.
    • High/low season:
      • Deep cleaning of surfaces and checking of perimeter joints.

      • Checking the distance from heat sources (grill/hotplate) and possible relocation of hot accessories.

Performance and ventilation

Heat dissipation is critical for the refrigerator to maintain cold temperatures without overloading. A beautiful island that doesn't breathe will fail.
  • Key points to consider
    • Leave at least 150 mm of space behind the refrigerator cabinet.
    • Do not cover grates or air vents with furniture, accessories or sealants.
    • Ensure inlet of fresh air at the bottom and outlet at the top/back of the niche.
    • If you notice overheating or abnormal noise from the compressor, free up the air flow and check that the panel is not pressing on the wiring.

Safety and regulations

Outdoor cooking combines electricity, heat and humidity. Safety depends on installing according to regulations and using the correct materials.
  • Key points to consider
    • Use non-combustible worktops and fittings suitable for outdoor use.
    • Use electrical outlets that are protected and suitable for outdoor use in accordance with local regulations.
    • Maintain safe distances from heat sources and avoid crossing cables near hot areas.
    • Do not modify perforations or make additional cuts that compromise the structure or ventilation of the cabinet.
  • Type and use
    • Double middle panel for refrigerator (middle position)
    • Rear panel; power cable passage at the rear; seamless finish
  • Materials
    • Galvanised steel with powder coating
    • Finish: matt black
  • Product dimensions
    • Height: 35" (90 cm)
    • Width: 37‘ (37 cm)
    • Depth: 3.50‘ (8.89 cm)
  • Warranty
    • 10 years, limited.
  • Type and use

    • Double end panel for refrigerator (end position)

    • Includes side panel and rear panel; seamless finish

  • Materials

    • Galvanised steel with powder coating

    • Finish: matt black

  • Product dimensions

    • Height: 35″ (88.90 cm)

    • Width: 37.75‘ (95.89 cm)

    • Depth: 23.75‘ (60.33 cm)

  • Warranty

    • 10 years, limited.

  • Type and use

    • Enclosure kit for refrigerator, intermediate position

    • Rear panel only; seamless finish

  • Materials

    • Galvanised steel with powder coating

    • Finish: matt black

  • Product dimensions

    • Height: 35″ (90 cm)

    • Width: 25″ (61 cm)

    • Depth: 2″ (5 cm)

  • Warranty

    • 10 years, limited.

  • Type and use

    • Enclosure kit for refrigerator, end position

    • Includes side panel and rear panel; seamless finish

  • Materials

    • Galvanised steel with powder coating

    • Finish: matt black

  • Product dimensions

    • Height: 35″ (89 cm)

    • Width: 25″ (68.60 cm)

    • Depth: 24″ (61 cm)

  • Warranty

    • 10 years, limited.


