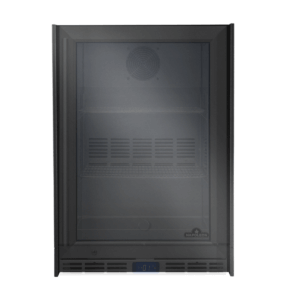
The Oasis Reversible Door Phantom Modules extend the OASIS® system with three solutions that share the same technical and aesthetic basis: galvanised steel with matt black powder coating, reversible door with soft closing, levelling feet, gas and electrical openings and fully assembled delivery. The variants differ in function: universal storage, cylinder management with sliding support and 10″ recessed burner panel with thermal protection and additional rear ventilation. They all retain the same footprint to visually integrate into the island.
🔩 Materials and construction
Construction is based on an outdoor-optimised metal chassis, powder-coated to provide the Phantom finish. Soft-close hardware, door reversibility and assembled delivery promote consistent on-site tolerances and a clean fit with the rest of the OASIS® system.
Reversible door
Manufactured in matt black powder coated galvanised steel. Integrates reversible door with soft close, comes pre-assembled and includes levelling feet and perforations for tidy passage of fittings.
Gas tank cabinet
Maintains the same body in galvanneal steel with matt black powder-coat. Adds a specific removable support for the cylinder and retains reversible door, soft closing, levelling and knockouts for gas and electricity.
Tank Cabinet + 10″ Burner Panel
Shares Phantom chassis and finish and adds a top panel prepared for 10″ recessed burners. Integrates heat shield for tank compartment and rear ventilation slots resolved in the structure itself.
🧠 Outstanding functionalities
The three versions are designed to facilitate installation and daily use: reversible door to decide which way to open, levelling on uneven floors and predisposition of services for a clean layout inside the island.
Reversible door
Functions as a front access cabinet. Reversibility allows choice of opening side on assembly; soft close ensures controlled actuation and levelling feet help to align the front with adjoining modules. Holes allow gas or electrical routing where required by the design.
Gas tank cabinet
Key feature is the sliding carriage that improves cylinder handling and keeps the interior organised. It maintains reversible door and leveling, so it can be positioned left or right without compromising the alignment of fronts.
Tank Cabinet + 10″ Burner Panel
In addition to housing the canister, it incorporates the panel for a compatible 10″ burner. Thermal protection separates the heat source from the compartment and the additional rear ventilation allows hot air to escape while maintaining front access operation.
⚡ Performance and operating efficiency
Although they do not generate heat themselves, these modules impact the island’s workflow: they tidy up tools and consumables, streamline propane management and allow an auxiliary fire to be added without breaking the OASIS® modulation.
Reversible door
Provides real storage capacity next to the cooking zone, freeing up worktop space and shortening trips. The soft close keeps it quick and quiet to use, with no misalignment over time.
Gas tank cabinet
Optimises gas management: the tank can be checked and replaced from the front thanks to the removable support, reducing service times and keeping the display clean.
Cabinet for tank + 10″ burner panel
Allows the addition of a 10″ burner in line with the modules. The panel + heat shield + ventilation set makes it possible to work with the burner while the island keeps its clean reading and the access to the tank remains in front.
🎛️ Design and aesthetics
The matt black Phantom finish maintains a uniform language with the fronts and worktops of the OASIS® system. The continuity of the modulation and the possibility of reversing the door help to sustain rhythms and symmetries in any composition.
Reversible door
The matt black powder-coat unifies the front with the rest of the island and the reversible door makes it easier to respect the planned composition, maintaining coplanarity and visual rhythm.
Propane tank cabinet
The internal support keeps the tank out of sight to preserve a clean reading. The Phantom finish ensures chromatic coherence with the adjacent modules.
Tank Cabinet + 10″ Burner Panel
The panel integrates the burner without breaking the line. The rear ventilation is discreetly resolved, so that the Phantom aesthetics are perceived continuous on the front and sides.
🔌 Compatibilities and ecosystem
The three modules are part of the OASIS® ecosystem, share footprint and height and coordinate with drawer units, sinks and grill heads from the same family.
Reversible door
Aligns with the OASIS® modulation to combine with other cabinets and the corresponding grill head, taking advantage of knockouts when ducting is required.
Gas tank cabinet
Designed for configurations using propane as a supply, it facilitates the routing of the line to the grill or other compatible modules within the island.
Tank Cabinet + 10″ Burner Panel
The top panel is designed for the brand’s 10″ recessed burners (500/700 series), respecting the additional rear ventilation provided for this use.
🍖 Styles of cooking that enhances
The organisation of space and, where appropriate, the addition of an auxiliary burner make it possible to keep the main grill dedicated to its task while attending to back-up preparations.
Reversible door
Enhances preparation and mise en place on grills and extended roasts by concentrating utensils and consumables in the work area.
Gas tank cabinet
Favours continuous propane gas services, as the front extraction of the tank simplifies the control of the supply during long sessions.
Cabinet for tank + 10″ burner panel
Enables cooking on the 10″ burner – such as sauces, reductions or boiling – in parallel to the main grill, maintaining the same aesthetic and operational line.
🛡️ Safety and ease of use
Each module incorporates resources aimed at a reliable and tidy use, from the soft closing to the specific ventilation when a burner is integrated.
Reversible door
Soft closing reduces knocks and protects the finish. Leveling feet help ensure proper seating to avoid stress on hardware.
Gas tank cabinet
The sliding support provides ergonomic handling of the gas cylinder, and the holes provided allow the gas line to be routed in a defined path within the cabinet.
Cabinet for tank + 10″ burner panel
Integrates thermal protection in the tank area and additional rear ventilation to promote airflow when the burner is in use. Reversible door maintains controlled access to the compartment.
📊 Comparison table
| Variation |
Dimensions (H × W × D) |
Accessories / Panel |
Extra ventilation |
10″ burner compat. |
| Reversible door |
90 × 61 × 61 cm |
– |
– |
– |
| Tank with support |
90 × 61 × 61 cm |
Sliding support for tank |
– |
– |
| Tank + burner panel |
90 × 61 × 61 cm |
Burner panel + heat shield + sliding canister holder |
Yes |
500 (BI10) / 700 (BIB10) Series |
📦 Receipt and unpacking
The modules arrive
fully assembled to simplify installation. It is advisable to check the finish and basic operation before installing.
Steps
- Place the package on a flat, stable surface.
- Remove the packaging without dragging the matte black front.
- Verify that the door opens and closes with a soft close.
- Check that the levelling feet rotate correctly.
- Identify the holes/knockouts for gas and electricity.
📐 Installation and levelling
OASIS® modulation requires coplanar front faces. The
levelling feet allow for small irregularities in the floor to be compensated for.
Steps
- Place the module in its location within the OASIS® island.
- Loosen/adjust the legs until the front face is aligned with the adjacent modules.
- Check for perimeter gaps in the door and parallelism with the worktop.
- Hand-tighten the legs again to ensure a firm fit.
🚪 Direction of opening and soft closing
The
reversible door allows you to define the opening side according to the workflow; the
soft closing prevents knocks and protects the finish.
Steps
- Choose the opening side that best fits the hob, sink or other modules.
- Reverse the door following the procedure in the manufacturer's manual (if applicable).
- Open and close several times to confirm the soft closing and alignment of the front.
- Adjust the door stops/position if you detect any friction.
🧰 Service passage through pre-drilled holes
The modules incorporate
knockouts for routing
gas and
electricity without drilling into the structure.
Steps
- Identify the holes you will use according to the design of your island.
- Run the conduits through the knockouts provided.
- Organise the interior so that the lines do not interfere with the door or the support (if any).
- Make the connections and checks according to the manual and local regulations.
🧼 Cleaning and care of the finish
The front and chassis are finished in
galvanneal steel with matte black powder coating. Gentle maintenance preserves the Phantom look.
Steps
- Clean with a soft cloth and water with neutral detergent.
- Dry the surfaces to preserve the coating.
- Avoid scouring pads, steel wool or abrasive products.
- Remove construction dust before first use.
🔁 Daily operation
Proper use extends the life of the hardware and keeps the front panel clean.
Steps
- Open/close the door using the soft close mechanism.
- Keep the interior tidy for quick access.
- Periodically check the levelling; readjust if floor conditions change.
- Check that the knockouts and bushings remain clear and free of edges that rub against pipes.
🧷 Tank management — Sliding support
This version incorporates a removable support designed to hold and handle the cylinder from the front, keeping it hidden when not in use.
Steps
- Remove the support completely and place it in the loading position.
- Place the cylinder on the support, ensuring its stability.
- Slide the support inside and confirm that the door closes without interference.
- Route the gas line through the knockouts provided and make the connections according to the manual.
- For inspections or replacement, remove the support again and proceed from the front.
🔥 10‘ panel and burner — Thermal protection and ventilation
This variant adds a
top panel for compatible
10’ built-in burners and features a
thermal protection shield and
additional rear ventilation for the tank compartment.
Steps
- Place the 10" burner on the panel and secure it according to the burner manual.
- Verify that the heat shield is correctly positioned between the burner and the tank compartment.
- Ensure that the rear ventilation slots are free of obstructions.
- Route the burner power supply through the knockouts provided and make the connections according to the manual and regulations.
- Confirm that the door operates normally and that access to the tank compartment remains unobstructed.
🗓️ Seasonal inspection and hibernation
Regular inspection keeps the island within tolerances and the finish in good condition.
Steps
- Check the alignment of the front and readjust the levelling feet if necessary.
- Check that the reversible door closes smoothly without rubbing.
- Clean the powder coating and remove any dust or grease deposits.
- If you are not going to use the cooker for a while, follow the manufacturer's instructions and local regulations for storing the gas installation.
📦 Receipt and unpacking (common)
The modules arrive fully assembled to simplify the build. It is advisable to check the finish and basic operation before installation.
Steps
Place the package on a flat, stable surface.
Remove the packaging without dragging the matt black front.
Check that the door opens and closes with soft-close.
Check that the levelling feet turn correctly.
Identify the openings/knockouts for gas and electricity.
📐 Installation and levelling (common)
OASIS® modularity requires the front faces to be coplanar. The levelling feet allow you to compensate for small irregularities in the paving.
Steps
Position the module in its location within the OASIS® island.
Loosen/adjust the feet until the front face is aligned with the adjacent modules.
Check the door’s perimeter clearances and its parallel alignment with the worktop.
Hand-tighten the feet again to leave it firmly seated.
🚪 Opening direction and soft-close (common)
The reversible door lets you choose the opening side to suit the workflow; the soft-close prevents slamming and protects the finish.
Steps
Choose the opening side that best suits the grill, sink or other modules.
Reverse the door handing by following the manufacturer’s manual (if applicable).
Open and close it several times to confirm the soft-close action and front alignment.
Adjust the stops/door position if you notice any rubbing.
🧰 Routing services through the provided openings (common)
The modules incorporate knockouts to route gas and electricity without drilling the structure.
Steps
Identify which openings you will use according to your island design.
Run the services through the available knockouts.
Organise the interior so the lines do not interfere with the door or the support (if fitted).
Carry out connections and checks in accordance with the manual and local regulations.
🧼 Cleaning and care of the finish (common)
The front and chassis are finished in Galvanneal steel with a matt black powder coating. Gentle maintenance preserves the Phantom appearance.
Steps
Clean with a soft cloth and water with a neutral detergent.
Dry the surfaces to protect the coating.
Avoid scouring pads, wire wool or abrasive products.
Remove construction dust before first use.
🔁 Daily operation (common)
Correct use extends the life of the hardware and keeps the front looking clean and tidy.
Steps
Open/close the door and allow the soft-close to do its job.
Keep the interior organised for quick access.
Periodically check the levelling; readjust if ground conditions change.
Check that the knockouts and grommets remain clear and free of sharp edges that could chafe the services.
🧷 Tank management — Sliding support
This version includes a pull-out support designed to hold and handle the gas cylinder from the front, keeping it hidden when not in use.
Steps
Pull the support fully out and place it in the loading position.
Place the cylinder on the support, ensuring it is stable.
Slide the support back in and confirm the door closes without interference.
Route the gas line through the designated knockouts and make the connections in line with the manual.
For inspections or replacement, pull the support out again and work from the front.
🔥 10" panel and burner — Thermal protection and ventilation
This variant adds an upper panel for compatible 10" built-in burners and includes a thermal protection shield plus additional rear ventilation for the cylinder compartment.
Steps
Position the 10" burner in the panel and secure it according to the burner manual.
Check the heat shield is correctly fitted between the burner and the cylinder compartment.
Ensure the rear ventilation slots remain free of obstructions.
Route the burner supply through the designated knockouts and make connections according to the manual and regulations.
Confirm the door operates normally and access to the cylinder compartment remains unobstructed.
🗓️ Seasonal check and winterising (common)
A periodic check keeps the island within tolerances and the finish in good condition.
Steps
Check front alignment and readjust the levelling feet if necessary.
Check the reversible door still closes without rubbing.
Clean the powder coating and remove any build-up of dust or grease.
If you will not be using the outdoor kitchen for a while, follow the manufacturer’s guidance and local regulations for storing the gas installation.
📦 Receipt and unpacking
The modules arrive fully assembled to simplify installation. It is advisable to check the finish and basic operation before installation.
Steps
-
Place the package on a flat, stable surface.
-
Remove the packaging without dragging the front matt black front.
-
Check that the door opens and closes with a soft close.
-
Check that the levelling feet turn correctly.
Identify the holes/knockouts for gas and electricity.
📐 Installation and levelling
OASIS® modulation requires coplanar front faces. The levelling feet allow for minor floor irregularities to be compensated for. Steps ‘>Steps
-
Place the module in its location within the OASIS® island.
-
Loosen/adjust the legs until the front face is aligned with the adjacent modules.
-
Check for gaps around the door and parallelism with the worktop.
-
Tighten the legs again by hand to ensure they are firmly in place.
🚪 Smooth opening and closing
The reversible door allows you to choose the opening side according to your workflow; the soft close prevents knocks and protects the finish. -start=‘1932’>soft close prevents impact and protects the finish.
Steps
-
Choose the opening side that best fits your hob, sink or other units.
-
Reverse the door following the procedure in the manufacturer's manual (if applicable).
-
Open and close several times to confirm the smooth closing and alignment of the front.
Adjust the door stops/position if you detect any friction. ul>
🧰 Service passage through designated holes
The modules incorporate knockouts for routing gas and electricity without drilling into the structure.
Steps
-
Identify the holes you will use according to the design of your island.
-
Run the pipes through the knockouts provided.
-
Arrange the interior so that the lines do not interfere with the door or the support (if any).
-
Make the connections and checks according to the manual and local regulations.
🧼 Cleaning and care of the finish
The front and chassis are finished in galvanneal steel with matt black powder coating. Gentle maintenance preserves the Phantom look.
Steps
-
Clean with a soft cloth and water with neutral detergent.
-
Dry surfaces to preserve the coating.
-
Avoid scouring pads, steel wool or abrasive products.
-
Remove construction dust before first use.
🔁 Daily operation
Correct use extends the life of the hardware and keeps the front clean.
Steps
-
Open/close the door, allowing the soft close to take effect.
-
Keep the interior tidy for quick access.
-
Periodically check the levelling; readjust if ground conditions change.
Ensure that the knockouts and bushings remain clear and free of edges that could rub against pipes.
🧷 Tank management — Sliding support
This version incorporates a removable support designed to house and handle the cylinder from the front, keeping it hidden when not in use.
Steps
-
Remove the support completely and place it in the loading position.
-
Place the cylinder on the support, ensuring it is stable.
Slide the holder inside and check that the door closes without any interference.
Route the gas line through the knockouts provided and make the connections according to the manual.
For inspections or replacement, remove the bracket again and proceed from the front.
🔥 10‘ panel and burner — Thermal protection and ventilation
This variant adds a top panel for additional rear ventilation for the tank compartment.
Steps
-
Place the 10‘ burner on the panel and secure it according to the burner manual.
-
Verify that the heat shield is correctly positioned between the burner and the tank compartment.
-
Ensure that the rear ventilation slots are free of obstructions.
-
Route the burner supply through the knockouts provided and make the connections according to the manual and regulations.
-
Confirm that the door is operating normally and that access to the tank compartment remains clear.
🗓️ Seasonal and winterisation check
A periodic review keeps the island within tolerances and the finish in good condition.
Steps
-
Check the alignment of the front and readjust the levelling feet if necessary.
-
Check that the reversible door closes smoothly without rubbing.
-
Clean the powder coating and remove any dust or grease deposits.
-
If you are not going to use the cooker for a while, follow the instructions of the manufacturer and local regulations for storing the gas installation.