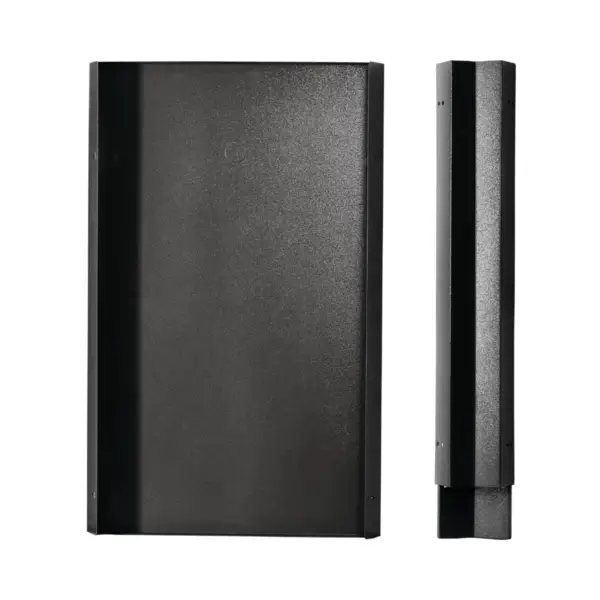
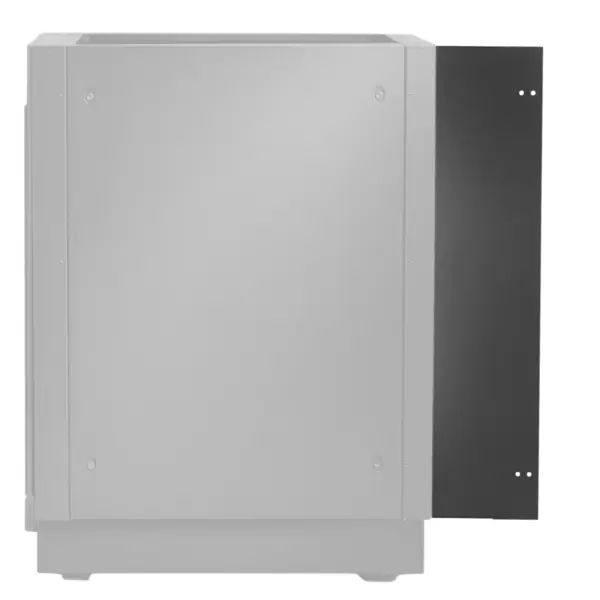
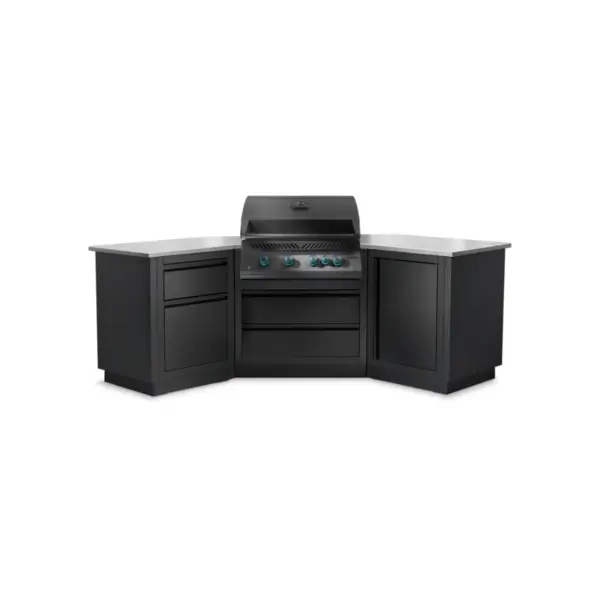
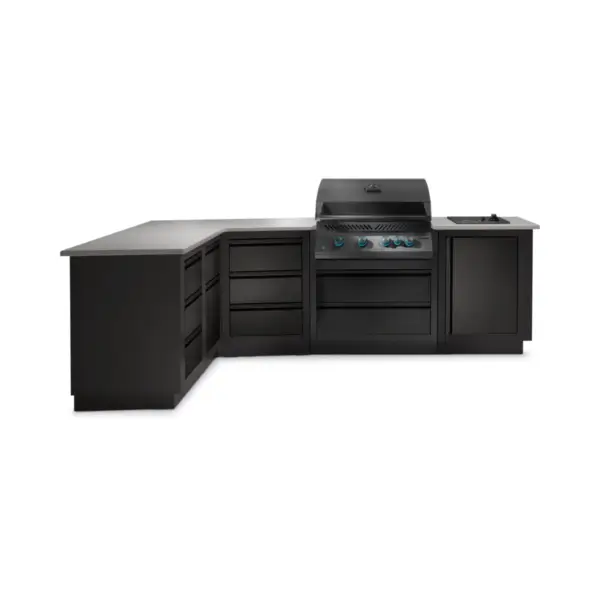
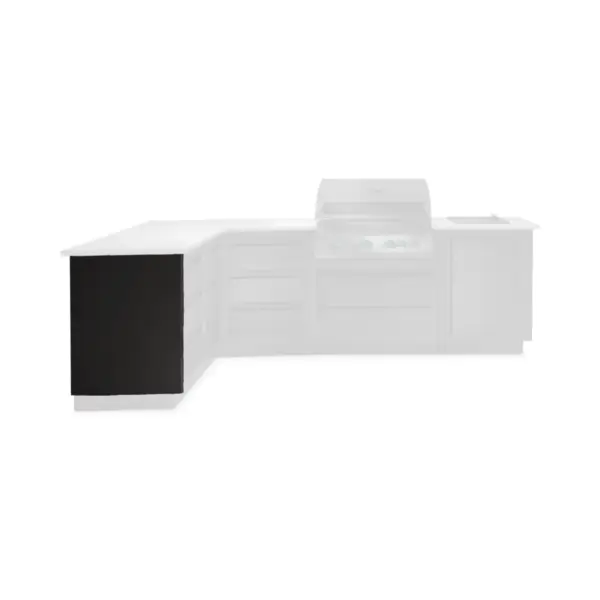
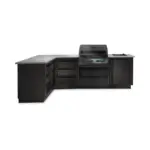
The Oasis Phantom Panels complete the OASIS modular system with specific solutions for resolving turns, finishing off visible ends and maintaining the necessary separation when the kitchen is located next to a wall. They share a matt black powder-coated finish and are designed to visually integrate with the fronts and worktops of the OASIS ecosystem, achieving a uniform and clean ensemble from any angle.
🧱 Materials and construction
Oasis Phantom 45º Angle Panel
This panel is manufactured from powder coated galvanised steel. The metal construction and matt black finish are intended for outdoor use and to maintain aesthetic continuity with the system fronts. The design is optimised to work at 45° joints and to form a 90° angle when two corner panels are used.
Oasis Phantom End Panel
This part uses powder coated galvanised steel and features the same matt black colour. Its purpose is to close the end of an OASIS configuration leaving the front in line and with edge continuity, while concealing knockouts and mounting holes that would be visible without the trim.
Oasis Phantom Wall Partition Panel
The material here is powder coated galvanneal steel with the same matt black finish. It acts as a barrier between the kitchen and the wall or other structure and is designed to conceal the gap created by respecting the required separation, leaving a seamless finish on the outside view.
🧩 Function within the OASIS system
Oasis Phantom 45º Angle Panel
Provides design flexibility by allowing 45° joints between OASIS cabinets. The continuity of the front edge is maintained, so the line of sight of the island is not interrupted in the turn. With two corner panels, a 90° joint is achieved that retains the same homogeneous appearance.
Oasis Phantom end panel
Finishes off the exposed side of the kitchen. Its role is to cover perforations and fabrication dies and to maintain the clean reading of the front with the same continuous edge as the rest of the assembly. It is specifically designed for use at the end of OASIS configurations.
Oasis Phantom Wall Partition Panel
Used when the island is installed next to a wall. Provides the manufacturer’s specified clearance for this type of installation, conceals the gap between the cabinet and the wall and provides a seamless finish for a uniform appearance.
🖤 Finish and visual readability
Oasis Phantom 45° Angle Panel
The matte black powder-coated finish helps the turn to be perceived as a natural part of the front line. The continuous edge promise avoids steps at the junction and maintains the Phantom aesthetic around the angle.
Oasis Phantom End Panel
The trim adopts the same texture and tone as the OASIS fronts. Once in place, the exposed end is smooth and even, with no exposed perforations, and with edge continuity across the entire front face.
Oasis Phantom Wall Divider Panel
The divider profile hides the safety joint against the wall and leaves a seamless seal. In this way, the kitchen maintains the same Phantom language even in semi-detached installations.
📐 Dimensions and proportions on the island
Oasis Phantom 45° corner panel
Height indicated is thirty-five inches with value shown as ninety centimetres. The width indicated is twenty-one point seventy-five inches with value shown as fifty-five point twenty-five centimetres. The depth indicated is two point fifty inches with value shown as five centimetres. These proportions allow for overlap and rigidity at the turn without adding excessive bulk to the front.
Oasis Phantom End Panel
The indicated height is thirty-one inches with value shown as ninety centimetres. The width indicated is twenty-four inches with value shown as sixty-one centimetres. The depth indicated is two inches with value shown as five centimetres. The assembly is sized to cover perforations and align the exposed face with the countertop and fronts.
Oasis Phantom Wall Divider Panel
Height indicated is thirty-five inches with value shown as ninety centimetres. Width indicated is one point fifty inches with value shown as eighteen centimetres. Depth indicated is one point fifty inches with value shown as four centimetres. The slim format facilitates its role as a barrier without adding visual mass.
🛡️ Installation requirements and perceived safety
Oasis Phantom 45º Angle Panel
Its use is focused on the transition between cabinets, so the focus is on the alignment of the front edge and the correct joining of the units that converge at the angle. The aim is for the front to retain its continuity and for the meeting to be stable and clean.
Oasis Phantom End Panel
The assembly is carried out at the exposed end of the island. The priority is to cover the cut-outs and holes and to preserve the continuity of the edge, so that the side is smooth and aligned with the rest of the fronts and the worktop.
Oasis Phantom Wall Partition Panel
This element is directly associated with the installation next to walls. It must generate the separation required for this type of configuration and hide the gap between cabinet and wall, achieving a seamless finish that maintains the overall aesthetics.
🏷️ Warranty coverage
Oasis Phantom 45º Angle Panel
The manufacturer’s stated warranty is ten years on a limited basis. This aligns its coverage with that of the other parts of the same OASIS family.
Oasis Phantom End Panel
The product document reflects a ten year limited warranty. The coverage unifies the support within the OASIS suite of modules and trims.
Oasis Phantom Wall Partition Panel
A ten-year limited warranty is indicated, consistent with the other panels in the system. This simplifies project documentation and registration with the manufacturer.
🔗 Integration with the OASIS ecosystem
Oasis Phantom 45º Angle Panel
It is intended to join OASIS modular cabinets and resolve corners without resorting to custom parts. The result is a continuous edge transition that maintains the front reading throughout the corner.
Oasis Phantom End Panel
Its role is to complete the visible end while maintaining alignment and continuity with the system’s fronts and worktops. The function of covering dies and holes prevents the end view from showing fabrication elements.
Oasis Phantom Wall Partition Panel
Integrates when the design calls for a wall-mounted configuration. The piece serves two purposes at the same time, creating the required separation and masking the gap for a seamless finish.
📊 Explanatory table
| Option |
Key differential |
Technical function |
Dimensions (H × W × D, cm) |
Material / finish |
Key notes |
| OASIS® 45° piece (IM-45LT-MK) |
Precise corner with continuous edge |
Joins cabinets at 45°; with two pieces 90° shapes |
90 × 55,25 × 5 |
Galvanised, powder-coated steel, matt black |
Native solution for turns; visual continuity between fronts. |
| OASIS® End Panel (IM-CEP-MK) |
Clean closure conceals perforations |
Ends island end and covers dies/holes |
90 × 61 × 5 |
Powder-coated galvanised steel, matt black |
Maintains line and continuous edge at the end. |
| OASIS® Wall Separator (IM-WSF-MK) |
Wallbarrier with seamless finish |
Leaves the required separation between island and wall |
90 × 18 × 4 |
Powder-coated galvanised steel, matt black |
Conceals the gap with a clean and safe finish. |
1) Safety and scope
⚠️ Disconnect gas and electricity from all equipment before working.
Wear gloves, safety goggles and safety footwear.
Always work on a level and stable base.
Observe the clearances to combustible materials and the ventilation requirements specified by the manufacturer of your grill and OASIS® cabinets.
This manual covers the installation of finish and transition panels. It does not alter the structure nor replace the official instructions for each module.
2) Recommended tools
Spanner or screwdriver compatible with OASIS® fasteners.
Spirit level and a 90° set square.
Tape measure and a fine pencil for marking.
Clamps or holding clips (optional, for “dry fits”).
Spacers/feeler gauges (to maintain uniform gaps).
Microfibre cloths and a neutral cleaner for finishing.
3) Site preparation (before fixing anything)
Base and layout: check that the floor is level. Mark the front centreline of the island and, if applicable, the wall line.
Levelling cabinets: adjust feet or shims until all OASIS® modules are plumb and level.
Ventilation check: identify grilles, service gaps and airflow routes so as not to obstruct them with panels.
Parts inspection: inspect panels for knocks or scratches. Never install damaged parts.
Dry fit: bring the panel into position to validate alignment and a “continuous edge” with fronts and worktops.
4) Wall spacer installation — IM-WSF-MK
Objective: to create the required barrier/separation between the island and the wall, leaving a seamless finish.
Clearance check
Positioning
Place the spacer between the rear of the cabinet and the wall surface, keeping it parallel to the wall.
Align its top edge with the worktop/work surface line.
Fixing
Secure the spacer to the modules using only the fixings and points provided by OASIS®.
There is no need to fix it to the wall (unless specified by the project); if you choose to do so, use anchors suitable for the wall material and avoid drilling into services.
Thermal and ventilation control
5) Quality checks (QC) after installation
Alignment: front and top views without steps; uniform “continuous edge”.
Level and plumb: all panels and fronts read level.
Functionality: doors/drawers open without interference.
Ventilation: grilles and service openings left clear.
Finish integrity: no scratches, dents or misplaced screws.
6) Maintenance and cleaning (recommended routine)
6.1 Cleaning after each cooking session
Allow to cool.
Wipe with a soft, slightly damp cloth to remove fresh grease.
Apply neutral cleaner (pH balanced) if there are splashes.
Rinse with a damp cloth and dry thoroughly to preserve the coating.
6.2 Monthly maintenance
Visual inspection: look for marks, dents or loose screws.
Re-tightening: check the fixings; a light, even tightening is sufficient.
Ventilation check: vacuum dust or debris that could obstruct vents.
Finish protection: avoid waxes or silicones that leave a film; do not use abrasives, wire wool or harsh chemicals.
6.3 Coastal or high-humidity environments
Increase the frequency of cleaning and drying.
If surface corrosion appears, clean and dry; if it persists, consult the manufacturer’s technical service about paint touch-up options compatible with the powder coating.
7) Seasonal storage (winter / long periods without use)
Clean and dry all panels thoroughly.
Cover the island with a breathable cover to prevent condensation.
Avoid standing water and prolonged contact with snow/ice.
Carry out an inspection after windstorms or heavy rain.
8) Troubleshooting (quick diagnosis)
1) Safety and scope
⚠️ Disconnect gas and electricity from all equipment before working.
Wear gloves, safety goggles and safety footwear.
Always work on a level and stable base.
Observe the clearances to combustible materials and the ventilation requirements specified by the manufacturer of your grill and OASIS® cabinets.
This manual covers the installation of finish and transition panels. It does not alter the structure nor replace the official instructions for each module.
2) Recommended tools
Spanner or screwdriver compatible with OASIS® fasteners.
Spirit level and a 90° set square.
Tape measure and a fine pencil for marking.
Clamps or holding clips (optional, for “dry fits”).
Spacers/feeler gauges (to maintain uniform gaps).
Microfibre cloths and a neutral cleaner for finishing.
3) Site preparation (before fixing anything)
Base and layout: check the floor is level. Mark the front centreline of the island and, if applicable, the wall line.
Levelling cabinets: adjust feet or shims until all OASIS® modules are plumb and level.
Ventilation check: identify grilles, service gaps and airflow routes so you do not obstruct them with panels.
Parts inspection: check the panels for dents or scratches. Never install damaged parts.
Dry fit: bring the panel into position to confirm alignment and a “continuous edge” with fronts and worktops.
4) End Panel installation — IM-CEP-MK
Objective: to finish the end of the island, concealing punch-outs and openings with a smooth, aligned closure.
Identifying the end
Positioning and alignment
Set the end panel flush with the front and worktop, maintaining continuity with the system “edge”.
Use thin spacers if you need a uniform micro-gap.
Fixing
Verification
5) Quality checks (QC) after installation
Alignment: front and top views without steps; uniform “continuous edge”.
Level and plumb: all panels and fronts read level.
Functionality: doors/drawers open without interference.
Ventilation: grilles and service openings left clear.
Finish integrity: no scratches, dents or misplaced screws.
6) Maintenance and cleaning (recommended routine)
6.1 Cleaning after each cooking session
Allow to cool.
Wipe with a soft, slightly damp cloth to remove fresh grease.
Apply neutral cleaner (pH balanced) if there are splashes.
Rinse with a damp cloth and dry thoroughly to preserve the coating.
6.2 Monthly maintenance
Visual inspection: look for marks, dents or loose screws.
Re-tightening: check the fixings; a light, even tightening is sufficient.
Ventilation check: vacuum dust or debris that could obstruct vents.
Finish protection: avoid waxes or silicones that leave a film; do not use abrasives, wire wool or harsh chemicals.
6.3 Coastal or high-humidity environments
Increase the frequency of cleaning and drying.
If surface corrosion appears, clean and dry; if it persists, consult the manufacturer’s technical service for touch-up paint options compatible with the powder coating.
7) Seasonal storage (winter / long periods without use)
Clean and dry all panels thoroughly.
Cover the island with a breathable cover to prevent condensation.
Avoid standing water and prolonged contact with snow/ice.
Carry out an inspection after windstorms or heavy rain.
8) Troubleshooting (quick diagnosis)
1) Safety and scope
⚠️ Isolate gas and electricity supplies to all equipment before starting work.
Wear gloves, safety goggles and safety footwear.
Always work on a level and stable surface.
Observe the clearances to combustible materials and ventilation requirements specified by the manufacturer of your grill and OASIS® cabinets.
This manual covers the installation of finish and transition panels. It does not modify the structure or replace the official instructions for each module.
2) Recommended tools
Spanner or screwdriver compatible with OASIS® fasteners.
Spirit level and a 90° set square.
Tape measure and a fine pencil for marking.
Clamps or holding clips (optional, for dry fits).
Spacers/gauges (to maintain uniform gaps).
Microfibre cloths and neutral cleaner for finishing.
3) Site preparation (before fixing anything)
Base and layout: check that the floor is level. Mark the front edge of the island and, if applicable, the wall line.
Levelling cabinets: adjust legs or shims until all OASIS® modules are plumb and level.
Ventilation verification: identify grilles, service gaps and air circulation paths so as not to obstruct them with panels.
Parts inspection: inspect the panels for dents or scratches. Never install damaged parts.
Dry fit: bring the panel close to its position to check alignments and a “continuous edge” with fronts and worktops.
4) Installation of 45° Transition Piece — IM-45LT-MK
Objective: to join cabinets, creating a 45° angle; with two pieces forming a 90° turn with a continuous edge.
Angle definition
Geometric adjustment
Use the spirit level and the set square to check that both modules remain vertical and that the resulting edge is straight.
If you are using two 45° pieces for a 90° angle, check the diagonals of the “L” to avoid deviations.
Fixing
Only use the pre-drilled holes provided by the OASIS® system.
Tighten the screws from the centre outwards, with moderate torque and alternately to prevent warping.
Finish control
Professional tip: if the set includes a worktop, check the edge overhang before fixing it in place to avoid micro-steps.
5) Quality control (QC) after installation
Alignment: front and top views without steps; uniform “continuous edge”.
Level and plumb: all panels and fronts read level.
Functionality: doors/drawers open without interference.
Ventilation: unobstructed vents and service openings.
Finish integrity: no scratches, dents or loose screws.
6) Maintenance and cleaning (recommended routine)
6.1 Cleaning after each cooking session
Allow to cool completely.
Wipe with a soft, slightly damp cloth to remove fresh grease.
Apply neutral cleaner (pH balanced) if there are splashes.
Rinse with a damp cloth and dry thoroughly to preserve the coating.
6.2 Monthly maintenance
Visual inspection: look for marks, dents or loose screws.
Tightening: check screws; a light, even tighten is sufficient.
Ventilation check: vacuum any dust or debris that may be obstructing vents/openings.
Finish protection: avoid waxes or silicones that leave a film; do not use abrasives, wire wool or harsh chemicals.
6.3 Coastal or high-humidity environments
Increase the frequency of cleaning and drying.
If surface corrosion appears, clean and dry; if it persists, consult the manufacturer’s technical service about touch-up paint compatible with the powder coating.
7) Seasonal storage (winter/long periods without use)
Clean and dry all panels thoroughly.
Cover the island with a breathable cover to prevent condensation.
Avoid waterlogging and prolonged contact with snow/ice.
Carry out an inspection after windstorms or heavy rain.
8) Troubleshooting (quick diagnosis)