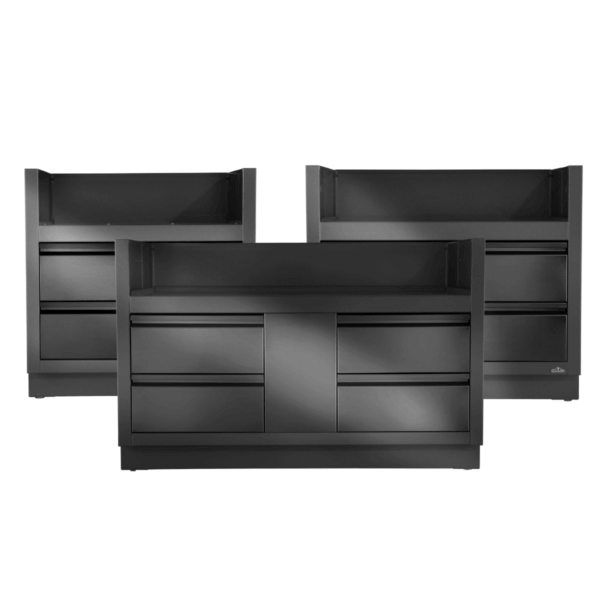
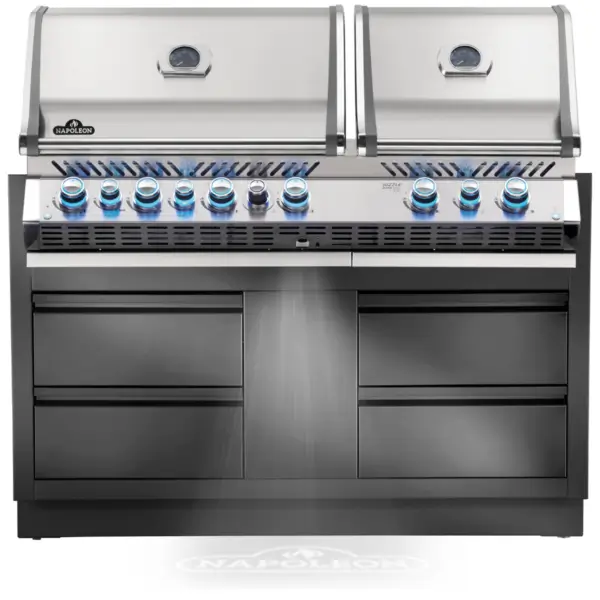
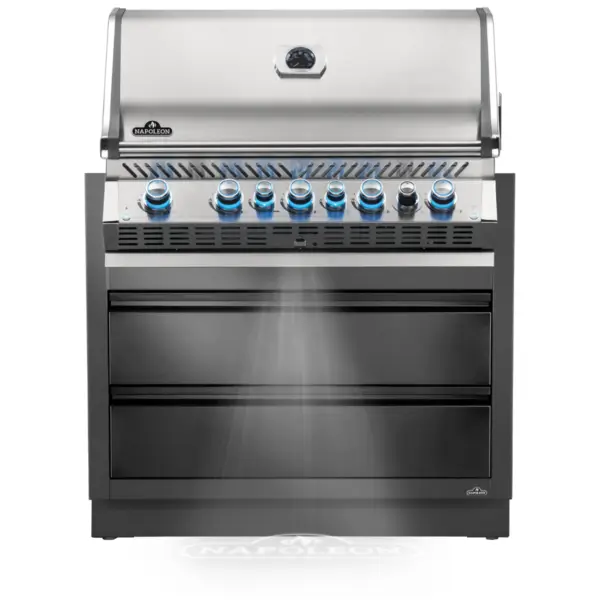
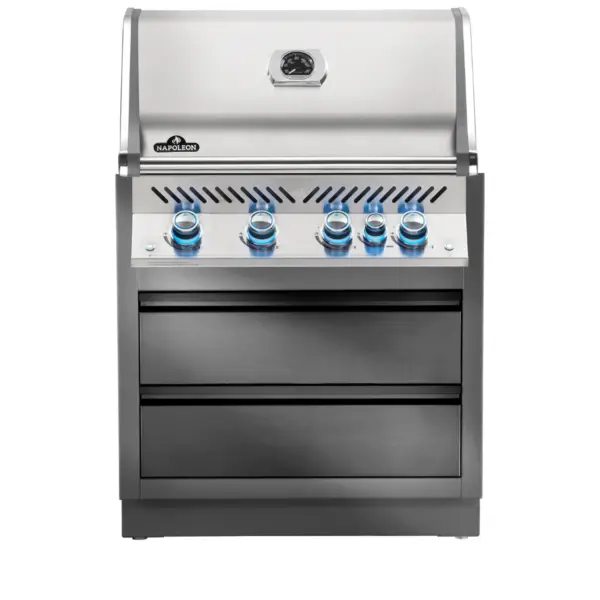
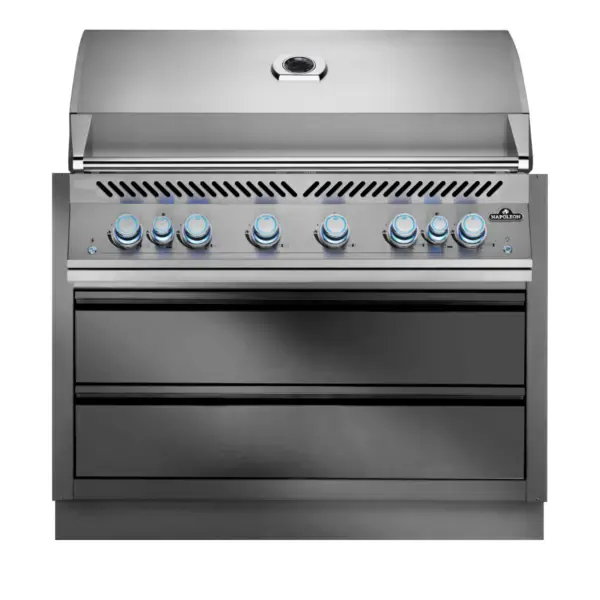
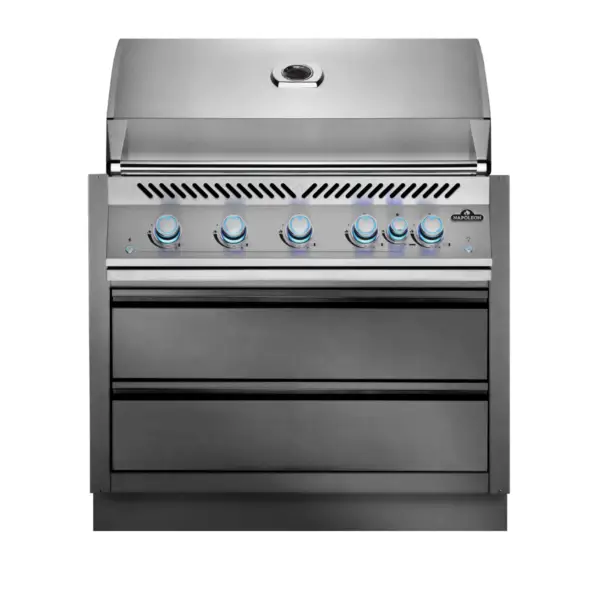
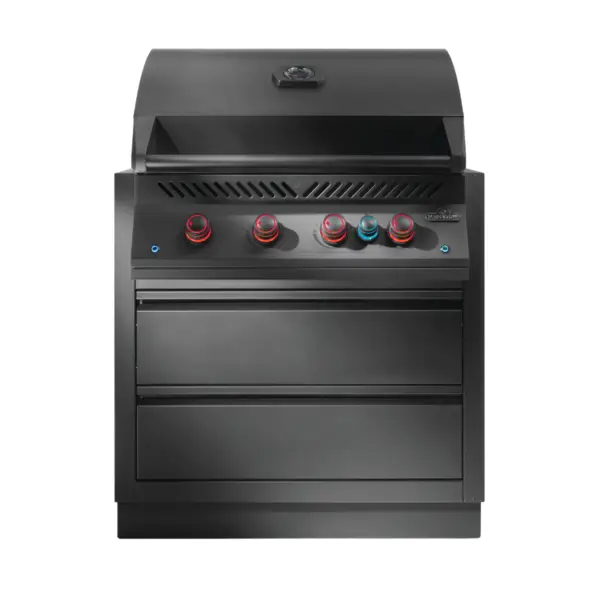
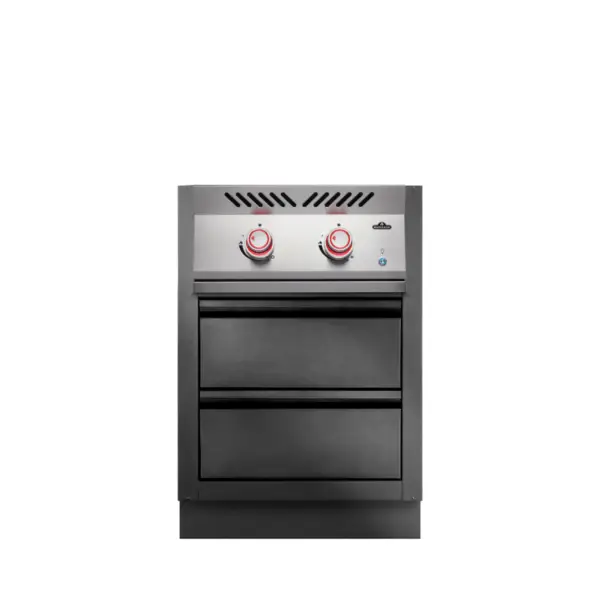
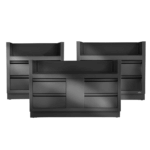
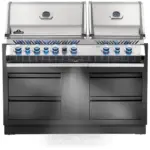
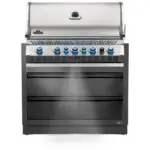
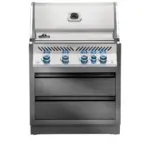
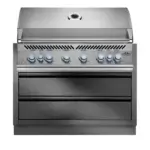
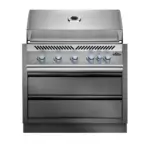
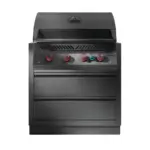
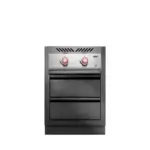
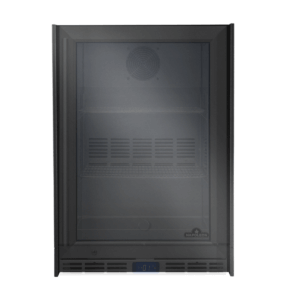
Designed for OASIS-type modular outdoor kitchen projects, this set of under-grill cabinets and side burner module allows a built-in barbecue or auxiliary burner to be precisely integrated into a customised island, while maintaining a uniform aesthetic in a matt black finish and an architecture designed for outdoor use. The key to these modules is not only to “hold” the equipment, but to turn it into a stable workstation: the unit defines the actual cooking height, access to storage, the orderly routing of installations (gas and electricity) and the distribution of loads on worktops and floors.
In outdoor kitchens, where the ground is not always perfectly level and exposure to humidity, thermal changes and intensive use is constant, the cabinet becomes a technical piece: it stabilises the whole, reduces vibrations when handling heavy grills and helps the assembly to be aligned with the rest of the modules (drawers, doors, corner units or preparation modules). Moreover, as it is a system with variations by size, it makes it easier for the project to be truly “made to measure”: you choose the exact module according to the head (32/38/44 or PRO 500/665/825 ranges) or according to the BIB18 side burner, and you build the island with visual and functional continuity, avoiding improvised gaps, carpentry adaptations or compromises in terms of ventilation and the passage of installations.
🔩 Materials and construction
The structure of each cabinet is designed for an outdoor environment and frequent use, prioritising rigidity and resistance. The metal chassis and matt black finish are designed to withstand splashes, temperature changes and constant handling of utensils and trays. On a practical level, the set is designed to withstand the load of a built-in barbecue and the dynamics of use (opening, closing, pulling drawers, occasional supports) without annoying deformations, maintaining a consistent base for the worktop.
⚙️ Outstanding functionalities
These modules are understood as an integration platform: they provide the exact space for each compatible piece of equipment, channel the passage of services and convert the space under the grill or burner into functional storage. The drawers make it possible to organise everything from grill tools and gloves to trays, thermometers or consumables, avoiding coming and going during cooking. The idea is for the “cooking station” to be self-sufficient and for the set-up to look neat, with concealed facilities accessible only when needed.
🔥 Performance and efficiency in the kitchen.
Performance here translates into workflow. An outdoor kitchen becomes efficient when everything is where it should be: utensils, auxiliary heat, surfaces and access. When you add the side burner module, you gain a separate cooking zone useful for tasks that get in the way of the main grill: reducing sauces, boiling, keeping warm, wok cooking or side dishes without stealing grill surface. In long services or with many guests, this point makes the difference between “cooking” and “coordinating” well.
🖤 Phantom design and aesthetics
The matt black finish visually unifies the island and fits in well with modern compositions: dark worktops, sintered stone, polished concrete or technical ceramics. It also “disguises” everyday use (slight marks, fingerprints) better than other, glossier finishes, and creates an elegant frame for the stainless steel of the drawers or for the elements of the grill itself.
🔌 Compatibilities and modules included.
Variations exist to ensure that every barbecue or burner fits precisely. That makes it easier for the final project not to rely on improvised cutbacks or adjustments and helps maintain consistency in heights and alignments between modules. At the island design level, this approach allows you to build a scalable outdoor kitchen: today you install grill and module, tomorrow you can add doors, waste module, extra storage or a preparation area, without “breaking” the aesthetics of the whole.
🍖 Benefits for different cooking styles
For intense direct cooking (searing, smashing, quick grilling), the advantage is in the speed of work and tidiness. For indirect (whole chicken, ribs, large roasts), the benefit is in the storage and logistics of trays and thermometry. For fish and vegetables, having clean utensils separated by drawers avoids cross-contamination. For events or large families, the wider modules allow a cooking station with a constant service rhythm.
🛡️ Safety and ease of use
Outdoor safety is about stability, accessibility and control. A well-seated cabinet reduces movements when opening the lid, handling grills or working with heavy pans. Ease of use comes from ergonomics: correct height, handy drawers and tidy management of installations. All of this reduces improvisation, which is where mistakes tend to appear (poorly guided hoses, forced outlets, unstable supports, etc.).
🌦️ Applications outside the barbecue
The side burner module is not just an “extra”: it can function as an auxiliary station for outdoor cooking in the broad sense of the word: for stocks, quick stews, boiling, controlled frying or even to keep a sauce warm while the grill works at its own pace. In temperate climates, it is a way of moving part of the cooking outside without giving up more “cooker top” techniques.
Comparison table (quick summary)
| Variation |
Cabinet model |
Compatibility |
Drawers |
Width × Depth × Height (in) |
Width × Depth × Height (cm) |
| BIB18 (burner) |
IM-UGC18-MK-1 |
BIB18 (BIB12/BI12) |
2 |
24 × 24 × 35.5 |
~61 × 61 × 90 |
| 32″ |
IM-UGC32-MK-1 |
BIG32 / BI32 |
2 |
34.75 × 24 × 35.5 |
88 × 61 × 90 |
| 38″ |
IM-UGC38-MK-1 |
BIG38 |
2 |
40.75 × 24 × 35.5 |
103.5 × 61 × 90 |
| 44″ |
IM-UGC44-MK-1 |
BIG44 |
2 |
46.75 × 24 × 35.5 |
118.7 × 61 × 90 |
| PRO/Prestige 500 |
IM-UGC500-MK-1 |
BIPRO500 / BIP500 |
2 |
34.75 × 24 × 35.5 |
88 × 61 × 90 |
| PRO 665 |
IM-UGC665-MK-1 |
BIPRO665 |
2 |
40.5 × 24 × 35.5 |
103 × 61 × 90 |
| PRO 825 |
IM-UGC825-MK-1 |
BIPRO825 |
4 |
55 × 24 × 35.5 |
139.5 × 61 × 90 |
In a modular outdoor kitchen, maintenance is not an ‘extra’: it is what ensures that the island remains
aligned, stable and safe over the seasons. The combination of
weathering, temperature changes, humidity and intensive use can loosen fittings, cause grease to accumulate in hidden areas or force drawer guides if the unit becomes uneven. That is why this section is presented as a simple technical protocol: first, compatibility and assembly are checked, then the gas/electricity installation is checked, and finally, cleaning routines and preventive checks are established. With these steps, the system maintains its Phantom aesthetics, ergonomics and, above all, reliable operation every time it is turned on.
1) Advance planning (before assembly)
- Confirm exact compatibility: identify the model of the barbecue head or side burner and assign its specific cabinet.
- Define the worktop line: decide on the final working height and check the actual floor level (slope, terrace joint, tiles).
- Plan the installations: plan where the gas and electricity will enter and where the shut-off valves and service access points will be located. A good design seeks short routes, without crossings and with room for maintenance.
- Consider ventilation and safety: gas integration requires a serious approach; avoid ‘airtight’ enclosures and respect distances from combustible materials.
2) Assembly and levelling (key to making the island ‘look professional’)
- Dry run: place the cabinet in its final position without fixing anything and check the alignment with the other modules.
- Levelling with legs: adjust the levelling legs until the unit is vertical and the top surface is stable. The aim is for the worktop to rest without tension and for the doors/drawers to have uniform clearance.
- Checking diagonals: if the module is “diamond-shaped”, the drawers may be forced; correct this before fixing.
- Fixing and continuity: join adjacent modules if the installation system allows it, so that the island functions as a single block and not as separate pieces.
3) Connections (gas and electricity) – best practices
- Accessible shut-off valve: leave the gas valve in an accessible location without dismantling the island.
- Protected passages: guide hoses and cables away from edges and areas where they could be pinched by drawers or doors.
- No tension: leave technical clearance for expansion and small movements, especially outdoors.
- Leak test: always check gas connections using a safe method (soapy solution or detector) before turning on.
4) Daily use (how to keep it in good condition over time)
- Organisation by area: assign one drawer to hot/dirty tools (tongs, spatulas) and another to clean consumables (paper, gloves, thermometer). This speeds things up and prevents everything from getting dirty.
- Avoid moisture in drawers: do not store wet utensils; trapped moisture is the silent enemy of the outdoors.
- Protection in the off-season: if you are not going to use the outdoor kitchen for weeks, empty any leftovers, clean it and cover it properly.
5) Cleaning and preventive maintenance
- Exterior: clean regularly with water and neutral soap; dry afterwards to avoid stubborn marks.
- Drawers and runners: vacuum up crumbs/grease and check that they slide smoothly; if you notice friction, clean before considering lubricating.
- Screws and adjustments: check handles, fixings and levellers from time to time; the exterior ‘moves’ the assemblies more due to expansion.
- Check installations: visually check hoses, connections and the condition of cable runs. Any hardening, cracks or scuffs should be corrected before they become a problem.
6) Extra recommendation (for bespoke projects)
- Take a photo of the space and the floor plan: with an image of the space and measurements of the worktop, I can help you define a coherent modular configuration (position of the grill, burner, preparation and storage).
In a modular outdoor kitchen, maintenance is not an ‘extra’: it is what ensures that the island remains
aligned, stable and safe over the seasons. The combination of
weathering, temperature changes, humidity and intensive use can loosen fittings, cause grease to accumulate in hidden areas or force drawer guides if the unit becomes uneven. That is why this section is presented as a simple technical protocol: first, compatibility and assembly are checked, then the gas/electricity installation is checked, and finally, cleaning routines and preventive checks are established. With these steps, the system maintains its Phantom aesthetics, ergonomics and, above all, reliable operation every time it is turned on.
1) Advance planning (before assembly)
- Confirm exact compatibility: identify the model of the barbecue head or side burner and assign its specific cabinet.
- Define the worktop line: decide on the final working height and check the actual floor level (slope, terrace joint, tiles).
- Plan the installations: plan where the gas and electricity will enter and where the shut-off valves and service access points will be located. A good design seeks short routes, without crossings and with room for maintenance.
- Consider ventilation and safety: gas integration requires a serious approach; avoid ‘airtight’ enclosures and respect distances from combustible materials.
2) Assembly and levelling (key to making the island ‘look professional’)
- Dry run: place the cabinet in its final position without fixing anything and check the alignment with the other modules.
- Levelling with legs: adjust the levelling legs until the unit is vertical and the top surface is stable. The aim is for the worktop to rest without tension and for the doors/drawers to have uniform clearance.
- Checking diagonals: if the module is “diamond-shaped”, the drawers may be forced; correct this before fixing.
- Fixing and continuity: join adjacent modules if the installation system allows it, so that the island functions as a single block and not as separate pieces.
3) Connections (gas and electricity) – best practices
- Accessible shut-off valve: leave the gas valve in an accessible location without dismantling the island.
- Protected passages: guide hoses and cables away from edges and areas where they could be pinched by drawers or doors.
- No tension: leave technical clearance for expansion and small movements, especially outdoors.
- Leak test: always check gas connections using a safe method (soapy solution or detector) before turning on.
4) Daily use (how to keep it in good condition over time)
- Organisation by area: assign one drawer to hot/dirty tools (tongs, spatulas) and another to clean consumables (paper, gloves, thermometer). This speeds things up and prevents everything from getting dirty.
- Avoid moisture in drawers: do not store wet utensils; trapped moisture is the silent enemy of the outdoors.
- Protection in the off-season: if you are not going to use the outdoor kitchen for weeks, empty any leftovers, clean it and cover it properly.
5) Cleaning and preventive maintenance
- Exterior: clean regularly with water and neutral soap; dry afterwards to avoid stubborn marks.
- Drawers and runners: vacuum up crumbs/grease and check that they slide smoothly; if you notice friction, clean before considering lubricating.
- Screws and adjustments: check handles, fixings and levellers from time to time; the exterior ‘moves’ the assemblies more due to expansion.
- Check installations: visually check hoses, connections and the condition of cable runs. Any hardening, cracks or scuffs should be corrected before they become a problem.
6) Extra recommendation (for bespoke projects)
- Take a photo of the space and the floor plan: with an image of the space and measurements of the worktop, I can help you define a coherent modular configuration (position of the grill, burner, preparation and storage).
In a modular outdoor kitchen, maintenance is not an ‘extra’: it is what ensures that the island remains
aligned, stable and safe over the seasons. The combination of
weathering, temperature changes, humidity and intensive use can loosen fittings, cause grease to accumulate in hidden areas or force drawer guides if the unit becomes uneven. That is why this section is presented as a simple technical protocol: first, compatibility and assembly are checked, then the gas/electricity installation is checked, and finally, cleaning routines and preventive checks are established. With these steps, the system maintains its Phantom aesthetics, ergonomics and, above all, reliable operation every time it is turned on.
1) Advance planning (before assembly)
- Confirm exact compatibility: identify the model of the barbecue head or side burner and assign its specific cabinet.
- Define the worktop line: decide on the final working height and check the actual floor level (slope, terrace joint, tiles).
- Plan the installations: plan where the gas and electricity will enter and where the shut-off valves and service access points will be located. A good design seeks short routes, without crossings and with room for maintenance.
- Consider ventilation and safety: gas integration requires a serious approach; avoid ‘airtight’ enclosures and respect distances from combustible materials.
2) Assembly and levelling (key to making the island ‘look professional’)
- Dry run: place the cabinet in its final position without fixing anything and check the alignment with the other modules.
- Levelling with legs: adjust the levelling legs until the unit is vertical and the top surface is stable. The aim is for the worktop to rest without tension and for the doors/drawers to have uniform clearance.
- Checking diagonals: if the module is “diamond-shaped”, the drawers may be forced; correct this before fixing.
- Fixing and continuity: join adjacent modules if the installation system allows it, so that the island functions as a single block and not as separate pieces.
3) Connections (gas and electricity) – best practices
- Accessible shut-off valve: leave the gas valve in an accessible location without dismantling the island.
- Protected passages: guide hoses and cables away from edges and areas where they could be pinched by drawers or doors.
- No tension: leave technical clearance for expansion and small movements, especially outdoors.
- Leak test: always check gas connections using a safe method (soapy solution or detector) before turning on.
4) Daily use (how to keep it in good condition over time)
- Organisation by area: assign one drawer to hot/dirty tools (tongs, spatulas) and another to clean consumables (paper, gloves, thermometer). This speeds things up and prevents everything from getting dirty.
- Avoid moisture in drawers: do not store wet utensils; trapped moisture is the silent enemy of the outdoors.
- Protection in the off-season: if you are not going to use the outdoor kitchen for weeks, empty any leftovers, clean it and cover it properly.
5) Cleaning and preventive maintenance
- Exterior: clean regularly with water and neutral soap; dry afterwards to avoid stubborn marks.
- Drawers and runners: vacuum up crumbs/grease and check that they slide smoothly; if you notice friction, clean before considering lubricating.
- Screws and adjustments: check handles, fixings and levellers from time to time; the exterior ‘moves’ the assemblies more due to expansion.
- Check installations: visually check hoses, connections and the condition of cable runs. Any hardening, cracks or scuffs should be corrected before they become a problem.
6) Extra recommendation (for bespoke projects)
- Take a photo of the space and the floor plan: with an image of the space and measurements of the worktop, I can help you define a coherent modular configuration (position of the grill, burner, preparation and storage).
In a modular outdoor kitchen, maintenance is not an ‘extra’: it is what ensures that the island remains
aligned, stable and safe over the seasons. The combination of
weathering, temperature changes, humidity and intensive use can loosen fittings, cause grease to accumulate in hidden areas or force drawer guides if the unit becomes uneven. That is why this section is presented as a simple technical protocol: first, compatibility and assembly are checked, then the gas/electricity installation is checked, and finally, cleaning routines and preventive checks are established. With these steps, the system maintains its Phantom aesthetics, ergonomics and, above all, reliable operation every time it is turned on.
1) Advance planning (before assembly)
- Confirm exact compatibility: identify the model of the barbecue head or side burner and assign its specific cabinet.
- Define the worktop line: decide on the final working height and check the actual floor level (slope, terrace joint, tiles).
- Plan the installations: plan where the gas and electricity will enter and where the shut-off valves and service access points will be located. A good design seeks short routes, without crossings and with room for maintenance.
- Consider ventilation and safety: gas integration requires a serious approach; avoid ‘airtight’ enclosures and respect distances from combustible materials.
2) Assembly and levelling (key to making the island ‘look professional’)
- Dry run: place the cabinet in its final position without fixing anything and check the alignment with the other modules.
- Levelling with legs: adjust the levelling legs until the unit is vertical and the top surface is stable. The aim is for the worktop to rest without tension and for the doors/drawers to have uniform clearance.
- Checking diagonals: if the module is “diamond-shaped”, the drawers may be forced; correct this before fixing.
- Fixing and continuity: join adjacent modules if the installation system allows it, so that the island functions as a single block and not as separate pieces.
3) Connections (gas and electricity) – best practices
- Accessible shut-off valve: leave the gas valve in an accessible location without dismantling the island.
- Protected passages: guide hoses and cables away from edges and areas where they could be pinched by drawers or doors.
- No tension: leave technical clearance for expansion and small movements, especially outdoors.
- Leak test: always check gas connections using a safe method (soapy solution or detector) before turning on.
4) Daily use (how to keep it in good condition over time)
- Organisation by area: assign one drawer to hot/dirty tools (tongs, spatulas) and another to clean consumables (paper, gloves, thermometer). This speeds things up and prevents everything from getting dirty.
- Avoid moisture in drawers: do not store wet utensils; trapped moisture is the silent enemy of the outdoors.
- Protection in the off-season: if you are not going to use the outdoor kitchen for weeks, empty any leftovers, clean it and cover it properly.
5) Cleaning and preventive maintenance
- Exterior: clean regularly with water and neutral soap; dry afterwards to avoid stubborn marks.
- Drawers and runners: vacuum up crumbs/grease and check that they slide smoothly; if you notice friction, clean before considering lubricating.
- Screws and adjustments: check handles, fixings and levellers from time to time; the exterior ‘moves’ the assemblies more due to expansion.
- Check installations: visually check hoses, connections and the condition of cable runs. Any hardening, cracks or scuffs should be corrected before they become a problem.
6) Extra recommendation (for bespoke projects)
- Take a photo of the space and the floor plan: with an image of the space and measurements of the worktop, I can help you define a coherent modular configuration (position of the grill, burner, preparation and storage).
In a modular outdoor kitchen, maintenance is not an ‘extra’: it is what ensures that the island remains
aligned, stable and safe over the seasons. The combination of
weathering, temperature changes, humidity and intensive use can loosen fittings, cause grease to accumulate in hidden areas or force drawer guides if the unit becomes uneven. That is why this section is presented as a simple technical protocol: first, compatibility and assembly are checked, then the gas/electricity installation is checked, and finally, cleaning routines and preventive checks are established. With these steps, the system maintains its Phantom aesthetics, ergonomics and, above all, reliable operation every time it is turned on.
1) Advance planning (before assembly)
- Confirm exact compatibility: identify the model of the barbecue head or side burner and assign its specific cabinet.
- Define the worktop line: decide on the final working height and check the actual floor level (slope, terrace joint, tiles).
- Plan the installations: plan where the gas and electricity will enter and where the shut-off valves and service access points will be located. A good design seeks short routes, without crossings and with room for maintenance.
- Consider ventilation and safety: gas integration requires a serious approach; avoid ‘airtight’ enclosures and respect distances from combustible materials.
2) Assembly and levelling (key to making the island ‘look professional’)
- Dry run: place the cabinet in its final position without fixing anything and check the alignment with the other modules.
- Levelling with legs: adjust the levelling legs until the unit is vertical and the top surface is stable. The aim is for the worktop to rest without tension and for the doors/drawers to have uniform clearance.
- Checking diagonals: if the module is “diamond-shaped”, the drawers may be forced; correct this before fixing.
- Fixing and continuity: join adjacent modules if the installation system allows it, so that the island functions as a single block and not as separate pieces.
3) Connections (gas and electricity) – best practices
- Accessible shut-off valve: leave the gas valve in an accessible location without dismantling the island.
- Protected passages: guide hoses and cables away from edges and areas where they could be pinched by drawers or doors.
- No tension: leave technical clearance for expansion and small movements, especially outdoors.
- Leak test: always check gas connections using a safe method (soapy solution or detector) before turning on.
4) Daily use (how to keep it in good condition over time)
- Organisation by area: assign one drawer to hot/dirty tools (tongs, spatulas) and another to clean consumables (paper, gloves, thermometer). This speeds things up and prevents everything from getting dirty.
- Avoid moisture in drawers: do not store wet utensils; trapped moisture is the silent enemy of the outdoors.
- Protection in the off-season: if you are not going to use the outdoor kitchen for weeks, empty any leftovers, clean it and cover it properly.
5) Cleaning and preventive maintenance
- Exterior: clean regularly with water and neutral soap; dry afterwards to avoid stubborn marks.
- Drawers and runners: vacuum up crumbs/grease and check that they slide smoothly; if you notice friction, clean before considering lubricating.
- Screws and adjustments: check handles, fixings and levellers from time to time; the exterior ‘moves’ the assemblies more due to expansion.
- Check installations: visually check hoses, connections and the condition of cable runs. Any hardening, cracks or scuffs should be corrected before they become a problem.
6) Extra recommendation (for bespoke projects)
- Take a photo of the space and the floor plan: with an image of the space and measurements of the worktop, I can help you define a coherent modular configuration (position of the grill, burner, preparation and storage).
In a modular outdoor kitchen, maintenance is not an ‘extra’: it is what ensures that the island remains
aligned, stable and safe over the seasons. The combination of
weathering, temperature changes, humidity and intensive use can loosen fittings, cause grease to accumulate in hidden areas or force drawer guides if the unit becomes uneven. That is why this section is presented as a simple technical protocol: first, compatibility and assembly are checked, then the gas/electricity installation is checked, and finally, cleaning routines and preventive checks are established. With these steps, the system maintains its Phantom aesthetics, ergonomics and, above all, reliable operation every time it is turned on.
1) Advance planning (before assembly)
- Confirm exact compatibility: identify the model of the barbecue head or side burner and assign its specific cabinet.
- Define the worktop line: decide on the final working height and check the actual floor level (slope, terrace joint, tiles).
- Plan the installations: plan where the gas and electricity will enter and where the shut-off valves and service access points will be located. A good design seeks short routes, without crossings and with room for maintenance.
- Consider ventilation and safety: gas integration requires a serious approach; avoid ‘airtight’ enclosures and respect distances from combustible materials.
2) Assembly and levelling (key to making the island ‘look professional’)
- Dry run: place the cabinet in its final position without fixing anything and check the alignment with the other modules.
- Levelling with legs: adjust the levelling legs until the unit is vertical and the top surface is stable. The aim is for the worktop to rest without tension and for the doors/drawers to have uniform clearance.
- Checking diagonals: if the module is “diamond-shaped”, the drawers may be forced; correct this before fixing.
- Fixing and continuity: join adjacent modules if the installation system allows it, so that the island functions as a single block and not as separate pieces.
3) Connections (gas and electricity) – best practices
- Accessible shut-off valve: leave the gas valve in an accessible location without dismantling the island.
- Protected passages: guide hoses and cables away from edges and areas where they could be pinched by drawers or doors.
- No tension: leave technical clearance for expansion and small movements, especially outdoors.
- Leak test: always check gas connections using a safe method (soapy solution or detector) before turning on.
4) Daily use (how to keep it in good condition over time)
- Organisation by area: assign one drawer to hot/dirty tools (tongs, spatulas) and another to clean consumables (paper, gloves, thermometer). This speeds things up and prevents everything from getting dirty.
- Avoid moisture in drawers: do not store wet utensils; trapped moisture is the silent enemy of the outdoors.
- Protection in the off-season: if you are not going to use the outdoor kitchen for weeks, empty any leftovers, clean it and cover it properly.
5) Cleaning and preventive maintenance
- Exterior: clean regularly with water and neutral soap; dry afterwards to avoid stubborn marks.
- Drawers and runners: vacuum up crumbs/grease and check that they slide smoothly; if you notice friction, clean before considering lubricating.
- Screws and adjustments: check handles, fixings and levellers from time to time; the exterior ‘moves’ the assemblies more due to expansion.
- Check installations: visually check hoses, connections and the condition of cable runs. Any hardening, cracks or scuffs should be corrected before they become a problem.
6) Extra recommendation (for bespoke projects)
- Take a photo of the space and the floor plan: with an image of the space and measurements of the worktop, I can help you define a coherent modular configuration (position of the grill, burner, preparation and storage).
In a modular outdoor kitchen, maintenance is not an ‘extra’: it is what ensures that the island remains
aligned, stable and safe over the seasons. The combination of
weathering, temperature changes, humidity and intensive use can loosen fittings, cause grease to accumulate in hidden areas or force drawer guides if the unit becomes uneven. That is why this section is presented as a simple technical protocol: first, compatibility and assembly are checked, then the gas/electricity installation is checked, and finally, cleaning routines and preventive checks are established. With these steps, the system maintains its Phantom aesthetics, ergonomics and, above all, reliable operation every time it is turned on.
1) Advance planning (before assembly)
- Confirm exact compatibility: identify the model of the barbecue head or side burner and assign its specific cabinet.
- Define the worktop line: decide on the final working height and check the actual floor level (slope, terrace joint, tiles).
- Plan the installations: plan where the gas and electricity will enter and where the shut-off valves and service access points will be located. A good design seeks short routes, without crossings and with room for maintenance.
- Consider ventilation and safety: gas integration requires a serious approach; avoid ‘airtight’ enclosures and respect distances from combustible materials.
2) Assembly and levelling (key to making the island ‘look professional’)
- Dry run: place the cabinet in its final position without fixing anything and check the alignment with the other modules.
- Levelling with legs: adjust the levelling legs until the unit is vertical and the top surface is stable. The aim is for the worktop to rest without tension and for the doors/drawers to have uniform clearance.
- Checking diagonals: if the module is “diamond-shaped”, the drawers may be forced; correct this before fixing.
- Fixing and continuity: join adjacent modules if the installation system allows it, so that the island functions as a single block and not as separate pieces.
3) Connections (gas and electricity) – best practices
- Accessible shut-off valve: leave the gas valve in an accessible location without dismantling the island.
- Protected passages: guide hoses and cables away from edges and areas where they could be pinched by drawers or doors.
- No tension: leave technical clearance for expansion and small movements, especially outdoors.
- Leak test: always check gas connections using a safe method (soapy solution or detector) before turning on.
4) Daily use (how to keep it in good condition over time)
- Organisation by area: assign one drawer to hot/dirty tools (tongs, spatulas) and another to clean consumables (paper, gloves, thermometer). This speeds things up and prevents everything from getting dirty.
- Avoid moisture in drawers: do not store wet utensils; trapped moisture is the silent enemy of the outdoors.
- Protection in the off-season: if you are not going to use the outdoor kitchen for weeks, empty any leftovers, clean it and cover it properly.
5) Cleaning and preventive maintenance
- Exterior: clean regularly with water and neutral soap; dry afterwards to avoid stubborn marks.
- Drawers and runners: vacuum up crumbs/grease and check that they slide smoothly; if you notice friction, clean before considering lubricating.
- Screws and adjustments: check handles, fixings and levellers from time to time; the exterior ‘moves’ the assemblies more due to expansion.
- Check installations: visually check hoses, connections and the condition of cable runs. Any hardening, cracks or scuffs should be corrected before they become a problem.
6) Extra recommendation (for bespoke projects)
- Take a photo of the space and the floor plan: with an image of the space and measurements of the worktop, I can help you define a coherent modular configuration (position of the grill, burner, preparation and storage).
In a modular outdoor kitchen, maintenance is not an ‘extra’: it is what ensures that the island remains
aligned, stable and safe over the seasons. The combination of
weathering, temperature changes, humidity and intensive use can loosen fittings, cause grease to accumulate in hidden areas or force drawer guides if the unit becomes uneven. That is why this section is presented as a simple technical protocol: first, compatibility and assembly are checked, then the gas/electricity installation is checked, and finally, cleaning routines and preventive checks are established. With these steps, the system maintains its Phantom aesthetics, ergonomics and, above all, reliable operation every time it is turned on.
1) Advance planning (before assembly)
- Confirm exact compatibility: identify the model of the barbecue head or side burner and assign its specific cabinet.
- Define the worktop line: decide on the final working height and check the actual floor level (slope, terrace joint, tiles).
- Plan the installations: plan where the gas and electricity will enter and where the shut-off valves and service access points will be located. A good design seeks short routes, without crossings and with room for maintenance.
- Consider ventilation and safety: gas integration requires a serious approach; avoid ‘airtight’ enclosures and respect distances from combustible materials.
2) Assembly and levelling (key to making the island ‘look professional’)
- Dry run: place the cabinet in its final position without fixing anything and check the alignment with the other modules.
- Levelling with legs: adjust the levelling legs until the unit is vertical and the top surface is stable. The aim is for the worktop to rest without tension and for the doors/drawers to have uniform clearance.
- Checking diagonals: if the module is “diamond-shaped”, the drawers may be forced; correct this before fixing.
- Fixing and continuity: join adjacent modules if the installation system allows it, so that the island functions as a single block and not as separate pieces.
3) Connections (gas and electricity) – best practices
- Accessible shut-off valve: leave the gas valve in an accessible location without dismantling the island.
- Protected passages: guide hoses and cables away from edges and areas where they could be pinched by drawers or doors.
- No tension: leave technical clearance for expansion and small movements, especially outdoors.
- Leak test: always check gas connections using a safe method (soapy solution or detector) before turning on.
4) Daily use (how to keep it in good condition over time)
- Organisation by area: assign one drawer to hot/dirty tools (tongs, spatulas) and another to clean consumables (paper, gloves, thermometer). This speeds things up and prevents everything from getting dirty.
- Avoid moisture in drawers: do not store wet utensils; trapped moisture is the silent enemy of the outdoors.
- Protection in the off-season: if you are not going to use the outdoor kitchen for weeks, empty any leftovers, clean it and cover it properly.
5) Cleaning and preventive maintenance
- Exterior: clean regularly with water and neutral soap; dry afterwards to avoid stubborn marks.
- Drawers and runners: vacuum up crumbs/grease and check that they slide smoothly; if you notice friction, clean before considering lubricating.
- Screws and adjustments: check handles, fixings and levellers from time to time; the exterior ‘moves’ the assemblies more due to expansion.
- Check installations: visually check hoses, connections and the condition of cable runs. Any hardening, cracks or scuffs should be corrected before they become a problem.
6) Extra recommendation (for bespoke projects)
- Take a photo of the space and the floor plan: with an image of the space and measurements of the worktop, I can help you define a coherent modular configuration (position of the grill, burner, preparation and storage).
Prestige PRO 825 (IM-UGC825-MK-1)
BIB18 – Side burner module (IM-UGC18-MK-1)
Compatibility: BIB18 (and BIB12/BI12).
Drawers: 2 soft-close.
Approximate cabinet dimensions: Height 35.5 inches (90 cm) · Width 24 inches · Depth 24 inches (61 cm).
Finish: matte black, galvanised steel, powder coating.
Prestige PRO 665 (IM-UGC665-MK-1)
Prestige/PRO 500 (IM-UGC500-MK-1)
BIG44 – 44‘ (IM-UGC44-MK-1)
BIG38 – 38‘ (IM-UGC38-MK-1)
BI32/BIG32 – 32" (IM-UGC32-MK-1)