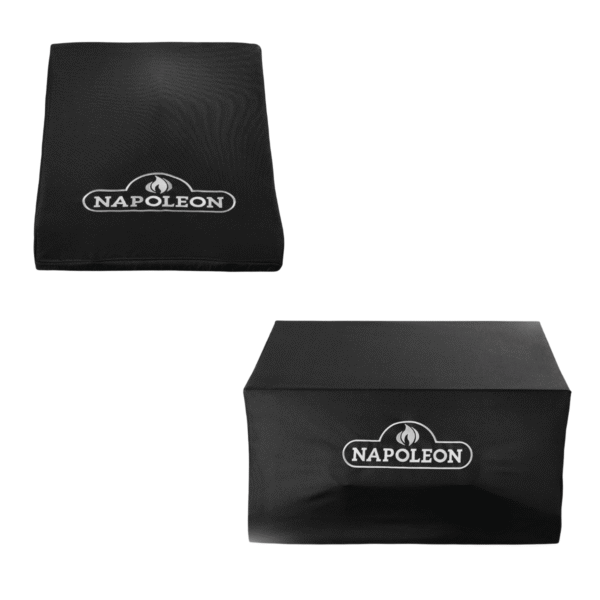
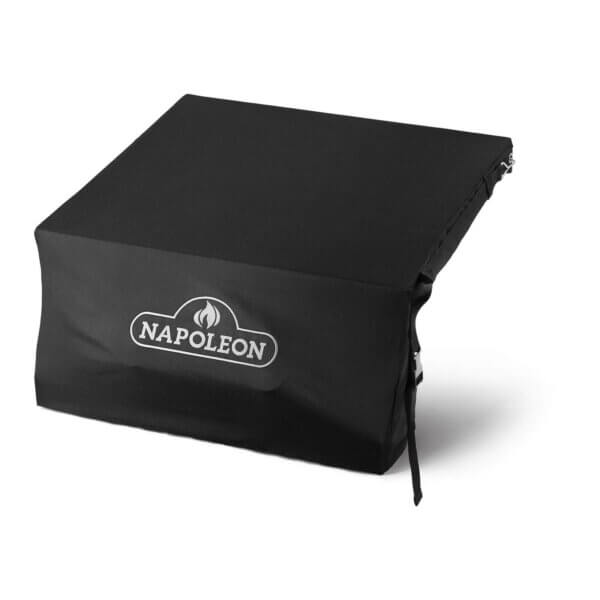
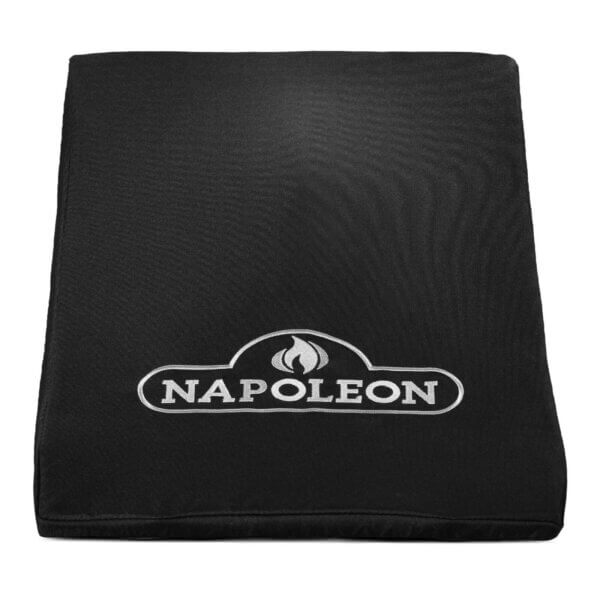
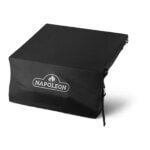
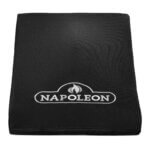

Napoleon Side Burner Cover – Napoleon

Price range: 34,94 € through 44,95 € (VAT inc.)

✅ 100% polyester fabric that is water-resistant and UV-resistant.

✅ Ventilation strips that reduce internal condensation.

✅ Hanging loops for easy handling and drying.

✅ Custom fit: BI10/BIB10 snug fit; BIB18 with adjustable straps.

✅ Officially compatible with the 700 Series (10‘ and 18’).

✅ Effective protection against weather, dirt and UV radiation.

✅ 3-year limited warranty.

Configure it to your liking

Clear selection

Complete your set

See more

Your selections

Total price

SKU: 6181X Categories: , ,
Métodos de pago

Your built-in burner works hard; its cover should too. These original Napoleon covers protect 10″ and 18″ built-in side burners with a precise fit, water- and UV-resistant technical fabrics, and real-life outdoor details like ventilation strips and hanging loops. All with guaranteed 700 Series compatibility and a clear focus: to keep your cooking area ready, clean and operational all year round.

🧵 Materials and construction

100% polyester fabric combines a dense weave with a water-repellent finish that helps rain to permeate and run off rather than soak in, reducing moisture build-up on the burner surface. UV resistance helps to maintain the colour and integrity of the material in prolonged exposure to the sun. Ventilation strips allow air to circulate, mitigating interior condensation and promoting faster drying after rain showers. Hanging loops facilitate handling and storage between uses, so the cover stays dry and tidy without taking up space on the work surface.

🛡️ Total outdoor protection

The cover acts as an all-round shield against rain, dust, pollen, residual grease splashes and solar radiation, all of which can affect burner finishes and control elements over time. Its wrap-around cover helps keep the side area clean and ready to light, preventing dirt from settling in nooks and crannies and moisture from accelerating wear and tear in the off-season. Even in sudden changes of weather, the fabric retains its flexibility and does not become brittle, prolonging the life cycle of the accessory and the burner itself.

⚙️ Outstanding functionalities

Every detail is designed for real outdoor use: the tailored fit prevents wind from lifting the cover and water pockets from forming; the ventilation strips reduce the risk of condensation leading to odours or marks; and the hanging loops allow for clean removal and storage while cooking. Adjustable straps are added to the BIB18 version to provide a firmer seat on double or wok modules, improving support in exposed installations or when wind gusts are expected.

🚀 Performance and efficiency of care.

By limiting direct exposure to UV, rain and dirt, the cover reduces the need for deep cleaning and protects surfaces, controls and auxiliary grills, resulting in less maintenance and more cooking time. This “passive maintenance” is especially noticeable at the beginning of the season: the burner lights consistently, the work area is dry and thermal performance is more predictable because there is no debris or moisture interfering with combustion or heat transfer.

🎨 Design and aesthetics

Its restrained, wrap-around cut respects the lines of the outdoor kitchen and provides a tidy aesthetic when you’re not cooking. The cover blends in visually with the whole, without drawing attention to itself or breaking the harmony of the built-in unit. The fabric finish retains its feel and appearance over time, reducing the typical sun fading effect and maintaining a neat look season after season.

🔗 Compatibilities and fittings

The 10″ cover is designed for BI10/BIB10 compatible 700 Series integrated side burners, including recessed Sizzle Zone. It covers the perimeter of the cavity and sits precisely over the rim for a stable, even seal. The 18″ sleeve is intended for double and power modules (wok/power burner) of the same series, where the straps help to adjust the contour and compensate for small installation variations typical of custom kitchens. In both cases, the perfect fit reduces movement and friction that could damage surfaces over time.

🍳 Benefits for your kitchen (barbecue and outdoor)

With the burner protected, you maintain its thermal response and first-time ignition, key to searing in the Sizzle Zone, powerful wok stir-frying and preparing sauces or side dishes without missing a beat. Stability in the state of the equipment translates into more consistent results, less set-up time and a smoother experience when you combine main grill and side zone for side-by-side cooking.

🧽 Safety and ease of use

Tailored fit prevents the cover from shifting or forming creases that can snag when removing or placing. Built-in ventilation helps keep the interior dry, minimising residual moisture that can affect components. Hanging loops improve grip and ergonomics when handling, and the 3-year limited warranty adds long-term peace of mind. In exposed installations, the straps on the BIB18 version increase the hold to keep the cover in place even in windy conditions.

🧰 Non-barbecue applications

In addition to its primary use on Napoleon integrated side burners, the cover can protect other built-in modules of equivalent dimensions, provided the fit is correct. In these cases, prioritise checking measurements and maintaining functional ventilation to reproduce the same balance between protection and breathing of the whole. It is a useful solution for extending the life of auxiliary surfaces in modular outdoor kitchens.

Comparative table

Variation Main compatibility Nominal size Material Clamping system Ventilation Hanging loops Warranty
BI10/BIB10 700 Series 10″, recessed Sizzle Zone 10″ (25.4 cm) 100% polyester, waterproof, UV Custom fit Yes Yes 3 years
BIB18 700 Series 18″, dual/power/wok 18″ (45.7 cm) 100% polyester, waterproof, UV Adjustable straps + adjustment Yes Yes 3 years

Use and Maintenance

1) Placement and removal

  • Before covering: check that the burner is completely cool and dry. If you have been cooking, wait for the surface to cool to room temperature and step a cloth to remove condensation or splashes.
  • Correct orientation: align the cover with the front of the module and spread it from back to front to avoid catching knobs or edges. Ensure that ventilation is unobstructed.
  • Perimeter adjustment: press down on the edges with your hands so that it fits snugly around the entire edge and there are no air pockets where water can accumulate.
  • Clean removal: first lift from the front, fold it over itself so as not to drag dirt inside, and hang it by the ties if you are going to continue cooking.
  • Notes by variation:
    • BIB18: adjust the straps until they are snug enough to allow two fingers between the fabric and the chassis; avoid excessive tension to prevent marking the fabric.
    • BI10/BIB10: confirm that the lower hem is completely seated around the perimeter; check the corners with your hand.

2) Drying and ventilation

  • After rain or washing: shake off excess water and let the cover air for a few minutes before replacing it. Do not cover wet surfaces: this encourages internal condensation.
  • Avoid the ‘greenhouse effect’: check that the ventilation strips are not obstructed by walls, furniture or accessories. Air circulation reduces humidity and unpleasant odours.
  • Quick micro-drying: if the cover is slightly damp, hang it by the ties in a ventilated area until the surface is dry to the touch; then replace the cover.
  • Cold environments: if there is dew or frost, remove the cover carefully so as not to stiffen the fabric; shake gently and let ventilate before replacing.

3) Routine cleaning

  • Frequency: once every 2–4 weeks (or after exposure to dust, pollen or splashes).
  • Method: use a soft sponge, lukewarm water and mild soap. Clean with broad strokes without rubbing aggressively, rinse with clean water and let dry naturally.
  • Prohibited: avoid bleach, solvents, strong degreasers, hard brushes or washing machines/dryers; these can damage the water-repellent coating and colour.
  • Localised dirt: for specific stains (grease, pollen), apply mild soap directly to the area, wait 3–5 minutes and remove with a damp cloth.
  • Notes on variations:
    • BIB18: also cleans straps and fittings; check that no soap remains on the buckles.
    • BI10/BIB10: pay attention to the bottom edge; this is the area that accumulates the most dust.

4) Storage

  • During use: hang the cover by the loops to keep it dry and out of the way; avoid placing it on damp or greasy floors.
  • Prolonged/between seasons: store completely dry in a ventilated place, without any weight on top or contact with abrasive surfaces.
  • Container: if you use a bag, make sure it is breathable (fabric or mesh). Avoid airtight plastics that trap moisture.
  • Extreme weather: in windy areas, secure it with the straps (BIB18) or add a soft anchor point to a fixed element in the kitchen (without piercing the cover).
  • Notes on variations:
    • BIB18: store the straps folded so that they do not leave marks.
    • BI10/BIB10: fold with wide hems to avoid a line of tension always in the same place.

Use and Maintenance


1) Placement and removal


  • Before covering: check that the burner is completely cool and dry. If you have been cooking, wait for the surface to cool to room temperature and step a cloth to remove condensation or splashes.

  • Correct orientation: align the cover with the front of the module and spread it from back to front to avoid catching knobs or edges. Ensure that ventilation is unobstructed.

  • Perimeter adjustment: press down on the edges with your hands so that it fits snugly around the entire edge and there are no air pockets where water can accumulate.

  • Clean removal: first lift from the front, fold it over itself so as not to drag dirt inside, and hang it by the ties if you are going to continue cooking.

  • Notes by variation:

    • BIB18: adjust the straps until they are snug enough to allow two fingers between the fabric and the chassis; avoid excessive tension to prevent marking the fabric.

    • BI10/BIB10: confirm that the lower hem is completely seated around the perimeter; check the corners with your hand.


2) Drying and ventilation


  • After rain or washing: shake off excess water and let the cover air for a few minutes before replacing it. Do not cover wet surfaces: this encourages internal condensation.

  • Avoid the ‘greenhouse effect’: check that the ventilation strips are not obstructed by walls, furniture or accessories. Air circulation reduces humidity and unpleasant odours.

  • Quick micro-drying: if the cover is slightly damp, hang it by the ties in a ventilated area until the surface is dry to the touch; then replace the cover.

  • Cold environments: if there is dew or frost, remove the cover carefully so as not to stiffen the fabric; shake gently and let ventilate before replacing.


3) Routine cleaning


  • Frequency: once every 2–4 weeks (or after exposure to dust, pollen or splashes).

  • Method: use a soft sponge, lukewarm water and mild soap. Clean with broad strokes without rubbing aggressively, rinse with clean water and let dry naturally.

  • Prohibited: avoid bleach, solvents, strong degreasers, hard brushes or washing machines/dryers; these can damage the water-repellent coating and colour.

  • Localised dirt: for specific stains (grease, pollen), apply mild soap directly to the area, wait 3–5 minutes and remove with a damp cloth.

  • Notes on variations:

    • BIB18: also cleans straps and fittings; check that no soap remains on the buckles.

    • BI10/BIB10: pay attention to the bottom edge; this is the area that accumulates the most dust.


4) Storage


  • During use: hang the cover by the loops to keep it dry and out of the way; avoid placing it on damp or greasy floors.

  • Prolonged/between seasons: store completely dry in a ventilated place, without any weight on top or contact with abrasive surfaces.

  • Container: if you use a bag, make sure it is breathable (fabric or mesh). Avoid airtight plastics that trap moisture.

  • Extreme weather: in windy areas, secure it with the straps (BIB18) or add a soft anchor point to a fixed element in the kitchen (without piercing the cover).

  • Notes on variations:

    • BIB18: store the straps folded so that they do not leave marks.

    • BI10/BIB10: fold with wide hems to avoid a line of tension always in the same place.


Use and Maintenance


1) Placement and removal


  • Before covering: check that the burner is completely cool and dry. If you have been cooking, wait for the surface to cool to room temperature and step a cloth to remove condensation or splashes.

  • Correct orientation: align the cover with the front of the module and spread it from back to front to avoid catching knobs or edges. Ensure that ventilation is unobstructed.

  • Perimeter adjustment: press down on the edges with your hands so that it fits snugly around the entire edge and there are no air pockets where water can accumulate.

  • Clean removal: first lift from the front, fold it over itself so as not to drag dirt inside, and hang it by the ties if you are going to continue cooking.

  • Notes by variation:

    • BIB18: adjust the straps until they are snug enough to allow two fingers between the fabric and the chassis; avoid excessive tension to prevent marking the fabric.

    • BI10/BIB10: confirm that the lower hem is completely seated around the perimeter; check the corners with your hand.


2) Drying and ventilation


  • After rain or washing: shake off excess water and let the cover air for a few minutes before replacing it. Do not cover wet surfaces: this encourages internal condensation.

  • Avoid the ‘greenhouse effect’: check that the ventilation strips are not obstructed by walls, furniture or accessories. Air circulation reduces humidity and unpleasant odours.

  • Quick micro-drying: if the cover is slightly damp, hang it by the ties in a ventilated area until the surface is dry to the touch; then replace the cover.

  • Cold environments: if there is dew or frost, remove the cover carefully so as not to stiffen the fabric; shake gently and let ventilate before replacing.


3) Routine cleaning


  • Frequency: once every 2–4 weeks (or after exposure to dust, pollen or splashes).

  • Method: use a soft sponge, lukewarm water and mild soap. Clean with broad strokes without rubbing aggressively, rinse with clean water and let dry naturally.

  • Prohibited: avoid bleach, solvents, strong degreasers, hard brushes or washing machines/dryers; these can damage the water-repellent coating and colour.

  • Localised dirt: for specific stains (grease, pollen), apply mild soap directly to the area, wait 3–5 minutes and remove with a damp cloth.

  • Notes on variations:

    • BIB18: also cleans straps and fittings; check that no soap remains on the buckles.

    • BI10/BIB10: pay attention to the bottom edge; this is the area that accumulates the most dust.


4) Storage


  • During use: hang the cover by the loops to keep it dry and out of the way; avoid placing it on damp or greasy floors.

  • Prolonged/between seasons: store completely dry in a ventilated place, without any weight on top or contact with abrasive surfaces.

  • Container: if you use a bag, make sure it is breathable (fabric or mesh). Avoid airtight plastics that trap moisture.

  • Extreme weather: in windy areas, secure it with the straps (BIB18) or add a soft anchor point to a fixed element in the kitchen (without piercing the cover).

  • Notes on variations:

    • BIB18: store the straps folded so that they do not leave marks.

    • BI10/BIB10: fold with wide hems to avoid a line of tension always in the same place.


Use and Maintenance


1) Placement and removal


  • Before covering: check that the burner is completely cool and dry. If you have been cooking, wait for the surface to cool to room temperature and step a cloth to remove condensation or splashes.

  • Correct orientation: align the cover with the front of the module and spread it from back to front to avoid catching knobs or edges. Ensure that ventilation is unobstructed.

  • Perimeter adjustment: press down on the edges with your hands so that it fits snugly around the entire edge and there are no air pockets where water can accumulate.

  • Clean removal: first lift from the front, fold it over itself so as not to drag dirt inside, and hang it by the ties if you are going to continue cooking.

  • Notes by variation:

    • BIB18: adjust the straps until they are snug enough to allow two fingers between the fabric and the chassis; avoid excessive tension to prevent marking the fabric.

    • BI10/BIB10: confirm that the lower hem is completely seated around the perimeter; check the corners with your hand.


2) Drying and ventilation


  • After rain or washing: shake off excess water and let the cover air for a few minutes before replacing it. Do not cover wet surfaces: this encourages internal condensation.

  • Avoid the ‘greenhouse effect’: check that the ventilation strips are not obstructed by walls, furniture or accessories. Air circulation reduces humidity and unpleasant odours.

  • Quick micro-drying: if the cover is slightly damp, hang it by the ties in a ventilated area until the surface is dry to the touch; then replace the cover.

  • Cold environments: if there is dew or frost, remove the cover carefully so as not to stiffen the fabric; shake gently and let ventilate before replacing.


3) Routine cleaning


  • Frequency: once every 2–4 weeks (or after exposure to dust, pollen or splashes).

  • Method: use a soft sponge, lukewarm water and mild soap. Clean with broad strokes without rubbing aggressively, rinse with clean water and let dry naturally.

  • Prohibited: avoid bleach, solvents, strong degreasers, hard brushes or washing machines/dryers; these can damage the water-repellent coating and colour.

  • Localised dirt: for specific stains (grease, pollen), apply mild soap directly to the area, wait 3–5 minutes and remove with a damp cloth.

  • Notes on variations:

    • BIB18: also cleans straps and fittings; check that no soap remains on the buckles.

    • BI10/BIB10: pay attention to the bottom edge; this is the area that accumulates the most dust.


4) Storage


  • During use: hang the cover by the loops to keep it dry and out of the way; avoid placing it on damp or greasy floors.

  • Prolonged/between seasons: store completely dry in a ventilated place, without any weight on top or contact with abrasive surfaces.

  • Container: if you use a bag, make sure it is breathable (fabric or mesh). Avoid airtight plastics that trap moisture.

  • Extreme weather: in windy areas, secure it with the straps (BIB18) or add a soft anchor point to a fixed element in the kitchen (without piercing the cover).

  • Notes on variations:

    • BIB18: store the straps folded so that they do not leave marks.

    • BI10/BIB10: fold with wide hems to avoid a line of tension always in the same place.


  • Compatibilidad: Serie 700, quemador lateral empotrado de 12" (p. ej., BIB12RTPSS-CE)

  • Medida nominal: 12" (30,4 cm)

  • Material: Poliéster con recubrimiento PVC (alta resistencia), impermeable

  • Protección UV:

  • Ventilación integrada: Sí (tiras de ventilación)

  • Lazos para colgar: Sí (metálicos)

  • Sistema de sujeción: Ajuste a medida (sin correas)

  • Garantía: Limitada, 3 años

  • Compatibility: 18" dual side burners/power/wok from the 700 Series.
  • Material: 100% polyester with water and UV resistance; ventilation strips; hanging loops.
  • Nominal dimension: 18" (45.7 cm).
  • Fit: Snug with adjustable straps.
  • Fastening: Adjustable straps for a secure fit.
  • Warranty: Limited 3 years.
  • Compatibility: 10" integrated side burners from the 700 Series (BI10/BIB10 and Sizzle Zone built-in).
  • Material: 100% polyester with water and UV resistance; ventilation strips; hanging loops.
  • Nominal dimension: 10" (25.4 cm).
  • Fit: Custom-fit.
  • Fastening: Custom design (no straps).
  • Warranty: 3-year limited warranty.

Quick stir-fried beef and vegetables in a wok

The 18" double burner provides a powerful, enveloping flame that quickly raises the temperature of the wok. The secret is to work in small batches, keep the ingredients dry and stir continuously to preserve their colour and crisp texture.

Ingredients (2–3 servings)

  • 300 g beef, thinly sliced (chuck/bottom sirloin)
  • 1 tbsp light soy sauce + 1 tsp cornflour (marinade)
  • 2 tbsp oil (added in batches)
  • 1 clove of garlic and 1 tsp of chopped fresh ginger
  • 1 red pepper, sliced, 1 spring onion, 100 g snow peas
  • 2 tbsp light soy sauce (final)
  • 1 tbsp rice vinegar or lime juice
  • 1 tsp toasted sesame oil
  • Sesame seeds and green spring onion stalks to finish
  • (Optional) 1 tsp sugar or honey to balance

Steps to follow

  1. Marinate the beef with soy sauce and cornflour for 10 minutes.
  2. Preheat the wok until it smokes slightly. Add 1 tbsp oil and stir-fry the beef for 45–60 seconds; remove.
  3. Reheat, add the other tablespoon of oil, aromatics (garlic and ginger) for 5–10 seconds and then the vegetables; sauté for 1–2 minutes over high heater.
  4. Reintroduce the beef, add the soy sauce, vinegar and, if desired, a touch of sweetener; mix for 30–40 seconds.
  5. Turn off the heater, add sesame oil, sprinkle with sesame seeds and spring onions and serve immediately with jasmine rice or noodles.

Vegetarian variation — Crispy tofu and mushroom stir-fry

Ingredients (2–3 servings)

  • 300 g firm tofu, drained and cubed
  • 1 tbsp cornflour + ½ tsp salt (light batter)
  • 150 g mushrooms (shiitake/button) sliced
  • 1 bell pepper, 1 spring onion, 1 carrot cut into sticks
  • 2–3 tbsp oil (in batches)
  • 2 tbsp light soy sauce, 1 tbsp rice vinegar
  • 1 tsp sesame oil and toasted sesame seeds

Steps

  1. Dry the tofu thoroughly and lightly coat with cornflour and salt.
  2. Brown the tofu in a very hot wok with 1–2 tablespoons of oil until crispy; remove.
  3. Add a little more oil, sauté the mushrooms for 60–90 seconds; add the rest of the vegetables for 1–2 minutes.
  4. Return the tofu, add soy sauce and vinegar; sauté for 30–40 seconds. Finish with sesame oil and toasted sesame seeds.

Seared entrecôte with garlic and herb butter

The Sizzle Zone on the 10" module is perfect for aggressive searing that creates a crispy, juicy crust in seconds. The intense radiant heat sears the outside without overcooking the centre, ideal for 3–4 cm thick cuts. We'll finish with an aromatic butter glaze to enhance flavour and shine.

Ingredients (2 servings)

  • 2 entrecôte steaks, 300–350 g (3–4 cm thick)
  • 1 tbsp high-smoke-point oil (sunflower/avocado)
  • Flaky salt and freshly ground black pepper
  • 40 g butter
  • 1 crushed garlic clove
  • 2 sprigs of thyme or rosemary
  • (Optional) 1 teaspoon lemon juice or a few drops of Worcestershire sauce

Steps to follow

  1. Preheat the Sizzle Zone for 5–8 minutes until the grill is very hot.
  2. Pat the meat dry with paper towels, brush with a thin film of oil and season with salt just before placing on the grate.
  3. Sear for 60–90 seconds per side without moving to form a crust. If you want diamond-shaped marks, turn 90° halfway through each side. Reduce the heat to medium or move to a cooler area. Add the butter, garlic and herbs; baste the meat with a spoon for 30–40 seconds on each side.
  4. Check the doneness (approximate): rare 50–52 °C; medium rare 55–57 °C; medium 60–63 °C.
  5. Rest for 3–5 minutes on a rack or board, spread the aromatic butter on top and finish with pepper and a touch of lemon/Worcestershire sauce if you like.

    Vegetarian variation — Glazed portobello ‘steak’

    Ingredients (2 servings)

    • 4 large portobello mushrooms, stems removed
    • 2 tbsp oil
    • 30 g butter
    • 1 clove garlic, minced
    • 1 tbsp light soy sauce
    • 1 tsp maple syrup or honey
    • Black pepper and chopped parsley

    Steps

    1. Preheat the Sizzle Zone and brush the portobello mushrooms with oil.
    2. Sear for 2–3 minutes on each side until golden brown.
    3. Glaze: reduce the heat; add butter, garlic, soy sauce and syrup. Baste for 1–2 minutes until shiny and juicy.
    4. Serve with pepper and parsley. They are perfect on mashed potatoes or creamy polenta.