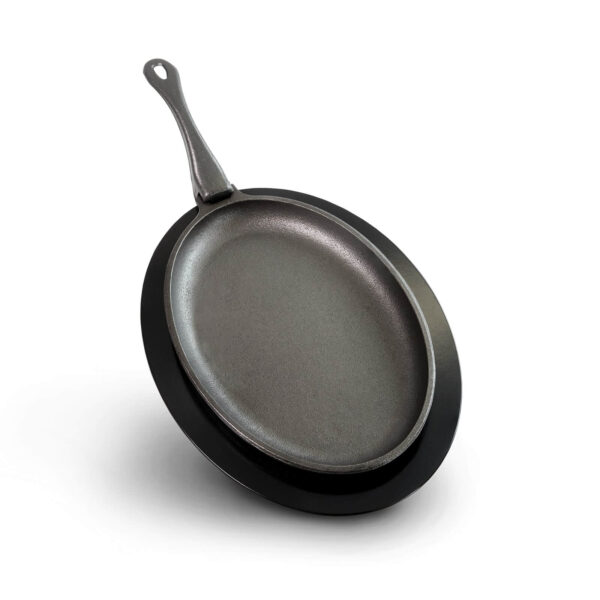
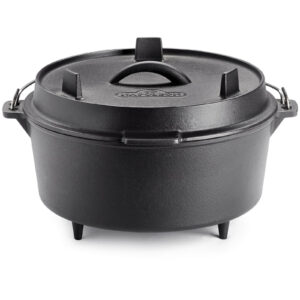
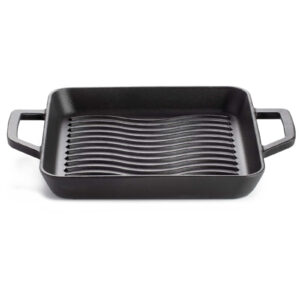
The Napoleon Cast Iron Skillet with Cover is much more than a kitchen utensil: it is a robust, elegant and functional tool that transforms any preparation into a gourmet experience. Designed for both outdoor barbecues and conventional kitchens, this skillet stands out for its durability, thermal adaptability and ergonomic design.
A Frying Pan for Life
Cast iron is synonymous with strength. This frying pan is made from high-quality materials and has a design that stands the step of time. With minimal care and proper use, it becomes a piece that lasts for generations, remaining functional and aesthetically intact. It does not deform or wear out easily, even with intensive use and exposure to high temperatures.
Cooking Without Complications
Thanks to the curing process, the pan develops a natural non-stick surface that improves with time and use. This allows you to cook everything from meat and fish to eggs or omelettes without the food sticking, avoiding excessive use of fats. This organic non-stick surface respects the original flavour of the ingredients and offers uniform and healthy cooking.
From the Grill to the Oven without Problems
Its ability to adapt to various heat sources — barbecues, side burners, conventional ovens or even open heaters — makes this pan an indispensable wild card in the kitchen. It is ideal for sautéing, searing, baking or keeping food warm, offering professional results both indoors and outdoors.
Control and Convenience
The ergonomically designed removable handle offers a clear advantage over other pans. It stays cool to the touch, connects and disconnects easily, and improves the cook’s control during the process. This is particularly useful when handling the pan over hot coals or serving directly at the table, reducing the risk of accidents and burns.
Enhancing the Performance of Your Pan
The curing process is not only essential for achieving effective non-stick properties, but also strengthens the pan’s protection against oxidation. It is recommended to cure it before first use and periodically to maintain its properties. Heating it with a layer of vegetable oil in the oven creates a protective film that improves with frequent use.
Traditional and Professional Cooking
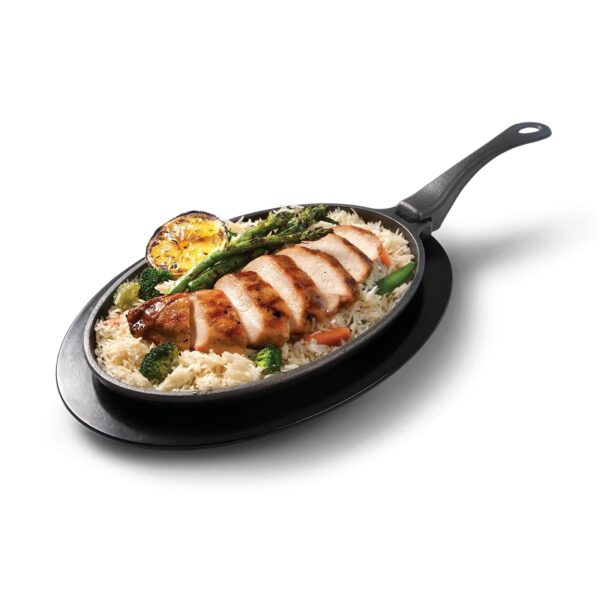
Although its design is geared towards outdoor cooking, this pan also shines in conventional kitchens. It is perfect for sautéing vegetables, preparing sauces, baked eggs, omelettes, biscuits or cornbread. In professional kitchens, it is used for its heat retention capacity and durability compared to other more delicate options.
Added Value to Your Kitchen Equipment
As part of Napoleon’s line of accessories, this pan is not just another item: it is a tool that extends the possibilities of your barbecue. Combined with other Napoleon utensils, it allows you to prepare complex recipes directly over the coals, achieving unique textures and flavours that cannot be obtained with conventional pans.
Maintenance and Suggested Uses to Keep Your Pan Like New
Napoleon cast iron pans are designed to last for generations, but their longevity depends largely on consistent and proper care. Unlike other more delicate or disposable cookware, cast iron becomes stronger over time if maintained correctly. This type of material requires special attention, but in return offers natural non-stick properties, even cooking and unmatched heat resistance. Below, we explain step by step how to keep your pan like new and give you ideas for exploring new uses that go beyond barbecuing.
Steps for optimal maintenance of your cast iron pan
- Cleaning after each use: hygiene without damaging the surfaceOnce the pan has cooled slightly (but is still warm), clean it with hot water and a soft sponge. Avoid using aggressive detergents or metal scouring pads that could damage the seasoning. If there is stubborn residue, use a wooden spatula or a little coarse salt as a natural abrasive. Dry it thoroughly with a clean cloth, letting no moisture remain to prevent rusting.
- Occasional re-seasoning: restoration and reinforcement of non-stick propertiesFrom time to time — especially if you notice that food is starting to stick or if you have cleaned with soap and water — it is advisable to re-season the pan. Apply a thin, even layer of vegetable oil to the entire surface (inside and outside), then place it upside down in an oven preheated to 180°C for at least one hour. Let it cool in the oven before storing. This process restores the protective non-stick coating.
- Proper storage: preventing moisture and damageStore the pan in a dry, well-ventilated place. If you stack it with other utensils, place absorbent paper or a cloth between them to prevent scratching or moisture build-up. Do not store it with the lid tightly closed, as this can promote mould growth if any moisture remains.
- Avoid prolonged immersion in water: protect the structure of the ironNever let the pan be submerged in water for long periods of time, or put it in the dishwasher. Prolonged exposure to moisture is the main enemy of cast iron, as it can cause premature and irreversible oxidation.
- Regular use: the more you use it, the better it gets One of the greatest virtues of cast iron is that it improves with continued use. The more you cook with your pan, the more layers of seasoning will naturally form, strengthening its non-stick surface. Feel free to use it daily, not only for barbecues, but also in your everyday cooking.
Alternative Uses for the Napoleon Pan: Beyond the Grill
The versatility of this pan makes it an indispensable kitchen tool. Apart from its classic use on the grill, you can also use it for creative and traditional preparations in your oven or on the stove. Here are some ideas we let you:
- Focaccia or naan bread: Thanks to its ability to retain and distribute heat evenly, it is ideal for baking dough with a crispy crust and fluffy centre.
- Skillet cookie or giant cookie: Prepare a delicious large cookie directly in the pan, ideal for sharing, with crispy edges and a soft centre.
- Potato omelettes or frittatas: Achieve even cooking and perfect browning both on the hob and in the oven.
- To sear cheese or gratin dishes: The pan can go from the hob to the oven, making it perfect for gratins, melted cheese or hot dip-style recipes.
- Reheating stews without losing texture: Unlike the microwave, cast iron allows you to reheat without drying out the food, maintaining flavours and consistency.
Napoleon-Style Chicken and Pepper Fajitas Recipe
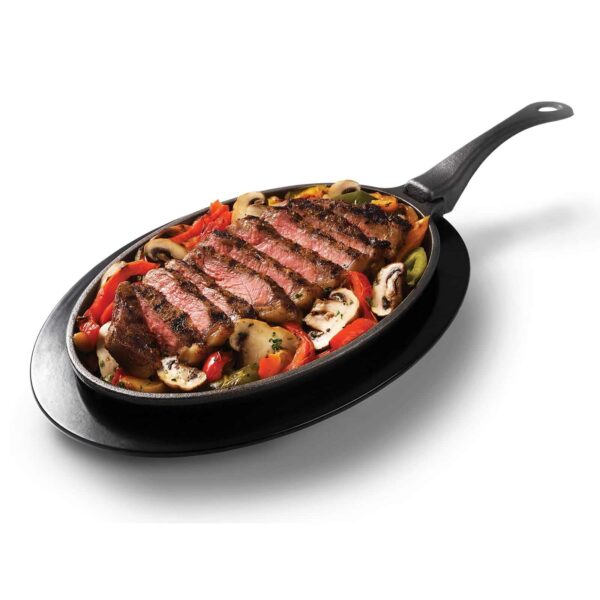
This fajita recipe is a perfect example of the superior performance of the Napoleon cast iron skillet. Thanks to its excellent heat retention, each ingredient is cooked to perfection, with even searing, internal juiciness and intense flavours. Perfect for quick dinners or outdoor events, this recipe combines fresh ingredients and balanced spices to create a tasty, healthy and colourful dish.
Ingredients (serves 4):
- 2 chicken breasts (approx. 400-450 g), cut into thin strips
- 1 red pepper and 1 yellow pepper, cut into julienne strips
- 1 red onion, cut into thin slices
- 2 cloves of garlic, finely chopped
- 2 tablespoons of extra virgin olive oil
- Juice of 1 lime (can be substituted with lemon if lime is not available)
- 1 teaspoon ground cumin
- 1 teaspoon sweet smoked paprika
- ½ teaspoon chilli powder or hot paprika (optional, for a spicy touch)
- Sea salt and freshly ground black pepper to taste
- A few sprigs of fresh coriander, chopped
- 8 corn or wheat tortillas (can also be heated in a frying pan)
- Optional garnishes: guacamole, sour cream, grated cheese, jalapeño slices
Detailed steps:
- Prepare the ingredients: Cut all the vegetables and chicken into uniform strips to ensure even cooking. Have all the ingredients ready before turning on the heater.
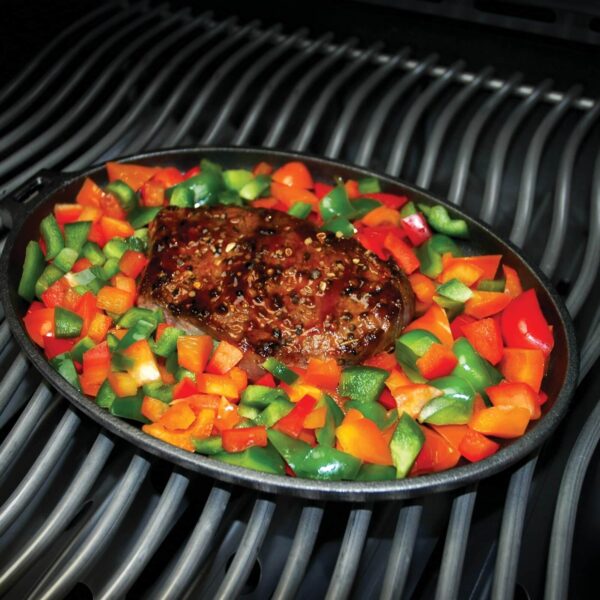
- Preheat the pan: Place the cast iron pan over medium-high heat for about 3-5 minutes. This ensures a hot base for good searing.
- Sauté the aromatics: Add the olive oil, followed by the garlic and red onion. Sauté for 2 minutes or until the onion begins to caramelise slightly.
- Sear the chicken: Add the chicken strips and spread them out evenly in the pan so they sear without crowding. Cook for 6-7 minutes, turning occasionally, until browned on the outside and cooked through on the inside.
- Add the vegetables and spices: Add the peppers, cumin, smoked paprika, chilli powder (if using) and a generous pinch of salt and pepper. Cook everything together for about 7-8 minutes more, stirring occasionally until the peppers are tender but still firm.
- Finish with freshness: Just before removing from the heater, add the lime juice and stir to deglaze and add a fresh acidic touch.
- Serve: Heat the tortillas directly in the pan for 10-15 seconds per side. Serve the filling hot with fresh coriander sprinkled on top and your favourite garnishes.
Vegetarian Variation of Portobello Mushroom and Smoked Tofu Fajitas
For those looking for a meatless option that doesn't sacrifice flavour or texture, this vegetarian variation is ideal. The smoked tofu adds a deep, slightly meaty richness, while the portobello mushrooms offer a robust umami flavour and a hearty texture that perfectly mimics the experience of traditional fajitas.
Ingredients (serves 4):
- 200 g portobello mushrooms, cleaned and cut into thick strips
- 150 g smoked tofu, cut into medium cubes
- 1 red and 1 green bell pepper, cut into strips
- 1 red onion, thinly sliced
- 2 cloves garlic, minced
- 2 tablespoons extra virgin olive oil
- Juice of 1 lime
- 1 teaspoon cumin
- 1 teaspoon smoked paprika
- Salt and pepper to taste
- Fresh coriander, tortillas and garnishes as in the original recipe
Detailed steps:
- Prepare the ingredients: Dry the tofu thoroughly with paper towels to prevent it from releasing too much moisture during sautéing. Cut all the ingredients as indicated.
- Sear the tofu: Preheat the pan and add a tablespoon of oil. Place the tofu in a single layer and let it sear without moving for 2-3 minutes per side until golden brown and slightly crispy. Remove from the pan and set aside.
- Sauté the vegetables: Add the other tablespoon of oil, add the garlic and onion, and sauté for 2 minutes. Then add the mushrooms and peppers, sautéing everything for 6-8 minutes until cooked but not soft.
- Add spices and tofu: Add the cumin, paprika, salt, pepper, and reserved tofu. Stir to combine flavours. Cook for 2 more minutes.
- Finishing touch: Squeeze the lime juice over the mixture and sprinkle with chopped fresh coriander.
- Serve: Heat the tortillas in a pan or on a griddle and serve with your favourite accompaniments.