The Cast Iron Frying Pan with Wooden Base and Removable Handle is an essential piece for every cooking enthusiast, from home chefs to expert grillers. With its sturdy construction, superior heat retention, and a design that combines functionality with elegance, this pan is a must-have tool both at the barbecue and in the warmth of your home.
Superior Heat Retention and Even Cooking
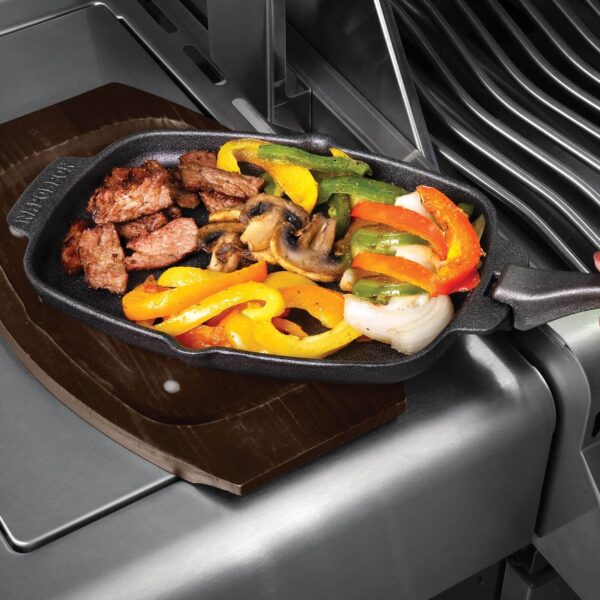
Cast iron is renowned for its incredible ability to retain heat and distribute it evenly. This pan maximises these qualities, offering consistent cooking, ideal for searing meats, cooking vegetables to perfection and keeping food warm for longer without the need for reheating.
Total Adaptability to Different Cooking Environments
Designed for use on the grill, in the oven, on the stove, on the side burner or directly over hot coals, this pan performs effectively in any situation. Its adaptability makes it the perfect ally for both the backyard barbecue chef and the urban cook seeking professional results in their everyday kitchen.
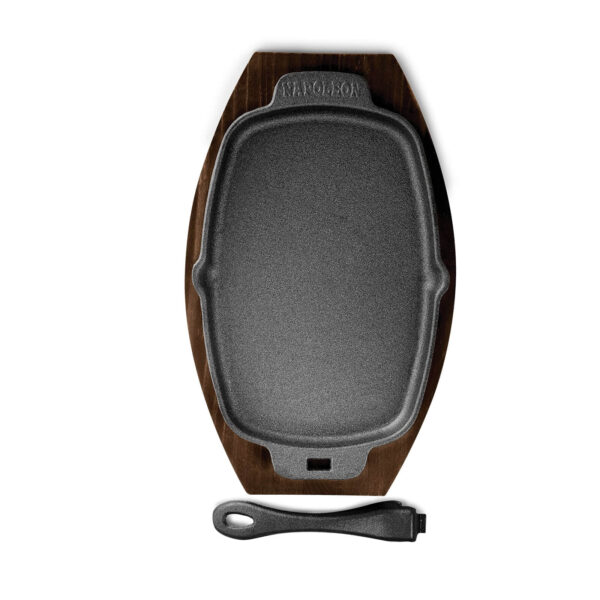
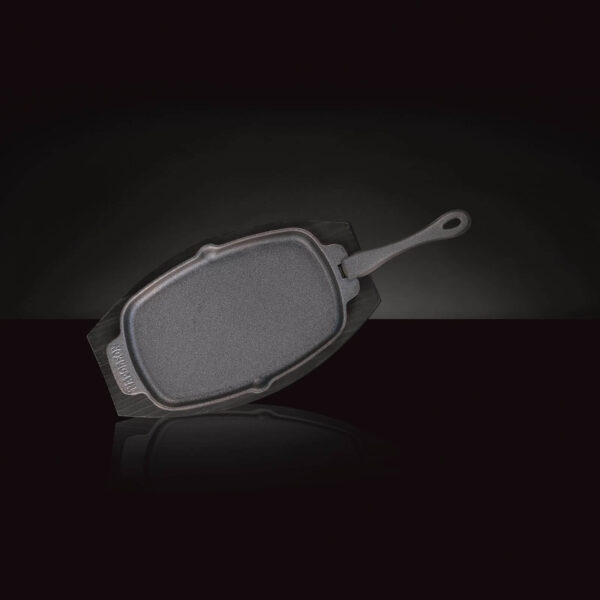
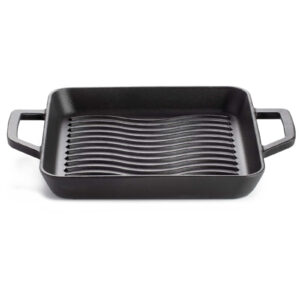
Wooden Base and Removable Handle: Aesthetics and Functionality
The inclusion of an elegant wooden base allows the pan to be taken directly from the heater to the table, enhancing the presentation of dishes and protecting surfaces. The removable handle, which remains cool to the touch, facilitates safe handling even during cooking, making every preparation more comfortable.
Naturally Enhances the Flavour of Your Dishes
Thanks to its cast iron construction and seasoning process, this pan develops a natural non-stick surface that improves with use. This not only prevents food from sticking, but also intensifies flavours, giving meats, vegetables and stews a deeper, more authentic taste.
Compact Size, Maximum Power
Measuring 25 cm long x 17 cm wide x 2 cm high, this pan is the ideal size for preparing generous portions without taking up too much space. It is perfect for quick meals, intimate dinners or to complement other preparations at large outdoor gatherings.
Applications Beyond Barbecuing
Although it shines on the grill, this pan is also ideal for preparing breakfasts, sautéing vegetables, searing cheese, or even making small savoury tarts in the oven. Its versatility makes it an integral kitchen tool, useful 365 days a year.
Care and Maintenance to Preserve Quality for Generations
One of the great advantages of cast iron is its
exceptional durability, but to get the most out of it, proper maintenance is essential from the first use. As a porous material, cast iron requires a
seasoning process that creates a natural protective barrier and contributes to its non-stick surface, which improves with constant use.
Proper care not only prevents rust and wear, but also improves
cooking quality and extends the life of the pan, making it a piece that can last for decades—it can even be passed down if cared for properly.
Steps for ideal maintenance:
- Before first use: initial cleaning and thorough drying. Wash the pan with hot water and a soft sponge only, without detergents. This removes any factory residue. Then dry it thoroughly with a clean, dry cloth. Avoid letting it air dry to prevent rusting.
- Applying the initial seasoning. With the pan clean and dry, apply a thin layer of vegetable fat or cooking oil (canola, sunflower or linseed oil) over the entire surface, including the outside. Ensure that there is no excess fat build-up.
- Oven curing to activate the non-stick coating. Place the pan upside down in an oven preheated to 180°C and bake for 1 hour. You can place aluminium foil on the bottom rack to catch any drips. Once the time is up, turn off the oven and let the pan cool inside.
- Cleaning after each use: avoid strong soap. After cooking, let the pan cool slightly before washing. Use hot water and a soft bristle brush or sponge. If there are stubborn residues, you can scrub with coarse salt and a little water as a natural abrasive. Dry immediately, leaving no moisture.
- Reapplying oil: the secret to a perfect surface. Apply a very light coat of oil after each wash. This keeps the protective layer active and prevents oxidation. Do not use butter or oils with a low smoke point, as they can let sticky residues.
- Proper storage: dry and ventilated Store the pan in a dry place, preferably out of reach of moisture. If you stack it with other items, place a paper towel between them to prevent scratches or contact with residual moisture from other utensils.
- Periodic re-seasoning: when needed. If you notice that the pan is starting to stick, has dull spots or small areas of rust, it is advisable to repeat the entire seasoning process. This will keep it performing as well as it did on the first day.
🍳 Recipe for Rustic Rosemary Potato Skillet with Chorizo
Serves 2 to 3 people | Total time: 30-35 minutes | Difficulty level: Easy
A classic combination of seared golden potatoes, savoury chorizo and the fragrant touch of rosemary. Cooked directly in a cast iron skillet, this recipe is perfect for breakfast, brunch or a casual dinner full of flavour.
📝 Detailed Ingredients:
- 3 medium potatoes (approximately 600 g), with skin, washed and cut into 1.5 cm cubes.
- 150-200 g Spanish or Creole chorizo, thinly sliced.
- 1 red onion, thinly sliced (approximately 120 g).
- 2 cloves of garlic, finely chopped.
- 1 teaspoon of fresh rosemary, chopped (can be substituted with ½ teaspoon of dried rosemary).
- 2-3 tablespoons of extra virgin olive oil.
- Sea salt and freshly ground black pepper, to taste.
- Optional: 1 or 2 large eggs.
- Serving suggestion: toasted rustic bread or warm corn tortillas.
👨🍳 Step-by-step preparation:
- Preheat the cast iron skillet for 2-3 minutes over medium-high heat (or place it on a hot grill).
- Add the olive oil and potatoes. Cook for 10-12 minutes, stirring every 3 minutes, until they are seared on the outside and soft on the inside.
- Add the chorizo slices and cook for 5-7 minutes, until they release their fat and are crispy.
- Add the onion, garlic, and rosemary. Sauté for 4-5 minutes more, until the onion is caramelised and fragrant.
- Optional: Make one or two wells between the potatoes and crack the eggs directly into the pan. Lid for 2-3 minutes until the whites are cooked and the yolks are slightly runny.
- Season with salt and pepper to taste and serve hot directly from the pan on a wooden board to keep it warm and make for an attractive presentation.
🌿 Vegetarian Version of Rustic Potato Skillet with Chickpeas and Smoked Paprika
Serves 2 | Total time: 30 minutes | Rich in vegetable protein
A tasty and balanced alternative with the smoky touch of paprika and the crunchy texture of golden chickpeas that have been seared. Just as complete as the version with chorizo, but 100% plant-based.
📝 Detailed Ingredients:
- 3 medium potatoes (approx. 600 g), with skin and cut into 1.5 cm cubes.
- 1 cup cooked chickpeas (approximately 170 g), well drained and dried.
- 1 white onion, thinly sliced.
- 2 cloves garlic, minced.
- 1 teaspoon smoked paprika.
- 1 teaspoon fresh or dried rosemary.
- 3 tablespoons extra virgin olive oil.
- Sea salt and freshly ground black pepper, to taste.
- Optional: 1 cup of fresh spinach or chopped kale.
- Suggested accompaniment: yoghurt sauce with lemon or vegan aioli.
👨🍳 Step-by-step preparation:
- Dry the chickpeas thoroughly with kitchen paper to achieve a crispy texture.
- Preheat the frying pan over medium-high heat. Add the oil and potatoes. Cook for 12-15 minutes, stirring until tender on the inside and seared on the outside.
- Add the chickpeas and sauté for 5 minutes, until crispy.
- Add the onion, garlic, smoked paprika, and rosemary. Cook for 5 more minutes, mixing well to blend the flavours.
- Add the spinach or kale at the end, just for 2 minutes, until wilted.
- Season with salt and pepper. Serve hot in the pan on a wooden board and accompany with fresh salsa.