Gas Barbecues Freestyle 2026 – Napoleon

Price range: 499,00 € through 999,00 € (VAT inc.)

✅ Choose your barbecue: 3 or 4 burners and a choice of side burner or infrared burner

JETFIRE™ ignition + ACCU-PROBE™ thermometer for consistent control

✅ Oven-style cooking with a closed lid and indirect cooking for long roasts

✅ PRO with SIZZLE ZONE™: powerful and fast searing (in DSIB)

WAVE™ grates: sealing marks and even distribution (porcelain, cast iron or stainless steel in Phantom)

✅ Folding shelves and a closed trolley to save space and tidy up the station

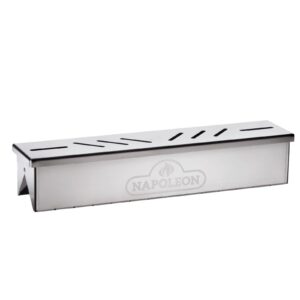
✅ Ecosystem of accessories for baking/smoking and expanded uses

Configure it to your liking

Clear selection

Complete your set

See more

Your selections

Total price

SKU: F365D-FP425D-ALL Categories: ,
Métodos de pago

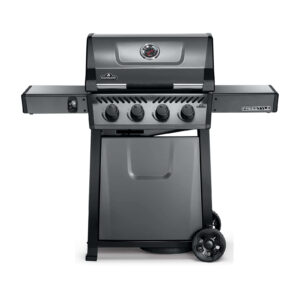
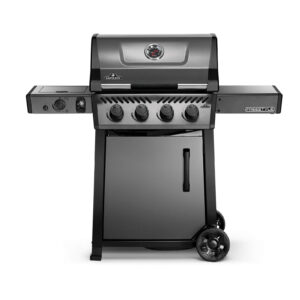
Freestyle 2026 gas barbecues, Napoleon’s range that makes it easy from minute one and lets you play chef whenever you feel like it, 365 or 425, side burner or SIZZLE ZONE™ and get cooking.

Freestyle 2026 gas barbecues, which size to choose, 365 or 425

If you’re looking for a gas barbecue that’s fast on weekdays and powerful when you’re making Sunday plans, these Freestyle 2026 gas barbecues make it easy. Choose your size depending on space and diners.

Then you decide on the life-changing extra: side burner for stovetop-style cooking or SIZZLE ZONE™ to top it off with steakhouse searing.

Freestyle 2026 gas barbecues, the Napoleon range that makes it easy from minute one and lets you play chef whenever you feel like it, 365 or 425, side burner or SIZZLE ZONE™ and get cooking.

It’s the typical range that starts as your quick Tuesday plan and ends up becoming your official outdoor kitchen: choose 365 or 425 depending on space and hunger, decide whether you prefer the side burner for cooker top cooking or the infrared SIZZLE ZONE™ for steakhouse style finishing, and if you’re into the fancy stuff, the Phantom finish brings the black suit to the party. The idea is simple, Freestyle doesn’t force you to cook one way, it lets you choose the style… and change it when you feel like it.

🔩 The feeling of “serious equipment” from the moment you lift the lid.

Some barbecues feel like a big toy and barbecues that feel like a tool. Freestyle falls into the second category, and that’s evident in one thing you can understand without reading the data sheets – you cook more quietly. Why? Because when a barbecue is stable and distributes heat well, you’re not chasing the fire with your food as if it were a video game. You’re cooking, full stop. You put the meat in, adjust, close the lid, and the machine does its job.

And this is especially important when you go from “fast direct” to “closed lid mode”. That’s where many barbecues lose the plot: they go up and down in temperature, they force you to open every two minutes, and they change the result without warning. Freestyle, on the other hand, is designed to make the experience more predictable. You’re in charge, the barbecue responds. And that feeling is engaging, because cooking this way not only tastes better, it’s also more fun.

🔥 Power with purpose, not bragging rights

Power isn’t here to put big numbers on a chip, it’s here so you can do three things that really matter – preheat fast, maintain stability and finish off with joy. In the real world, this means you arrive, turn on, preheat, and within minutes, you’re cooking in earnest. No “wait… wait… wait… now it’s done… oh, it’s cooled down”.

With the 365, the focus is on agility. It takes up less space, it’s quick to master, and it’s perfect if you cook often and don’t want to set up a logistical operation every time you feel like dining out. With the 425 you gain “margin”, more surface area to work with, more space for cooking by zones, and more facility to do several things at the same time without having to move food around as if it were chips. That leap in surface area is the typical “I didn’t know I needed it until I had it”.

And then there’s the PRO version with infrared, which plays another league at the end of the plate. Because cooking well is not just about the process, it’s about the last minute, that moment when the exterior browns, caramelises, and the dish goes from “yummy” to “oh my gosh”. That’s where well-placed power is worth its weight in gold.

🌡️ The trick that changes everything, closed lid and oven mode outside.

If your goal is “oven-style cooking”, Freestyle makes it easy for you because the lid here is not decoration, it is the heart of the system. With the lid closed, the barbecue becomes an outdoor oven. And that opens up a world that many people don’t take advantage of, roasts that are evenly cooked, large pieces that are done without burning on the outside, vegetable trays that are cooked to perfection, breads that are toasted without drama, gratins, whole fish, even recipes that you would bake at home… but with that outdoor touch that tastes great.

The key is to learn just one thing: indirect cooking. That is, the food doesn’t have a flame right underneath it. Leave one side on and the other side as a cooking zone, close the lid and you’re left with a stable heat chamber. The result? Fewer scares, less drying out, less “it’s overcooked on one side and raw on the other”. And because you’re not opening the lid every two minutes, everything stays more constant. This, for beginners, is the shortcut to better cooking. And for experts, it’s the perfect terrain to play with technique without fighting with the equipment.

🎛️ Easy control to start, fine control to obsess over.

Freestyle has a very commercial virtue, it doesn’t intimidate. You can be a beginner and feel you have it under control quickly, because everything is designed to make ignition and heat setting clear. But if you’re the kind of person who gets itchy about the exact point, it also gives you game, working by zones, cooking by temperatures, repeating results, and turning your barbecue from “something I turn on” to “something I cook with”.

This is where recipes with personality come in, roast chicken with crispy skin that comes out the same every time, ribs that are slow and juicy, vegetables on a tray that stay in the oven, and the classic that anyone who tries it will fall in love with, cooking the meat indirectly with a lid to nail the internal point and then finishing it off with a strong crust. That transition from “I cook” to “I cook well” is what makes people repeat and recommend.

🥩 Two side roads, full kitchen or steakhouse end.

On these Freestyle 2026 gas barbecues, the fun is in choosing your style, full kitchen with side burner or steakhouse end with SIZZLE ZONE™.


Hornillo lateral en Barbacoas de gas Freestyle 2026, cocina exterior completa
Side burner, full outdoor kitchen

If you choose a sideburner, you’re saying, “I want to cook outside like I’m inside,” because while the main grill grills, bakes or works in indirect, the sideburner lets you do the cooking part.

A proper sauce, a reduction, a hot side dish, a pan of mushrooms or a potato casserole, and suddenly your barbecue stops being “a grill” and becomes a full station, with no trips to the kitchen and no missed conversation.


SIZZLE ZONE, quemador infrarrojo para sellado en Barbacoas de gas Freestyle 2026
SIZZLE ZONE™, steakhouse finale

If you choose SIZZLE ZONE™, you’re saying something else, “I want the end that shows”, because infrared is the kicker, it’s not for slow cooking, it’s for searing and crusting with brutal heat.

And here’s the selling point, an infrared burner can reach up to 982°C, 1800°F, enough radiant heat to caramelise and brown almost instantly, which translates into powerful sear marks and more intense flavour.
Also, at that temperature, much of the fat and debris that falls nearby is vaporised on the spot, so the maintenance trick is as simple as leaving it on full power for a few minutes after an intense session.

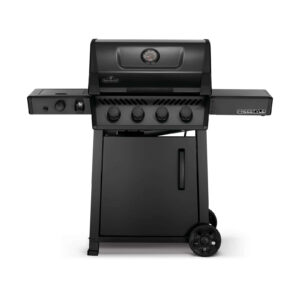
🖤 Phantom, when you want it to cook well and look great too.

Phantom is not just “black”, it’s attitude. It’s the version that turns your terrace into a kitchen area with presence. And yes, this matters, people buy with their eyes, and if the product looks premium, it is perceived as “serious equipment”. The barbecue goes from being “just another thing” to being the centrepiece of the exterior.

And there is another very human detail, when you have a barbecue that you love to sit there, you use it more. And if you use it more, you cook more. And if you cook more, you improve. It’s a vicious circle, but a good one.

🛡️ Quiet cooking, safety and maintenance without killing the mood.

Without cutting to the chase, but with truth, cooking well is also cooking quietly. The minimum that makes the difference is simple, you check connections from time to time, you preheat properly, you don’t let grease build up to create surprise flare-ups, and you keep the equipment clean just enough to keep it working. This is not posturing, it’s why a barbecue keeps working just as well over time. And when your equipment performs, you enjoy it more.

Besides, there’s a phrase that works very well in sales because it’s 100% true, fewer flare-ups, more flavour. Because when there are no grease fires or flare-ups, the food cooks more evenly, is better controlled, and the result is finer.

🧭 Freestyle comparison table, choose your configuration in 30 seconds

Model Main burners Power, main burners Side burner, type, power and maximum temperature Total power Cooking surfaces, length × width Grates Folding side shelves Item dimensions, lid closed, height × width × depth
Freestyle 365 D 3 12 kW 12 kW Main grill 51 × 45 cm
Warming rack 52.5 × 15.5 cm
Side
Main grates WAVE™ enamelled cast iron, warming rack enamelled ✅ 2, no side rack 116 × 124 × 64 cm
Freestyle 365 DSB 3 12 kW 🍳 Side burner, 3 kW 15 kW, 12 + 3 Main grill 51 × 45 cm
Warming rack 52.5 × 15.5 cm
Side burner 20 × 20 cm
Main grills WAVE™ enamelled cast iron, warming rack enamelled ✅ 1, side without burner 116 × 124 × 64 cm
Freestyle 425 D 4 13.6 kW 13.6 kW Main grill 60 × 45 cm
Warming rack 59 × 15.4 cm
Side
Main grills WAVE™ enamelled cast iron, warming rack enamelled ✅ 2, no side grill 116 × 132 × 63.5 cm
Freestyle PRO 365 DSIB 3 12 kW 🔥🥩 SIZZLE ZONE™ infrared up to 982 ºC 15 kW, 12 + 3 Main grill 51 × 45 cm
Warming rack 52.5 × 15.5 cm
SIZZLE ZONE™ 23 × 26 cm
Main grills WAVE™ enamelled cast iron, SIZZLE ZONE™ grate in Stainless steel, heating enamelled ✅ 1, the side without a burner 116 × 124 × 64 cm
Freestyle PRO 425 DSIB 4 13.6 kW 🔥🥩 SIZZLE ZONE™ infrared up to 982 °C 16.6 kW, 13.6 + 3 Main grill 60 × 45 cm
Warming rack 59 × 15.4 cm
Main grates enamelled cast iron WAVE™, SIZZLE ZONE™ rack in stainless steel, warming rack enamelled ✅ 1, foldable only on the side without SIZZLE ZONE™ 116 × 132 × 63.5 cm
Freestyle PRO 425 DSIB Phantom 4 13.6 kW 🔥🥩 SIZZLE ZONE™ up to 982 ºC 16.6 kW, 13.6 + 3 Main grill 60 × 45 cm
Warming rack 59 × 15.4 cm
Main grates stainless steel, warming rack stainless steel, SIZZLE ZONE™ grate stainless steel ✅ 1, foldable only on the side without SIZZLE ZONE™ 116 × 132 × 63.5 cm
To keep your Freestyle, PRO or Phantom performing like new and cook with complete peace of mind, these points cover the essentials of use and maintenance. The idea is simple: check connections, heat thoroughly, cook with the lid on when you want an “oven” effect, and clean just enough to prevent flare-ups and extend the life of your grills and burners. Open only what you need and follow the steps. 🧪 Check for leaks before cooking This is your ‘anti-scare insurance’. With gas barbecues, a micro-leak can ruin your day. This quick check confirms that everything is properly connected.
  1. Do not smoke and keep away from any source of ignition. This will prevent a possible leak from encountering a spark.
  2. Leave all controls in the OFF position and turn on the gas. We start from a controlled state.
  3. Apply a 50/50 mixture of water and soap to joints, regulator, hose and connections. Bubbles are the simplest and most effective ‘detector’.
  4. If bubbles appear, there is a leak. Tighten and repeat the test; if it persists, turn off the gas, disconnect and have it checked by a professional.
🔥 First use and preheating The first ignition ‘cures’ factory residues and leaves the barbecue ready for clean cooking. Preheating, on the other hand, stabilises the temperature and improves the seal.
  1. First use: perform an ‘initial burn’ with the main burners at maximum power for 30 minutes. It is normal for there to be an odour at first.
  2. To cook, preheat with the lid closed for about 10 minutes. This allows the grates to reach the right temperature and prevents food from sticking.
🍗 Oven mode with lid and indirect cooking This is the trick for juicy roasts and long cooking times. You cook with ‘hot air’ inside, not with a direct flame underneath, and everything is more uniform.
  1. Light one or more burners and leave an area without a direct flame. You create an “oven” zone and a ‘fire’ zone.
  2. Place the food in the area without flames, close the lid and monitor with a thermometer. The less you open the lid, the more stable the cooking will be.
  3. For large pieces, use indirect cooking as your basic method. You'll avoid burning the outside and achieve a perfect inside.
🍲 If your model has a side burner Think of it as an outdoor kitchen stove. It is ideal for sauces and side dishes while the main grill is working, without having to go back and forth to the house.
  1. Use it with pots or pans with a maximum recommended diameter of 25 cm. This concentrates the heat and allows the flame to work efficiently.
  2. Do not cook food directly over the burner flame. It is designed for containers, not for ‘grilling on top’.
  3. Do not close the side lid while it is hot and avoid frying with oil. Less smoke, less risk, more control.
🥩 If your model has an infrared SIZZLE ZONE® Infrared is the ‘turbo’ of searing. It provides very intense and rapid heat, perfect for crusting and caramelisation, but it must be treated with care.
  1. Avoid sudden changes in temperature. Do not pour water on it and do not let rain or sprinklers touch the hot ceramic.
  2. If it gets wet before use, allow it to dry. Moisture can generate steam and damage the ceramic.
  3. Use it as a finisher. First, cook indirectly for the inside, then give it a quick blast on SIZZLE for the crust.
🧼 Cleaning and care to extend its life Cleaning here is not just about aesthetics. It's about performance, flavour and safety. Less accumulated grease means fewer flare-ups and more even heat.
  1. Clean grease and sealing plates regularly. This is the most direct way to prevent grease fires.
  2. Do not use a pressure washer and avoid cold water on a hot grill.Thermal shock damages materials and finishes. If you have stainless steel surfaces and live in a “harsh” area such as the coast or in high humidity, clean every 3-4 weeks with warm water and soap.You gain non-stick properties, improve rust resistance and make cleaning much easier.
    1. Wash, dry thoroughly and apply a thin layer of oil with a high smoke point. A thin layer is best; too much will become sticky.
    2. Heat to between 176 and 204 °C for 30–60 minutes.The heat ‘sets’ the protective film. Repeat every 3–4 uses. This is preventive maintenance, like sharpening a knife before it cuts poorly. 🛡️ Mini safety reminder for everyday useThis block is the ‘mental check’ before turning on. These few seconds will prevent problems and allow you to cook with peace of mind.
      • Use only outdoors and with natural ventilation.
      • Always light with the lid open, and if it does not light quickly, turn it off and wait before trying again.
      • Keep the area around it clear of combustible objects and rags.
To keep your Freestyle, PRO or Phantom performing like new and cook with complete peace of mind, these points cover the essentials of use and maintenance. The idea is simple: check connections, heat thoroughly, cook with the lid on when you want an “oven” effect, and clean just enough to prevent flare-ups and extend the life of your grills and burners. Open only what you need and follow the steps. 🧪 Check for leaks before cooking This is your ‘anti-scare insurance’. With gas barbecues, a micro-leak can ruin your day. This quick check confirms that everything is properly connected.
  1. Do not smoke and keep away from any source of ignition. This will prevent a possible leak from encountering a spark.
  2. Leave all controls in the OFF position and turn on the gas. We start from a controlled state.
  3. Apply a 50/50 mixture of water and soap to joints, regulator, hose and connections. Bubbles are the simplest and most effective ‘detector’.
  4. If bubbles appear, there is a leak. Tighten and repeat the test; if it persists, turn off the gas, disconnect and have it checked by a professional.
🔥 First use and preheating The first ignition ‘cures’ factory residues and leaves the barbecue ready for clean cooking. Preheating, on the other hand, stabilises the temperature and improves the seal.
  1. First use: perform an ‘initial burn’ with the main burners at maximum power for 30 minutes. It is normal for there to be an odour at first.
  2. To cook, preheat with the lid closed for about 10 minutes. This allows the grates to reach the right temperature and prevents food from sticking.
🍗 Oven mode with lid and indirect cooking This is the trick for juicy roasts and long cooking times. You cook with ‘hot air’ inside, not with a direct flame underneath, and everything is more uniform.
  1. Light one or more burners and leave an area without a direct flame. You create an “oven” zone and a ‘fire’ zone.
  2. Place the food in the area without flames, close the lid and monitor with a thermometer. The less you open the lid, the more stable the cooking will be.
  3. For large pieces, use indirect cooking as your basic method. You'll avoid burning the outside and achieve a perfect inside.
🍲 If your model has a side burner Think of it as an outdoor kitchen stove. It is ideal for sauces and side dishes while the main grill is working, without having to go back and forth to the house.
  1. Use it with pots or pans with a maximum recommended diameter of 25 cm. This concentrates the heat and allows the flame to work efficiently.
  2. Do not cook food directly over the burner flame. It is designed for containers, not for ‘grilling on top’.
  3. Do not close the side lid while it is hot and avoid frying with oil. Less smoke, less risk, more control.
🥩 If your model has an infrared SIZZLE ZONE® Infrared is the ‘turbo’ of searing. It provides very intense and rapid heat, perfect for crusting and caramelisation, but it must be treated with care.
  1. Avoid sudden changes in temperature. Do not pour water on it and do not let rain or sprinklers touch the hot ceramic.
  2. If it gets wet before use, allow it to dry. Moisture can generate steam and damage the ceramic.
  3. Use it as a finisher. First, cook indirectly for the inside, then give it a quick blast on SIZZLE for the crust.
🧼 Cleaning and care to extend its life Cleaning here is not just about aesthetics. It's about performance, flavour and safety. Less accumulated grease means fewer flare-ups and more even heat.
  1. Clean grease and sealing plates regularly. This is the most direct way to prevent grease fires.
  2. Do not use a pressure washer and avoid cold water on a hot grill.Thermal shock damages materials and finishes. If you have stainless steel surfaces and live in a “harsh” area such as the coast or in high humidity, clean every 3-4 weeks with warm water and soap.You gain non-stick properties, improve rust resistance and make cleaning much easier.
    1. Wash, dry thoroughly and apply a thin layer of oil with a high smoke point. A thin layer is best; too much will become sticky.
    2. Heat to between 176 and 204 °C for 30–60 minutes.The heat ‘sets’ the protective film. Repeat every 3–4 uses. This is preventive maintenance, like sharpening a knife before it cuts poorly. 🛡️ Mini safety reminder for everyday useThis block is the ‘mental check’ before turning on. These few seconds will prevent problems and allow you to cook with peace of mind.
      • Use only outdoors and with natural ventilation.
      • Always light with the lid open, and if it does not light quickly, turn it off and wait before trying again.
      • Keep the area around it clear of combustible objects and rags.
To keep your Freestyle, PRO or Phantom performing like new and cook with complete peace of mind, these points cover the essentials of use and maintenance. The idea is simple: check connections, heat thoroughly, cook with the lid on when you want an “oven” effect, and clean just enough to prevent flare-ups and extend the life of your grills and burners. Open only what you need and follow the steps. 🧪 Check for leaks before cooking This is your ‘anti-scare insurance’. With gas barbecues, a micro-leak can ruin your day. This quick check confirms that everything is properly connected.
  1. Do not smoke and keep away from any source of ignition. This will prevent a possible leak from encountering a spark.
  2. Leave all controls in the OFF position and turn on the gas. We start from a controlled state.
  3. Apply a 50/50 mixture of water and soap to joints, regulator, hose and connections. Bubbles are the simplest and most effective ‘detector’.
  4. If bubbles appear, there is a leak. Tighten and repeat the test; if it persists, turn off the gas, disconnect and have it checked by a professional.
🔥 First use and preheating The first ignition ‘cures’ factory residues and leaves the barbecue ready for clean cooking. Preheating, on the other hand, stabilises the temperature and improves the seal.
  1. First use: perform an ‘initial burn’ with the main burners at maximum power for 30 minutes. It is normal for there to be an odour at first.
  2. To cook, preheat with the lid closed for about 10 minutes. This allows the grates to reach the right temperature and prevents food from sticking.
🍗 Oven mode with lid and indirect cooking This is the trick for juicy roasts and long cooking times. You cook with ‘hot air’ inside, not with a direct flame underneath, and everything is more uniform.
  1. Light one or more burners and leave an area without a direct flame. You create an “oven” zone and a ‘fire’ zone.
  2. Place the food in the area without flames, close the lid and monitor with a thermometer. The less you open the lid, the more stable the cooking will be.
  3. For large pieces, use indirect cooking as your basic method. You'll avoid burning the outside and achieve a perfect inside.
🍲 If your model has a side burner Think of it as an outdoor kitchen stove. It is ideal for sauces and side dishes while the main grill is working, without having to go back and forth to the house.
  1. Use it with pots or pans with a maximum recommended diameter of 25 cm. This concentrates the heat and allows the flame to work efficiently.
  2. Do not cook food directly over the burner flame. It is designed for containers, not for ‘grilling on top’.
  3. Do not close the side lid while it is hot and avoid frying with oil. Less smoke, less risk, more control.
🥩 If your model has an infrared SIZZLE ZONE® Infrared is the ‘turbo’ of searing. It provides very intense and rapid heat, perfect for crusting and caramelisation, but it must be treated with care.
  1. Avoid sudden changes in temperature. Do not pour water on it and do not let rain or sprinklers touch the hot ceramic.
  2. If it gets wet before use, allow it to dry. Moisture can generate steam and damage the ceramic.
  3. Use it as a finisher. First, cook indirectly for the inside, then give it a quick blast on SIZZLE for the crust.
🧼 Cleaning and care to extend its life Cleaning here is not just about aesthetics. It's about performance, flavour and safety. Less accumulated grease means fewer flare-ups and more even heat.
  1. Clean grease and sealing plates regularly. This is the most direct way to prevent grease fires.
  2. Do not use a pressure washer and avoid cold water on a hot grill.Thermal shock damages materials and finishes. If you have stainless steel surfaces and live in a “harsh” area such as the coast or in high humidity, clean every 3-4 weeks with warm water and soap.You gain non-stick properties, improve rust resistance and make cleaning much easier.
    1. Wash, dry thoroughly and apply a thin layer of oil with a high smoke point. A thin layer is best; too much will become sticky.
    2. Heat to between 176 and 204 °C for 30–60 minutes.The heat ‘sets’ the protective film. Repeat every 3–4 uses. This is preventive maintenance, like sharpening a knife before it cuts poorly. 🛡️ Mini safety reminder for everyday useThis block is the ‘mental check’ before turning on. These few seconds will prevent problems and allow you to cook with peace of mind.
      • Use only outdoors and with natural ventilation.
      • Always light with the lid open, and if it does not light quickly, turn it off and wait before trying again.
      • Keep the area around it clear of combustible objects and rags.
To keep your Freestyle, PRO or Phantom performing like new and cook with complete peace of mind, these points cover the essentials of use and maintenance. The idea is simple: check connections, heat thoroughly, cook with the lid on when you want an “oven” effect, and clean just enough to prevent flare-ups and extend the life of your grills and burners. Open only what you need and follow the steps. 🧪 Check for leaks before cooking This is your ‘anti-scare insurance’. With gas barbecues, a micro-leak can ruin your day. This quick check confirms that everything is properly connected.
  1. Do not smoke and keep away from any source of ignition. This will prevent a possible leak from encountering a spark.
  2. Leave all controls in the OFF position and turn on the gas. We start from a controlled state.
  3. Apply a 50/50 mixture of water and soap to joints, regulator, hose and connections. Bubbles are the simplest and most effective ‘detector’.
  4. If bubbles appear, there is a leak. Tighten and repeat the test; if it persists, turn off the gas, disconnect and have it checked by a professional.
🔥 First use and preheating The first ignition ‘cures’ factory residues and leaves the barbecue ready for clean cooking. Preheating, on the other hand, stabilises the temperature and improves the seal.
  1. First use: perform an ‘initial burn’ with the main burners at maximum power for 30 minutes. It is normal for there to be an odour at first.
  2. To cook, preheat with the lid closed for about 10 minutes. This allows the grates to reach the right temperature and prevents food from sticking.
🍗 Oven mode with lid and indirect cooking This is the trick for juicy roasts and long cooking times. You cook with ‘hot air’ inside, not with a direct flame underneath, and everything is more uniform.
  1. Light one or more burners and leave an area without a direct flame. You create an “oven” zone and a ‘fire’ zone.
  2. Place the food in the area without flames, close the lid and monitor with a thermometer. The less you open the lid, the more stable the cooking will be.
  3. For large pieces, use indirect cooking as your basic method. You'll avoid burning the outside and achieve a perfect inside.
🍲 If your model has a side burner Think of it as an outdoor kitchen stove. It is ideal for sauces and side dishes while the main grill is working, without having to go back and forth to the house.
  1. Use it with pots or pans with a maximum recommended diameter of 25 cm. This concentrates the heat and allows the flame to work efficiently.
  2. Do not cook food directly over the burner flame. It is designed for containers, not for ‘grilling on top’.
  3. Do not close the side lid while it is hot and avoid frying with oil. Less smoke, less risk, more control.
🥩 If your model has an infrared SIZZLE ZONE® Infrared is the ‘turbo’ of searing. It provides very intense and rapid heat, perfect for crusting and caramelisation, but it must be treated with care.
  1. Avoid sudden changes in temperature. Do not pour water on it and do not let rain or sprinklers touch the hot ceramic.
  2. If it gets wet before use, allow it to dry. Moisture can generate steam and damage the ceramic.
  3. Use it as a finisher. First, cook indirectly for the inside, then give it a quick blast on SIZZLE for the crust.
🧼 Cleaning and care to extend its life Cleaning here is not just about aesthetics. It's about performance, flavour and safety. Less accumulated grease means fewer flare-ups and more even heat.
  1. Clean grease and sealing plates regularly. This is the most direct way to prevent grease fires.
  2. Do not use a pressure washer and avoid cold water on a hot grill.Thermal shock damages materials and finishes. If you have stainless steel surfaces and live in a “harsh” area such as the coast or in high humidity, clean every 3-4 weeks with warm water and soap.You gain non-stick properties, improve rust resistance and make cleaning much easier.
    1. Wash, dry thoroughly and apply a thin layer of oil with a high smoke point. A thin layer is best; too much will become sticky.
    2. Heat to between 176 and 204 °C for 30–60 minutes.The heat ‘sets’ the protective film. Repeat every 3–4 uses. This is preventive maintenance, like sharpening a knife before it cuts poorly. 🛡️ Mini safety reminder for everyday useThis block is the ‘mental check’ before turning on. These few seconds will prevent problems and allow you to cook with peace of mind.
      • Use only outdoors and with natural ventilation.
      • Always light with the lid open, and if it does not light quickly, turn it off and wait before trying again.
      • Keep the area around it clear of combustible objects and rags.
To keep your Freestyle, PRO or Phantom performing like new and cook with complete peace of mind, these points cover the essentials of use and maintenance. The idea is simple: check connections, heat thoroughly, cook with the lid on when you want an “oven” effect, and clean just enough to prevent flare-ups and extend the life of your grills and burners. Open only what you need and follow the steps. 🧪 Check for leaks before cooking This is your ‘anti-scare insurance’. With gas barbecues, a micro-leak can ruin your day. This quick check confirms that everything is properly connected.
  1. Do not smoke and keep away from any source of ignition. This will prevent a possible leak from encountering a spark.
  2. Leave all controls in the OFF position and turn on the gas. We start from a controlled state.
  3. Apply a 50/50 mixture of water and soap to joints, regulator, hose and connections. Bubbles are the simplest and most effective ‘detector’.
  4. If bubbles appear, there is a leak. Tighten and repeat the test; if it persists, turn off the gas, disconnect and have it checked by a professional.
🔥 First use and preheating The first ignition ‘cures’ factory residues and leaves the barbecue ready for clean cooking. Preheating, on the other hand, stabilises the temperature and improves the seal.
  1. First use: perform an ‘initial burn’ with the main burners at maximum power for 30 minutes. It is normal for there to be an odour at first.
  2. To cook, preheat with the lid closed for about 10 minutes. This allows the grates to reach the right temperature and prevents food from sticking.
🍗 Oven mode with lid and indirect cooking This is the trick for juicy roasts and long cooking times. You cook with ‘hot air’ inside, not with a direct flame underneath, and everything is more uniform.
  1. Light one or more burners and leave an area without a direct flame. You create an “oven” zone and a ‘fire’ zone.
  2. Place the food in the area without flames, close the lid and monitor with a thermometer. The less you open the lid, the more stable the cooking will be.
  3. For large pieces, use indirect cooking as your basic method. You'll avoid burning the outside and achieve a perfect inside.
🍲 If your model has a side burner Think of it as an outdoor kitchen stove. It is ideal for sauces and side dishes while the main grill is working, without having to go back and forth to the house.
  1. Use it with pots or pans with a maximum recommended diameter of 25 cm. This concentrates the heat and allows the flame to work efficiently.
  2. Do not cook food directly over the burner flame. It is designed for containers, not for ‘grilling on top’.
  3. Do not close the side lid while it is hot and avoid frying with oil. Less smoke, less risk, more control.
🥩 If your model has an infrared SIZZLE ZONE® Infrared is the ‘turbo’ of searing. It provides very intense and rapid heat, perfect for crusting and caramelisation, but it must be treated with care.
  1. Avoid sudden changes in temperature. Do not pour water on it and do not let rain or sprinklers touch the hot ceramic.
  2. If it gets wet before use, allow it to dry. Moisture can generate steam and damage the ceramic.
  3. Use it as a finisher. First, cook indirectly for the inside, then give it a quick blast on SIZZLE for the crust.
🧼 Cleaning and care to extend its life Cleaning here is not just about aesthetics. It's about performance, flavour and safety. Less accumulated grease means fewer flare-ups and more even heat.
  1. Clean grease and sealing plates regularly. This is the most direct way to prevent grease fires.
  2. Do not use a pressure washer and avoid cold water on a hot grill.Thermal shock damages materials and finishes. If you have stainless steel surfaces and live in a “harsh” area such as the coast or in high humidity, clean every 3-4 weeks with warm water and soap.You gain non-stick properties, improve rust resistance and make cleaning much easier.
    1. Wash, dry thoroughly and apply a thin layer of oil with a high smoke point. A thin layer is best; too much will become sticky.
    2. Heat to between 176 and 204 °C for 30–60 minutes.The heat ‘sets’ the protective film. Repeat every 3–4 uses. This is preventive maintenance, like sharpening a knife before it cuts poorly. 🛡️ Mini safety reminder for everyday useThis block is the ‘mental check’ before turning on. These few seconds will prevent problems and allow you to cook with peace of mind.
      • Use only outdoors and with natural ventilation.
      • Always light with the lid open, and if it does not light quickly, turn it off and wait before trying again.
      • Keep the area around it clear of combustible objects and rags.
To keep your Freestyle, PRO or Phantom performing like new and cook with complete peace of mind, these points cover the essentials of use and maintenance. The idea is simple: check connections, heat thoroughly, cook with the lid on when you want an “oven” effect, and clean just enough to prevent flare-ups and extend the life of your grills and burners. Open only what you need and follow the steps. 🧪 Check for leaks before cooking This is your ‘anti-scare insurance’. With gas barbecues, a micro-leak can ruin your day. This quick check confirms that everything is properly connected.
  1. Do not smoke and keep away from any source of ignition. This will prevent a possible leak from encountering a spark.
  2. Leave all controls in the OFF position and turn on the gas. We start from a controlled state.
  3. Apply a 50/50 mixture of water and soap to joints, regulator, hose and connections. Bubbles are the simplest and most effective ‘detector’.
  4. If bubbles appear, there is a leak. Tighten and repeat the test; if it persists, turn off the gas, disconnect and have it checked by a professional.
🔥 First use and preheating The first ignition ‘cures’ factory residues and leaves the barbecue ready for clean cooking. Preheating, on the other hand, stabilises the temperature and improves the seal.
  1. First use: perform an ‘initial burn’ with the main burners at maximum power for 30 minutes. It is normal for there to be an odour at first.
  2. To cook, preheat with the lid closed for about 10 minutes. This allows the grates to reach the right temperature and prevents food from sticking.
🍗 Oven mode with lid and indirect cooking This is the trick for juicy roasts and long cooking times. You cook with ‘hot air’ inside, not with a direct flame underneath, and everything is more uniform.
  1. Light one or more burners and leave an area without a direct flame. You create an “oven” zone and a ‘fire’ zone.
  2. Place the food in the area without flames, close the lid and monitor with a thermometer. The less you open the lid, the more stable the cooking will be.
  3. For large pieces, use indirect cooking as your basic method. You'll avoid burning the outside and achieve a perfect inside.
🍲 If your model has a side burner Think of it as an outdoor kitchen stove. It is ideal for sauces and side dishes while the main grill is working, without having to go back and forth to the house.
  1. Use it with pots or pans with a maximum recommended diameter of 25 cm. This concentrates the heat and allows the flame to work efficiently.
  2. Do not cook food directly over the burner flame. It is designed for containers, not for ‘grilling on top’.
  3. Do not close the side lid while it is hot and avoid frying with oil. Less smoke, less risk, more control.
🥩 If your model has an infrared SIZZLE ZONE® Infrared is the ‘turbo’ of searing. It provides very intense and rapid heat, perfect for crusting and caramelisation, but it must be treated with care.
  1. Avoid sudden changes in temperature. Do not pour water on it and do not let rain or sprinklers touch the hot ceramic.
  2. If it gets wet before use, allow it to dry. Moisture can generate steam and damage the ceramic.
  3. Use it as a finisher. First, cook indirectly for the inside, then give it a quick blast on SIZZLE for the crust.
🧼 Cleaning and care to extend its life Cleaning here is not just about aesthetics. It's about performance, flavour and safety. Less accumulated grease means fewer flare-ups and more even heat.
  1. Clean grease and sealing plates regularly. This is the most direct way to prevent grease fires.
  2. Do not use a pressure washer and avoid cold water on a hot grill.Thermal shock damages materials and finishes. If you have stainless steel surfaces and live in a “harsh” area such as the coast or in high humidity, clean every 3-4 weeks with warm water and soap.You gain non-stick properties, improve rust resistance and make cleaning much easier.
    1. Wash, dry thoroughly and apply a thin layer of oil with a high smoke point. A thin layer is best; too much will become sticky.
    2. Heat to between 176 and 204 °C for 30–60 minutes.The heat ‘sets’ the protective film. Repeat every 3–4 uses. This is preventive maintenance, like sharpening a knife before it cuts poorly. 🛡️ Mini safety reminder for everyday useThis block is the ‘mental check’ before turning on. These few seconds will prevent problems and allow you to cook with peace of mind.
      • Use only outdoors and with natural ventilation.
      • Always light with the lid open, and if it does not light quickly, turn it off and wait before trying again.
      • Keep the area around it clear of combustible objects and rags.
To keep your Freestyle, PRO or Phantom performing like new and cook with complete peace of mind, these points cover the essentials of use and maintenance. The idea is simple: check connections, heat thoroughly, cook with the lid on when you want an “oven” effect, and clean just enough to prevent flare-ups and extend the life of your grills and burners. Open only what you need and follow the steps. 🧪 Check for leaks before cooking This is your ‘anti-scare insurance’. With gas barbecues, a micro-leak can ruin your day. This quick check confirms that everything is properly connected.
  1. Do not smoke and keep away from any source of ignition. This will prevent a possible leak from encountering a spark.
  2. Leave all controls in the OFF position and turn on the gas. We start from a controlled state.
  3. Apply a 50/50 mixture of water and soap to joints, regulator, hose and connections. Bubbles are the simplest and most effective ‘detector’.
  4. If bubbles appear, there is a leak. Tighten and repeat the test; if it persists, turn off the gas, disconnect and have it checked by a professional.
🔥 First use and preheating The first ignition ‘cures’ factory residues and leaves the barbecue ready for clean cooking. Preheating, on the other hand, stabilises the temperature and improves the seal.
  1. First use: perform an ‘initial burn’ with the main burners at maximum power for 30 minutes. It is normal for there to be an odour at first.
  2. To cook, preheat with the lid closed for about 10 minutes. This allows the grates to reach the right temperature and prevents food from sticking.
🍗 Oven mode with lid and indirect cooking This is the trick for juicy roasts and long cooking times. You cook with ‘hot air’ inside, not with a direct flame underneath, and everything is more uniform.
  1. Light one or more burners and leave an area without a direct flame. You create an “oven” zone and a ‘fire’ zone.
  2. Place the food in the area without flames, close the lid and monitor with a thermometer. The less you open the lid, the more stable the cooking will be.
  3. For large pieces, use indirect cooking as your basic method. You'll avoid burning the outside and achieve a perfect inside.
🍲 If your model has a side burner Think of it as an outdoor kitchen stove. It is ideal for sauces and side dishes while the main grill is working, without having to go back and forth to the house.
  1. Use it with pots or pans with a maximum recommended diameter of 25 cm. This concentrates the heat and allows the flame to work efficiently.
  2. Do not cook food directly over the burner flame. It is designed for containers, not for ‘grilling on top’.
  3. Do not close the side lid while it is hot and avoid frying with oil. Less smoke, less risk, more control.
🥩 If your model has an infrared SIZZLE ZONE® Infrared is the ‘turbo’ of searing. It provides very intense and rapid heat, perfect for crusting and caramelisation, but it must be treated with care.
  1. Avoid sudden changes in temperature. Do not pour water on it and do not let rain or sprinklers touch the hot ceramic.
  2. If it gets wet before use, allow it to dry. Moisture can generate steam and damage the ceramic.
  3. Use it as a finisher. First, cook indirectly for the inside, then give it a quick blast on SIZZLE for the crust.
🧼 Cleaning and care to extend its life Cleaning here is not just about aesthetics. It's about performance, flavour and safety. Less accumulated grease means fewer flare-ups and more even heat.
  1. Clean grease and sealing plates regularly. This is the most direct way to prevent grease fires.
  2. Do not use a pressure washer and avoid cold water on a hot grill.Thermal shock damages materials and finishes. If you have stainless steel surfaces and live in a “harsh” area such as the coast or in high humidity, clean every 3-4 weeks with warm water and soap.You gain non-stick properties, improve rust resistance and make cleaning much easier.
    1. Wash, dry thoroughly and apply a thin layer of oil with a high smoke point. A thin layer is best; too much will become sticky.
    2. Heat to between 176 and 204 °C for 30–60 minutes.The heat ‘sets’ the protective film. Repeat every 3–4 uses. This is preventive maintenance, like sharpening a knife before it cuts poorly. 🛡️ Mini safety reminder for everyday useThis block is the ‘mental check’ before turning on. These few seconds will prevent problems and allow you to cook with peace of mind.
      • Use only outdoors and with natural ventilation.
      • Always light with the lid open, and if it does not light quickly, turn it off and wait before trying again.
      • Keep the area around it clear of combustible objects and rags.
  • 3 Main Burners: 12.0 kW
  • Side Burner (Stovetop): 3.0 kW
  • Total Power: 15.0 kW
  • Materials and Finishes
    • Exterior Finish: Black
    • Grates (main): Porcelain-enamelled cast iron, WAVE™ design
    • Warming rack: Enamelled steel
    • Main burners: Stainless steel
    • Side burner: Sink with chrome-plated top grate (chrome-plated)
    • Flavorizer / burner shields: Stainless steel
    • Combustion chamber: Cast aluminium
    • Grease management: Enamelled components for easy cleaning
  • Cooking surfaces (width × depth)
    • Main grill: 52 × 46 cm
    • Warming rack: 52.5 × 15.5 cm
    • Side burner (hotplate): 20 × 20 cm
  • Item dimensions
    • Lid closed (H × W × D): 116 × 124 × 64 cm
    • Lid open (H × W × D): 155.5 × 124 × 64 cm
    • Width with folded trays: 100 cm
    • Working height: 90 cm
  • 4 Main Burners: 13.6 kW
  • Side Burner: No
  • Total Power: 13.6 kW
  • Materials and Finishes
    • Exterior Finish: Black
    • Grates (Main): Porcelain-enamelled cast iron, WAVE™ design
    • Warming Rack: Chrome-plated steel (verchromado)
    • Main burners: Stainless steel
    • Flavorizer / burner shields: Stainless steel
    • Combustion chamber: Cast aluminium
    • Grease management: Enamelled components for easy cleaning
  • Cooking surfaces (width × depth)
    • Main grill: 60 × 45 cm
    • Warming rack: 59 × 15.4 cm
  • Item dimensions
    • Lid closed (H × W × D): 116 × 132 × 64 cm
    • Lid open (H × W × D): 155.5 × 132 × 64 cm
    • Width with trays folded: 108 cm
    • Working height: 90.5 cm
  • 3 Main Burners: 12.0 kW
  • Side Burner (SIZZLE ZONE®): 3.0 kW
  • Total Power: 15.0 kW
  • Materials and Finishes
    • Exterior Finish: Black
    • Grates (main): Porcelain-enamelled cast iron, WAVE™ design
    • Warming rack: Enamelled steel
    • SIZZLE ZONE® grate: Stainless Steel
    • Main burners: Stainless steel
    • Infrared burner: Ceramic (high-intensity direct radiation)
    • Flavorizer / burner shields: Stainless steel (PRO upgrade)
    • Combustion chamber: Cast aluminium
    • Grease management: Enamelled components for easy cleaning
  • Cooking surfaces (width × depth)
    • Main grill: 52 × 46 cm
    • Warming rack: 52.5 × 15.5 cm
    • Sizzle Zone (infrared): 23 × 26 cm
  • Item dimensions
    • Lid closed (H × W × D): 116 × 124 × 64 cm
    • Lid open (H × W × D): 155.5 × 124 × 64 cm
    • Width with tray folded (right): 100 cm
    • Working height: 90 cm
  • 4 Main Burners: 13.6 kW
  • Side Burner (SIZZLE ZONE®): 3.0 kW
  • Total Power: 16.6 kW
  • Materials and Finishes
    • Exterior Finish: Black
    • Grates (main): Porcelain-enamelled cast iron, WAVE™ design
    • Warming rack: Enamelled steel
    • SIZZLE ZONE® grate: Stainless Steel
    • Main burners: Stainless steel
    • Infrared burner: Ceramic (direct radiation)
    • Flavorizer / burner shields: Stainless steel (PRO upgrade)
    • Combustion chamber: Cast aluminium
    • Grease management: Enamelled components for easy cleaning
  • Cooking surfaces (width × depth)
    • Main grill: 60 × 45 cm
    • Warming rack: 59 × 15.4 cm
    • Sizzle Zone (infrared): 23 × 26 cm
  • Item dimensions
    • Lid closed (H × W × D): 116 × 132 × 64 cm
    • Lid open (H × W × D): 155.5 × 132 × 64 cm
    • Width with folded tray (right): 108 cm
    • Working height: 90.5 cm
  • 3 Main Burners: 12.0 kW
  • Side Burner: No
  • Total Power: 12.0 kW
  • Materials and Finishes
    • Exterior Finish: Black
    • Grates (main): Porcelain-enamelled cast iron, WAVE™ design
    • Warming rack: enamelled steel
    • Main burners: stainless steel
    • Flavorizer / burner shields: stainless steel
    • Combustion chamber: cast aluminium (high heat retention and distribution)
    • Grease management: Enamelled components for easy cleaning
  • Cooking surfaces (width × depth)
    • Main grill: 51 × 45 cm
    • Warming rack: 52.5 × 15.5 cm
  • Item dimensions
    • Lid closed (H × W × D): 116 × 124 × 64 cm
    • Lid open (H × W × D): 155.5 × 124 × 64 cm
    • Width with trays folded: 100 cm
    • Working height: 90 cm
  • 4 Main Burners: 13.6 kW
  • Side Burner (SIZZLE ZONE®): 3.0 kW
  • Total Power: 16.6 kW
  • Materials and Finishes
    • Exterior Finish: Phantom (uniform matte black on visible parts)
    • Grates (main): Solid stainless steel, WAVE™ design
    • SIZZLE ZONE® grate: Stainless steel
    • Warming grate: Stainless steel (multifunction: support/indirect)
    • Main burners: Stainless steel
    • Infrared burner: Ceramic (direct radiation for ultra-fast searing)
    • Flavorizer / burner shields: Stainless steel
    • Combustion chamber: Cast aluminium
    • Grease management: Enamelled components for easy cleaning
    • Phantom details: Premium knobs with improved grip and ‘stealth’ aesthetics
  • Cooking surfaces (width × depth)
    • Main grill: 60 × 45 cm
    • Warming rack: 59 × 15.4 cm
    • Sizzle Zone (infrared): 23 × 26 cm
  • Item dimensions
    • Lid closed (H × W × D): 116 × 132 × 64 cm
    • Lid open (H × W × D): 155.5 × 132 × 64 cm
    • Width with folded tray (right): 108 cm
    • Working height: 90.5 cm

🍖 Oven-baked ribs with glaze in a casserole dish (Freestyle 365 DSB with hob)

Tender ribs cooked slowly with a lid and a glaze made on the hob, without leaving the terrace.

🌡️ Target temperatures

  • Barbecue (lid, low & slow indirect): 135–150 °C

  • Final caramelisation: 170–190 °C (or a quick burst at a higher temperature if you keep an eye on it)

🎯 Internal temperature with probe

  • The ribs are going for feel, but as a guide

    • Very tender: 90–96 °C in the thickest part (without touching the bone)

    🧾 Ingredients (4–6 servings)

    • 1–2 racks of pork ribs

    • Salt, pepper, paprika

    • Garlic powder and brown sugar (optional)

    Glaze (stovetop)

    • 200 ml barbecue sauce

    • 1–2 tablespoons honey or brown sugar

    • 1 tablespoon mustard (optional)

    • Juice of 1/2 lemon or orange

    • Dash of vinegar (optional)

    👨‍🍳 Step by step on the barbecue

    1. Gentle indirect heat: turn on 1 burner on low (or 2 on very low) and stabilise at 135–150 °C with the lid on.

    2. Season the ribs on both sides.

    3. Cook slowly over indirect heat with the lid on for 2–3 hours.

    4. Extra juicy option: if they start to dry out, wrap them in foil for part of the cooking time (optional).

    5. Glaze on the hob: heat and reduce for 8–12 minutes until thickened (glazed texture).

    6. Glaze and caramelise: open, brush and leave for 10–20 minutes with the lid on at 170–190 °C.

    7. Point: if using a probe, aim for 90–96 °C or test with tongs: it should bend easily.

    8. Rest for 5–10 minutes and cut.

🥦🌭 Family tray of roasted vegetables + roast sausages (Freestyle 425 D)

Brief description: Oven-style tray and juicy sausages without bursting, using the advantage of the 425 to work in zones.

🌡️ Target temperatures

  • Barbecue (lid, indirect for tray): 180–200 °C

  • Browning sausages (direct): 220–250 °C

🎯 Internal temperature with probe

  • Sausages (pork/mixture): 71–74 °C in the centre

🧾 Ingredients (4–6 servings)

  • 8–12 sausages

  • 2 courgettes, 2 peppers, 1 onion

  • 250 g mushrooms

  • Olive oil, salt, pepper

  • Oregano/rosemary (optional)

👨‍🍳 Step by step on the barbecue

  1. Create two zones: 2 burners for indirect cooking and 1–2 for direct cooking (depending on the heat you need).

  2. Preheat with the lid on to 180–200 °C.

  3. Vegetables on a tray: season and cook indirectly with the lid on for 20–30 minutes, stirring once.

  4. Sausages first indirect heat 10–15 minutes (cook inside without bursting).

  5. Move them to direct heat and brown for 2–5 minutes, turning.

  6. Probe: remove sausages when they reach 71–74 °C.

  7. Serve and rest briefly for 3–5 minutes.

🥩⚡ Reverse-seared entrecôte with a beastly crust

Perfect interior without stress and a ‘steakhouse’ finish with infrared. It's the most rewarding pro trick.

🌡️ Target temperatures

  • Barbecue (lid on, gentle indirect heat): 110–135 °C

  • SIZZLE ZONE® (searing): maximum power, very high target (ideal > 300 °C on the surface)

🎯 Internal temperature with probe

Remove from indirect heat 3–5 °C before the end point (rises slightly with sealing and resting).

  • Rare: 50–52 °C

  • Less than medium: 54–57 °C

  • Medium: 58–60 °C

  • Done: 63+ °C

🧾 Ingredients (2 servings)

  • 1–2 thick entrecôte steaks (3–5 cm)

  • Salt (best at the beginning)

  • Pepper (best at the end)

  • Oil optional

  • Butter, garlic, thyme (optional)

👨‍🍳 Step by step on the barbecue

  1. Gentle indirect heat: on the main grill, light 1 burner on low and stabilise at 110–135 °C.

  2. Dry and season the entrecôte (paper towel + salt).

  3. Cook indirectly with the lid on until it is almost done (use a probe).

  4. Short rest 5–8 min.

  5. SIZZLE ZONE® to maximum and wait until it is very hot.

  6. Quick searing 45–90 seconds per side (crust only).

  7. Rest 3–5 min and pepper at the end.

🥩🔥 Tomahawk or large oven-style steak + SIZZLE finish

The 425 gives you ‘room to manoeuvre’ for a huge cut, and the SIZZLE finishes the crust without overcooking it.

🌡️ Target temperatures

  • Barbecue (lid, indirect): 120–140 °C (slow and controlled rise)

  • SIZZLE ZONE® (searing): maximum power, very high surface area

🎯 Internal temperature with probe

Same as for the entrecôte, aim and adjust to taste:

  • Rare: 50–52 °C

  • Medium rare: 54–57 °C

  • Perfect: 58–60 °C

  • Done: 63+ °C

🧾 Ingredients (2–3 servings)

  • 1 tomahawk steak (4–6 cm)

  • Salt

  • Pepper (at the end)

  • Garlic/paprika (optional)

  • Butter/oil and herbs (optional)

👨‍🍳 Step by step on the barbecue

  1. Indirect heat: turn on 2 burners on low and stabilise at 120–140 °C with the lid on.

  2. Sear the meat and place it in an area without a flame.

  3. Cook slowly with the lid on until you are 3–5 °C below the final point.

  4. Rest for 8–10 minutes.

  5. SIZZLE at full power and wait for the temperature to rise.

  6. Sear for 60–120 seconds per side, and stand the fat side up for a few seconds if you want extra browning.

  7. Rest for 5 minutes, season with pepper at the end and cut against the grain.

🐔 Crispy roast chicken with oven-style vegetables

A versatile recipe to get the most out of your lid. Indirect heat, golden skin and vegetables as if cooked in an outdoor oven.

🌡️ Target temperatures

  • Barbecue (lid, indirect): 180–200 °C

  • Final browning (short direct): 220–240 °C

🎯 Internal temperature with probe

  • Chicken ready: 74 °C in the thickest part (breast or thigh, without touching bone)

🧾 Ingredients (4 servings)

  • 1 whole chicken 1.5–2 kg (or 4 quarters)

  • 3 potatoes, 1 onion, 1 pepper

  • 2–3 garlic cloves

  • Olive oil, salt, pepper

  • Paprika (optional), rosemary/thyme (optional)

  • 1 lemon (optional)

👨‍🍳 Step by step on the barbecue

  1. Set up indirect heat: on a 3-burner barbecue, turn on only 1 burner to medium (or 2 to low if it is cold/windy) and leave the rest off.

  2. Preheat with the lid on until it reaches 180–200 °C.

  3. Vegetable tray: chop, season and place on a metal tray/suitable dish.

  4. Season the chicken: oil + salt + pepper (paprika optional). Add lemon and herbs if desired. >Cook indirectly: place chicken and tray in area without flame, lid closed.

  5. Check with a probe: when it reads 72–73 °C, get ready for the final stage.

  6. Final browning: increase to 220–240 °C for a few minutes or give it a quick blast on the hob for crispy skin.

  7. Rest for 10 minutes before cutting.

🦆✨ Crispy duck breast with roasted vegetables (Phantom Freestyle PRO 425 DSIB)

Brief description: Elegant and surprisingly easy. You control the rendering of the fat and end up with crispy skin without drying out the inside.

🌡️ Target temperatures

  • Barbecue (lid closed, indirect): 170–190 °C for vegetables + even finish

  • Crispy finishing touch: 220–240 °C short and monitored (or a quick blast in the intense zone)

🎯 Internal temperature with probe

  • Juicy pink: 55–57 °C

  • More done: 60–62 °C

🧾 Ingredients (2 servings)

  • 1–2 duck breasts

  • Salt

  • Pepper (at the end)

  • Honey (optional) + a few drops of lemon juice/vinegar (optional)

Vegetables

  • 1 sweet potato/potato

  • 1 courgette or aubergine

  • 1 pepper

  • Oil, salt, pepper

👨‍🍳 Step by step on the barbecue

  1. Vegetables on a tray: chop and season.

  2. Indirect with lid: turn on 2 low-medium burners and stabilise at 170–190 °C.

  3. Score the fat: make diamond-shaped cuts in the skin (without cutting into the meat) and season.

  4. Render the fat: start with moderate heat, skin side down, until the fat is released and nicely browned.

  5. Finish indirectly with the lid on: move the magret to indirect heat to reach 55–57 °C (or more if you prefer).

  6. Roasted vegetables: tray 20–30 minutes with lid; stir once.

  7. Final touch: if you want extra crispy skin, increase to 220–240 °C for 1–2 minutes, keeping an eye on it.

  8. Rest for 5–8 minutes, cut and pepper at the end. Optional: honey + lemon/vinegar for a light shine.

🥦🌭 Bandeja familiar de verduras asadas + salchichas “roast” (Freestyle 425 D)

Descripción breve: Bandeja al estilo horno y salchichas jugosas sin reventar, usando la ventaja del 425 para trabajar por zonas.

🌡️ Temperaturas objetivo

  • Barbacoa (tapa, indirecto para bandeja): 180–200 °C

  • Dorado de salchichas (directo): 220–250 °C

🎯 Temperatura interna con sonda

  • Salchichas (cerdo/mezcla): 71–74 °C en el centro

🧾 Ingredientes (4–6 raciones)

  • 8–12 salchichas

  • 2 calabacines, 2 pimientos, 1 cebolla

  • 250 g champiñones

  • Aceite de oliva, sal, pimienta

  • Orégano/romero (opcional)

👨‍🍳 Paso a paso en la barbacoa

  1. Crea dos zonas: 2 quemadores para indirecto y 1–2 para directo (según el calor que necesites).

  2. Precalienta con tapa a 180–200 °C.

  3. Verduras a bandeja: aliña y mete en indirecto con tapa 20–30 min, removiendo una vez.

  4. Salchichas primero indirecto 10–15 min (cocinan por dentro sin explotar).

  5. Pásalas a directo y dora 2–5 min girando.

  6. Sonda: saca salchichas cuando lleguen a 71–74 °C.

  7. Servir y reposo corto 3–5 min.