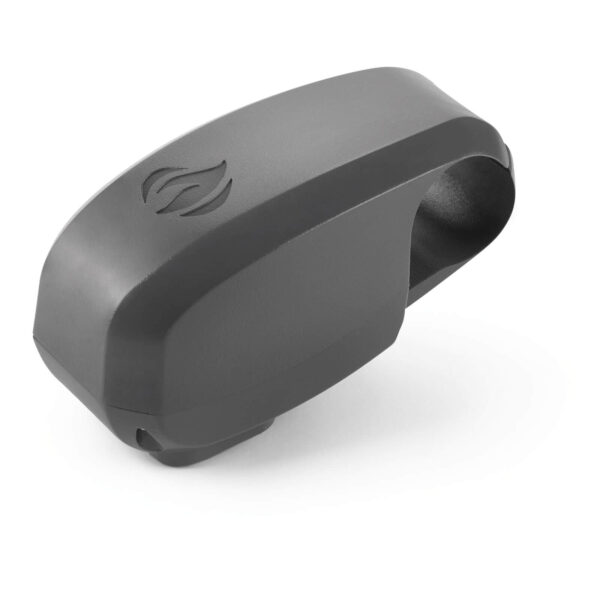
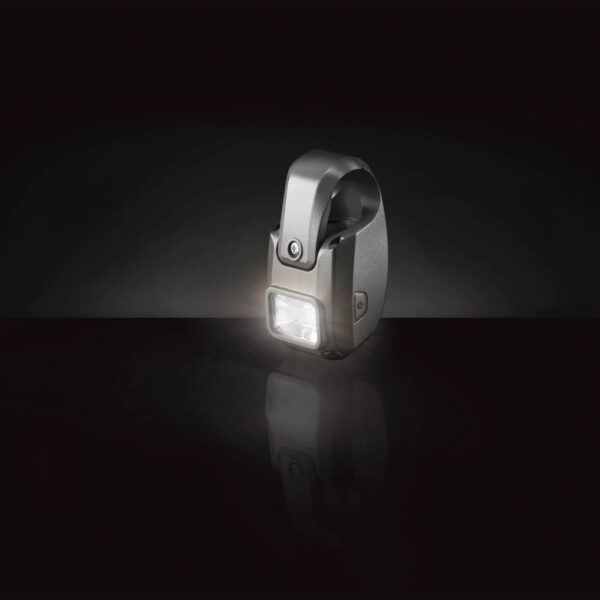
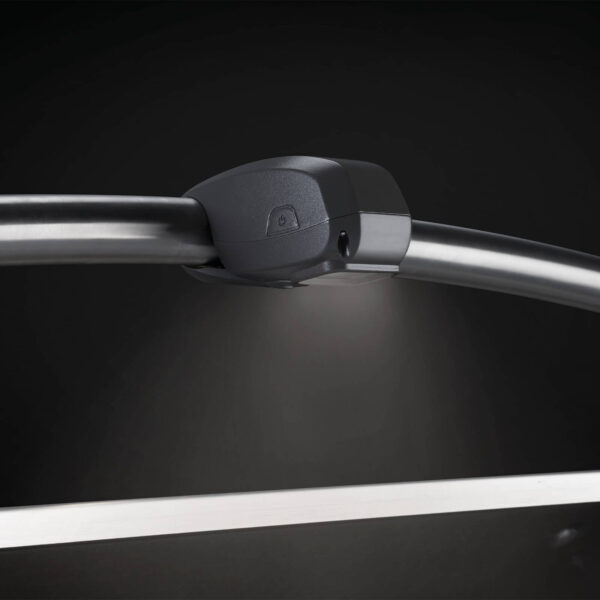
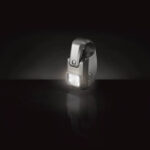
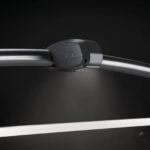
The Barbecue Handlebar Light is the perfect accessory for those who enjoy grilling under the stars. Designed specifically to illuminate the grill surface, this compact and functional LED torch offers a practical solution for cooking in low light conditions. With 4 adjustable LED lights, easy mounting and up to 50 hours of burn time, this tool is ideal for enhancing your grilling experience.
To See Everything Clearly
The 4 LED lights integrated in this lamp are the heart of its functionality. Thanks to their high-intensity technology, they evenly illuminate the entire grill surface, eliminating any shadows that might interfere with your cooking experience. This means you can accurately check the exact doneness of your food, from juicy cuts of meat to delicate vegetables, even in total darkness.
Two Brightness Levels: Do you want dimmer lighting so you don’t get dazzled, or do you need full power for grilling in total darkness? This device gives you the option to switch between a brightness level of 60% or a maximum brightness of 100%, simply by pressing the power button.
50 Hour Burn Time: This run time is ideal for several grilling sessions, even over a whole weekend outdoors. You won’t have to worry about constantly changing batteries, ensuring convenience and peace of mind with every use. In addition, the LED light is energy efficient, maximising the performance of the 3 AA batteries required (not included).
Ideal Surface Size: Designed to illuminate grills between 45cm and 90cm, this light is perfect for most barbecue models available on the market, both for home use and larger equipment. Regardless of the size of your grill, you will have adequate lighting coverage for the entire cooking process.
A Light that Fits All
Mounting in Minutes: Installing this light on your grill is a quick and easy process that requires no special tools or technical knowledge. Just attach the clamp to the handle of the grill lid, fix it with the integrated screw, and that’s it! This makes it a practical solution even for those who are not used to mounting accessories on their barbecue.
Compatibility with most grills: Its design is universal, as it can fit handles up to 3.2 cm in diameter. This includes everything from compact models to larger barbecues, such as the renowned Napoleon barbecues. In addition, its fixing system ensures that the lamp is perfectly secured, with no risk of it moving or coming loose during use.
Portability: If you have more than one grill or plan to grill in different locations, you can easily disassemble and assemble this light, taking it with you wherever you need it. It is a versatile tool that adapts to multiple configurations and workspaces.
Compact and rugged design:
Lightweight and Compact Construction: With dimensions of 11.5 x 6 x 6 x 6 cm, this light doesn’t take up unnecessary space or add extra weight to your grill. Its unobtrusive design ensures that it does not interfere with the handling of the grill handle or lid, allowing you to cook in comfort.
Weather Resistant: Designed for outdoor use, this light can withstand harsh weather conditions such as humidity, dew or varying temperatures. This means you won’t have to worry if you decide to grill in light rain or if your grill is exposed to the elements.
Guaranteed Durability: Made from high quality materials, this light is built to last. Its resistance to wear and tear ensures that it can accompany you through many seasons of outdoor grilling.
Technology at the Service of Comfort
Easy to Use Switch: Turning on and adjusting the light is a matter of a single button. Press it once to activate the low brightness level, twice to reach maximum brightness and a third time to turn it off. This intuitive design makes it easy to use even if your hands are busy or you’re cooking with gloves on.
Auto Power Off: If you forget to turn off the light after use, don’t worry. Thanks to its automatic shut-off function after 5 minutes of inactivity, the lamp conserves energy, avoiding unnecessary battery consumption and extending battery life.
Convenient AA batteries: Uses 3 AA batteries, easy to find and replace. This ensures that you never run out of light, as you can find these batteries in almost any shop or supermarket.
Perfect for the Night Barbecue Lover.
For those who enjoy grilling meat and vegetables under the stars or during evening events, this handlebar light is a must-have accessory. As well as being functional, it adds a touch of style and professionalism to your grill, giving you the confidence to cook like an expert at any time of the day.
Perfect for Gatherings: If you’re hosting an evening barbecue, this light will not only illuminate the grill, but will also help create a cosy and comfortable atmosphere for your guests. No more awkward torches or phones that barely illuminate, this lamp ensures that everything is clearly visible while you enjoy the company of your loved ones.
Ideal for All Seasons: Whether it’s warm summer nights or cooler winter evenings, this lamp means that light conditions are never an impediment to enjoying your favourite barbecues.
How to Extend the Life of Your Handlebar Light
To ensure optimal performance and extend the life of your LED barbecue handlebar light, it is important to perform proper maintenance and follow a few simple instructions for use. Below, we detail the steps you should follow to care for and get the most out of this accessory:
1. Regular Cleaning of the Light
Grease and residue can build up on the lamp during barbecuing. Cleaning it properly ensures that the LED lights maintain their brightness and that the device works smoothly.
- Step 1: Switch off the lamp and remove the batteries for safety.
- Step 2: Use a soft, slightly damp cloth to clean the casing and LED lights. Ensure that the cloth is not soaked to prevent water from entering the mechanism.
- Step 3: Dry the lamp completely with a dry cloth before reinstalling the batteries or using it again.
Note: Never immerse the torch in water or use abrasive cleaners that could damage the materials.
2. Battery Replacement and Management
To ensure good performance, it is important to check and replace the batteries as needed.
- Step 1: Use a coin to open the battery compartment lid. Turn it counterclockwise until it opens.
- Step 2: Remove the old batteries and dispose of them properly, following local battery recycling regulations.
- Step 3: Insert 3 new AA batteries, making sure to align the positive and negative terminals correctly according to the diagram on the lid.
- Step 4: Close the lid by aligning the marks and turn it clockwise until it is snug and secure.
Tip: If you do not plan to use the lamp for an extended period of time, remove the batteries to prevent leakage that could damage the compartment.
3. Checking the Assembly
Before each use, it is important to check that the light is correctly installed on the grill handle to ensure its stability.
- Step 1: Ensure that the clamp is securely attached to the handle and that the screw is tightly fastened.
- Step 2: Gently move the lamp to check that it does not wobble or feel loose.
- Step 3: If you notice that the device is slightly loose, tighten the screw until it is secure.
Note: Do not over-tighten the screw to avoid damaging the mounting system.
4. Inspecting the LED Lights
LED lights are designed to last a long time, but it is important to ensure that they are working properly.
- Step 1: Before each use, turn on the lamp to check that both brightness levels (60% and 100%) are working properly.
- Step 2: If you notice that any LED lights are not turning on, check the batteries and make sure they are inserted correctly. If the problem persists, the device may need to be replaced.
5. Proper Storage
Storing the lamp properly when not in use helps protect it and extend its life.
- Step 1: Ensure that the lamp is completely dry before storing it.
- Step 2: Remove the batteries if you will not be using it for a long period of time to prevent leakage.
- Step 3: Store the lamp in a dry place protected from moisture, preferably in a box or bag that prevents dust from accumulating.
6. Recommendations for Safe and Efficient Use
To ensure your safety and the proper functioning of the light, keep the following recommendations in mind:
- Do not expose the lamp directly to fire or extreme temperatures, as this could damage it.
- Ensure that there is no grease accumulated on the grill handle before installing the light, as this could make it difficult to secure.
- Avoid handling the lamp with wet hands to prevent possible electrical damage.
Grilled Chicken, Vegetable and Pineapple Skewers
This recipe is perfect for enjoying a delicious evening barbecue while making the most of the light from your barbecue lamp. The combination of juicy chicken, fresh vegetables and the sweet touch of pineapple will delight your guests. The lamp will ensure that you don't miss a thing while cooking, even in complete darkness!
Ingredients (serves 4)
For the skewers:
- 500 g chicken breast, cut into medium-sized cubes.
- 1 red pepper, cut into large chunks.
- 1 green pepper, cut into large chunks.
- 1 red onion, cut into squares.
- 1 courgette, thickly sliced.
- 200 g fresh pineapple, cut into chunks.
- Wooden or metal skewer.
For the chicken marinade:
- 3 tablespoons olive oil.
- 2 cloves garlic, finely chopped.
- 2 tablespoons soy sauce.
- 1 tablespoon honey.
- Juice of 1 lemon.
- 1 teaspoon sweet or smoked paprika.
- 1/2 teaspoon ground cumin.
- Salt and pepper to taste.
To serve:
- Yoghurt sauce or tzatziki (optional).
- Pita bread or tortillas (optional).
Steps to Prepare Chicken and Vegetable Skewers
1. Prepare the Ingredients
- Cut the chicken into medium-sized cubes (approximately 2-3 cm) so that they cook evenly.
- Wash and cut the peppers, onion, courgette and pineapple into chunks the same size as the chicken. This ensures that everything cooks evenly.
2. Prepare the Marinade
- In a large bowl, mix the olive oil, minced garlic, soy sauce, honey, lemon juice, paprika, cumin, salt, and pepper.
- Add the chicken chunks to the bowl and mix well so that they are completely covered with the marinade.
- Cover the bowl with cling film and let it marinate in the refrigerator for at least 30 minutes (or up to 2 hours for a more intense flavour).
3. Assemble the skewer
- If using wooden skewers, soak them in water for 10-15 minutes before use to prevent them from burning on the grill.
- Thread the ingredients onto the skewers, alternating between chunks of chicken, peppers, onion, courgette and pineapple. This will not only make them look appetising, but will also help to ensure that each skewer has a balanced mix of flavours.
4. Preheat the Grill
- Light your barbecue and adjust the heat to medium-high. Use the 100% brightness setting to illuminate the entire cooking surface and ensure that everything is clearly visible, even in the dark.
- Preheat the grill to medium-high heat (approximately 200-230 °C). Clean the grates and brush them with a little oil to prevent the skewers from sticking.
5. Cook the skewers
- Place the skewers on the hot grill, making sure the lamp illuminates the entire area so you can monitor the cooking process.
- Grill the skewers for 4-5 minutes on each side, turning them so that they cook evenly.
- Use the light to observe changes in colour and texture: the chicken should be seared on the outside and well cooked on the inside (the internal temperature of the chicken should reach 75 °C).
6. Serve and Enjoy
- Once cooked, remove the skewer from the grill and place it on a tray.
- Serve with yoghurt sauce or tzatziki for a refreshing touch, or accompany with pita bread or tortillas to make wraps.
- Garnish with fresh herbs, such as parsley or coriander, to add extra flavour and colour.
Vegetarian Tofu, Vegetable and Grilled Pineapple Skewers
This meat-free alternative retains all the vibrant flavours of the original version, with a healthy twist and plenty of vegetable protein. Perfect for vegetarian guests or those looking to reduce their meat consumption without sacrificing flavour at their evening barbecues.
Ingredients (serves 4)
For the skewers:
- 400 g firm tofu, drained and cut into medium-sized cubes.
- 1 red pepper, cut into large chunks.
- 1 green pepper, cut into large chunks.
- 1 red onion, cut into squares.
- 1 courgette, thickly sliced.
- 200 g fresh pineapple, cut into chunks.
- Wooden or metal skewer.
For the tofu marinade:
- 3 tablespoons olive oil.
- 2 cloves garlic, finely chopped.
- 2 tablespoons soy sauce.
- 1 tablespoon agave syrup or vegan honey.
- Juice of 1 lemon.
- 1 teaspoon sweet or smoked paprika.
- 1/2 teaspoon ground cumin.
- Salt and pepper to taste.
To serve:
- Plant-based yoghurt sauce or vegan tzatziki (optional).
- Wholemeal pita bread or tortillas (optional).
Process:
1. Prepare the tofu
- Drain the tofu well and press it to remove excess water.
- Cut it into medium-sized cubes similar in size to the vegetables.
2. Marinate the tofu
- Mix the marinade ingredients and add the tofu cubes.
- Marinate for at least 1 hour in the refrigerator, ideally 2 hours for maximum flavour.
3. Assemble the skewers
- Alternate tofu, peppers, onion, courgette and pineapple on the skewers.
- Ensure the tofu is firm to prevent it from falling apart when handling.
4. Grill
- Grill the skewers for 4-6 minutes per side.
- The tofu should sear slightly and the vegetables should caramelise.
- Use an LED headlamp to ensure full visibility when cooking at night.
5. Serve
- Accompany with plant-based yoghurt sauce or vegan tzatziki.
- Serve with pita or tortillas as flavourful vegetarian wraps.
Extra Tips:
- For even more flavourful tofu, you can use smoked tofu.
- For a crunchy touch, sprinkle with sesame seeds when serving.
- This version can also be prepared in the oven or in a frying pan if you don't have a grill.
Tips for Cooking with Night Light
- Position the lamp correctly: Adjust the light so that it illuminates the entire grill, ensuring that the skewers are always visible. This is especially useful for seeing if any pieces need more cooking time or need to be turned.
- Observe the details: Thanks to the light, you will be able to see if the chicken is nicely seared or if the edges of the vegetables are starting to caramelise, indicating that they are cooked to perfection.
- Use the right utensils: Keep your tongs or spatulas close by and in sight with the help of the lamp, so you can turn the skewer easily without wasting time.
- Ensure everything is cooked to perfection: With the lamp set to 100% brightness, it is much easier to prevent food from burning or remaining undercooked, even in low light conditions.