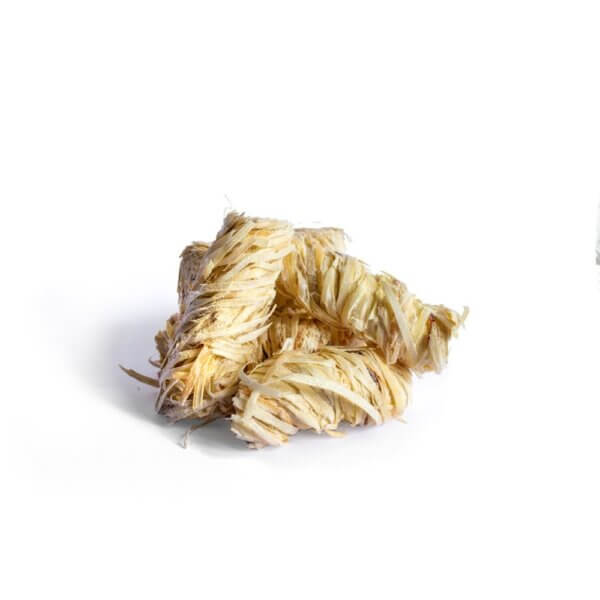
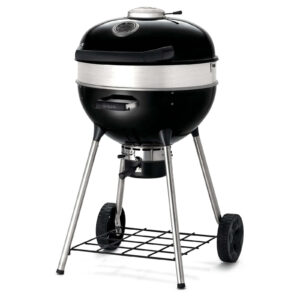
The cleanest and most consistent way to start a heater in your barbecue, fireplace or bonfire. These firelighters made from 100% natural wood wool are made from wood fibres and vegetable oil, do not give off chemical odours or fumes, and offer a reliable burning time of 8–10 minutes per piece, for quick and stable ignition without liquids or chemical tablets. The pack includes 40 units, ideal for the entire season.
🪵 Materials and construction
Each wick is made of wood fibres impregnated with vegetable oil, which promotes capillarity and a progressive, uniform flame. The natural composition ensures stable combustion without chemical residues that alter the taste of food.
⚙️ Key features
Its great virtue is its ease of use: you place the piece, light it and let it do its job. The stable flame for 8-10 minutes makes it easy to light charcoal or firewood without adding lighting liquids, with an odourless and non-toxic experience. It is a natural alternative to traditional chemical lighters.
🔥 Performance and efficiency
The extended burn time allows charcoal or logs to reach embers with less intervention. This consistency reduces relighting and speeds up the transition to working temperatures, helping to maintain the cooking pace from the start.
🎨 Design and aesthetics
The compact strand format is neat and easy to handle, fits neatly into the accessory box and maintains a natural look that fits into any outdoor kitchen set, whether rustic or modern.
🔗 Compatibility and uses
Works great with charcoal and wood barbecues, kettle or ceramic grills, as well as domestic fireplaces and outdoor bonfires. It is the perfect ally for direct grilling, indirect cooking and preparations over live coals.
🍗 Benefits for different cooking styles
For grilled meats, it ensures a clean start that does not contaminate aromas; for fish and seafood, it prevents unwanted chemical flavours; for slow smoking, it facilitates a controlled start that does not cause the initial temperature to spike, maintaining the cooking curve.
🛡️ Safety and ease of use
Being non-toxic and free of chemical fumes, it is more pleasant to use around food and people. It is easy to handle even with barbecue gloves, and it ignites immediately with a match or lighter, avoiding splashes or vapours from liquid accelerants.
🏞️ Applications beyond barbecuing
In addition to barbecues, it is ideal for fireplaces and recreational heaters. Its consistent flame helps to light logs with less paper or kindling, simplifying evenings by the fire at home or outdoors.
🔧 Use and maintenance (step by step)
These wooden wool lighters are designed to make lighting charcoal or firewood
predictable, clean and safe. They work equally well on barbecues, fireplaces and bonfires, and perform best when you let
space for air and avoid overloading them with fuel at the start. Below are detailed procedures for the most common scenarios, along with pro tips, safety advice and troubleshooting.
Method A — With a chimney starter (recommended for charcoal barbecues)
- Initial placement: place 1 piece at the base of the chimney starter.
- Loading charcoal: Fill the chimney with the amount of briquettes or charcoal you need, without compacting it excessively.
- Lighting: Light the piece at one end and place it under the chimney (or inside, at the base), letting the draft do its work.
- Waiting time: When the top of the charcoal is ash grey, it is ready to be poured onto the grill.
- Distribution: distribute the embers according to your method (direct, indirect or mixed) and let the temperature stabilise with the lid closed for a few minutes.
Method B — Without chimney (direct lighting on the barbecue)
- Aeration base: open the lower vents and create a light bed of charcoal.
- Positioning the lighter: insert 1 piece in the centre and another at the edge if you need to speed up the start-up.
- Lighting: light and let the flame grow; add charcoal around it little by little so as not to smother it.
- Transition to embers: wait until at least 70% of the charcoal is lit and grey before cooking.
Method C — Indoor fireplace or outdoor bonfire (firewood)
- Heater structure: place medium-sized logs in a ‘hut’ shape with a central hole for air.
- Priming: place 2 pieces under small chips or thin wood in the centre of the hole.
- Lighting: light the pieces and let the chips catch first; add logs gradually as the flame establishes itself.
- Maintenance: avoid compacting the logs; keep air corridors to maintain a healthy draught.
🧠 Pro tips (performance)
- Approximate quantity: normally 1 piece is enough for charcoal; 2 pieces help with thick firewood or on cold/damp days.
- Open vents: at the beginning, keep the air intakes open; then adjust them to stabilise the temperature.
- Don't rush: let the fuel turn grey and the temperature settle before cooking; this will prevent harsh flavours.
- Group, don't bury: place the lighter in direct contact with part of the fuel; if you bury it, you will suffocate it.
🐟 Whole grilled sea bass with lemon and herbs (natural ignition)
Why it works with your lighters: chemical-free ignition keeps the fish's flavour
pure, without any strange notes. Ideal for appreciating citrus fruits and herbs.
Ingredients (4 people)
- 2 whole sea bass (600–800 g each), gutted
- 1 lemon, thinly sliced
- 2–3 cloves of garlic, sliced
- 1 small bunch of parsley or thyme
- 2–3 tablespoons of olive oil
- Coarse salt and freshly ground pepper
- (Optional) a pinch of sweet or smoked paprika
Preparing the fire
- Place 1 piece of wood wool firelighter at the base of the firelighter chimney and light it.
- Fill the chimney with charcoal and let it burn until it turns ash grey.
- Pour the embers into two areas: one direct (high heat) and one indirect (medium heat). Close the lid for 5–10 minutes to stabilise at 200–220 °C.
Preparation of the fish
- Dry the sea bass thoroughly with paper towels. Make 3–4 diagonal cuts on each side (without cutting through the bone).
- Season inside and out with salt and pepper.
- Fill the cavity with slices of lemon, garlic and herbs; brush the outside with olive oil.
- Oil the grill (or use a fish basket) to prevent sticking.
Cooking
- Sear the sea bass first over direct heat for 2–3 minutes on each side to seal and brown.
- Step to indirect heat, lid and cook for a further 8–12 minutes (depending on size), until the flesh flakes easily and reaches ~62 °C in the thickest part.
- Remove and let rest for 3 minutes. Finish with a drizzle of oil and a pinch of paprika if you like.
Quick grilled accompaniments
- Zucchini and pepper slices: 2–3 minutes per side over direct heat, salt, pepper and oil.
- Toasted bread: 30–45 seconds per side; rub with garlic and a touch of oil.
Pro tips
- If you're worried about sticking, place the sea bass on lemon slices directly on the grill.
- Without a thermometer: pierce the thickest part; it should look juicy but opaque, not translucent.
- Fattier fish? Switch to salmon with skin: 4–6 minutes skin-side down over direct heat, 1–2 minutes on the other side; finish 3–5 minutes over indirect heat.