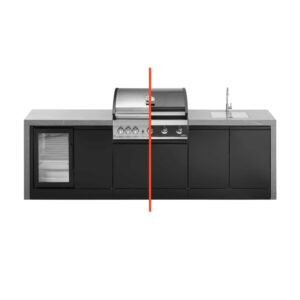
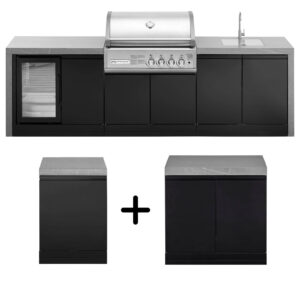
Electric outdoor cooker with refrigerator that integrates the fast-response E2 grill and a glass display cabinet with interior light to keep drinks and ingredients at the ready. The digital mode control and lid provide predictable, juicy cooking, while the worktop organises preparation and passing. Casters and leveling feet make it easy to move, position and cook with stability, without gas or embers and with the fridge always visible to decide without opening.
The Backyard Bistro Electric combines an electric barbecue with a reactive E2 fridge and a glass display cabinet in an elegant module that organises outdoor work like in a professional kitchen. Preparing, cooking and serving are just an arm’s length away: the heat is controlled from a clear digital panel, the cold is visible without opening the door and the worktop acts as a preparation and serving table. The whole thing rolls into place on castors and is secured with levelling feet to cook with absolute aplomb in a true electric outdoor cooking station.
🔥 Electric outdoor kitchen with fridge: E2 thermal system
The E2 concentrates energy where it matters: under the grill. Its electric heating elements provide reactive heat that reaches useful temperature in a few minutes and recovers quickly every time you open and close the lid.
When the lid is lowered, a stable convection chamber is formed, which accelerates the transfer of heat to the inside of the pieces and maintains juiciness. In practice this means crisp searing without drying out, even grilling with little intervention and controlled grilling that browns where it should without burning the edges.
🎛️ Electric outdoor cooking station: digital control by mode
The E2’s front interface eliminates the uncertainty of analogue controls. Three staggered modes – low, medium and high – organise the power: delicate items are protected, bulky items are cooked with a lid, and those that require a blast of heat are given an instant punchy mark.
The integrated timer helps to standardise recipes: program a section, close and take care of the mise en place while the appliance maintains the heat regime without any ups and downs.
🍳 Cooking technology and usable surface area
The rectangular grill allows you to work naturally in sections. The central area is the liveliest for grilling steaks, kebabs or burgers, while the tempered sides can be used as a resting platform or as a space for finishing vegetables, breads and side dishes.
The lid turns the interior into a micro-oven: first you bring it to the point with a gentle phase and then finish it off with an energetic sear; it is the basis of reverse searing that leaves a crispy crust and a juicy centre. With a compatible stone or griddle, the heat is evenly distributed and you get thin pizzas or bistro-textured griddles.
⚡ Performance and repeatability
The electric power supply brings a decisive advantage: what happens today, happens tomorrow with the same settings. Preheating is short, stability is maintained even in moderate wind and recovery after opening the lid is fast, so batches flow without delay.
That repeatability makes it easy to document your times per recipe and replicate them in any session, whether it’s a weeknight dinner or a longer service with guests.
🧊 Electric barbecue with fridge: glass display case in the spotlight
The integrated refrigerator is more than just an add-on; it is the hub of the cold flow. The glass door shows the contents at a glance and prevents unnecessary opening, which is key to preserving temperature and speeding up decisions. The interior lighting provides visibility at dusk and turns the module into a small display case for drinks, sauces and marinades.
The adjustable shelves allow you to configure heights for tall bottles, cans or mise en place trays, and the left or right hinge option adapts the opening to the natural circulation between fridge, worktop and grill. In practice, you work like at a well thought-out bar: you pick, season, cook and plate without leaving your station.
🧱 Worktop and organisation
The worktop acts both as a workbench and a pass-through. It is sturdy enough for cutting and skimming, stable enough to hold a compatible stone or griddle and wide enough to assemble a train of dishes without losing order. Underneath, storage integrates frequently used utensils, cloths and condiments, reducing trips to the indoor kitchen and turning each session into a streamlined, clean assembly line.
🛞 Mobility, levelling and strength
Moving the station at the start of service is as simple as pushing it on its castors; securing it is a matter of lowering the levelling feet until it is seated. Levelling eliminates tipping, prevents vibrations when handling heavy parts and ensures that the lid closes accurately, which is essential to maintain internal convection. The set is designed for frequent weekend cycles of start-up, rest and restart, maintaining its thermal response and poise over time.
🧯 Safety and ease of use
No gas or charcoal means no leaks, no sparks, no embers blowing in the wind and no risk of grease drip flares. The digital control adds predictability: choose a mode, close the lid and you get the same behaviour every time, without unexpected overheating. The mechanical stability provided by the levelling feet prevents unintentional shifting when working with trays and platters, and the transparency of the fridge door lets you decide without opening, which improves food safety by preserving the cold chain. The whole ecosystem – controlled heat, stable cabinet and visible cold – is designed to make the session as safe as it is intuitive.
🎨 Design and aesthetics
The black front and the horizontal geometry convey a minimalist language that fits in with modern terraces and classic patios because of its sobriety. The glass door of the refrigerator provides visual lightness and a scenic point when the bottles and containers are illuminated in the evening. The digital panel of the grill is centred and flush, offering an immediate reading of the status without breaking the harmony of the whole. With the lid closed, the station looks clean and monolithic; when opened, a clearly delimited cooking area emerges, inviting you to cook.
🌦️ Convenient outdoor use
The station is designed for domestic outdoor use, with ventilation provided for the electrical equipment and an approach that reduces trips back and forth to the indoor kitchen. Being electric, it is ideal in locations where charcoal or gas is not permitted or impractical, without sacrificing powerful searing and high quality covered grilling.
🍽️ Cooking styles it unlocks
The E2 allows you to switch techniques fluidly. You can start a whole chicken with a lid to ensure even cooking and finish with a burst of colour; prepare delicate fish in low mode without fear of breakage; sear burgers at high temperature and melt cheese with a lid for a perfect bite; or work vegetables and gratins with controlled browning. If you’re inclined to go for thin pizza, the combination of contact heat and hot environment on top delivers crispy bases and well-melted cheeses. The fridge, always in view, keeps ingredients and drinks where they belong so nothing slows down the pace.