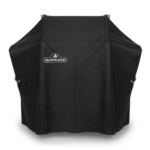
Rogue Cover – Napoleon

Price range: 74,95 € through 99,95 € (VAT inc.)

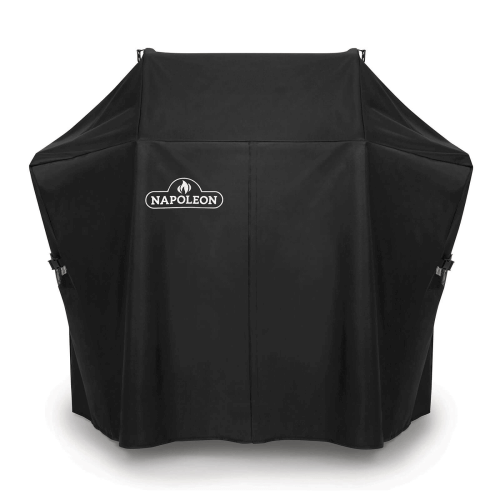
✅ Durable fabric, water resistant and with UV protection.

Ventilation to prevent mould and alleviate gusts of wind.

Snug fit with straps and buckles; stays secure.

Full coverage with folded side tables.

Hanging loops for storing the cover during cooking.

✅ Three specific cuts: 425 / RXT-SE 525 / SE 625.

Configure it to your liking

Clear selection

Complete your set

See more

Your selections

Total price

SKU: 61X27 Categories: , ,
Métodos de pago

The Rogue Cover – Napoleon is the technical barrier your barbecue needs to survive the elements: water-resistant fabric, UV inhibitors that slow down discolouration, integrated ventilation and a strap fastening that stays secure on windy days. Designed specifically for the Rogue 365, Rogue 425, Rogue XT/SE 525 and Rogue SE 625 series with folded side tables, it protects the entire surface without gaps or complications. By completely covering the lid, front and trolley, it keeps dust, moisture and pollen or saltpetre deposits at bay, helping to keep the grill ready to fire up and preserving its original appearance for longer.

🧱 Materials and construction

The cover uses a durable, water-repellent fabric that maintains its flexibility over time, preventing it from cracking due to sun exposure or sudden changes in temperature. This resistance helps to preserve the grill’s paint, enamels and chrome on the grille. In the 525 version, the cover is made of 100% polyester on the outside and 100% polyurethane on the inside, a combination that improves the moisture barrier without adding unnecessary rigidity, making it easy to handle on a daily basis. The sturdy feel of the fabric provides confidence when putting on and removing the cover, without the feeling of ‘thin plastic’ or excessive noise when handling it.

🛡️ Comprehensive protection against weather and radiation

Treatment with UV inhibitors helps prevent colour fading and fabric deterioration from continued sun exposure, keeping the cover functional and looking good season after season. Water resistance minimises the risk of accumulations that can seep into the tank or burners, especially after prolonged rain or night-time dew. This combination also protects against fine dust, leaves, bird droppings or salt spray, reducing the cleaning required before each use and extending the life of your equipment.

🌬️ Ventilation and humidity control

The ventilation openings promote airflow under the cover and reduce condensation, a common cause of odours and mould growth in equipment stored outdoors. By allowing air to circulate, residual moisture disperses more quickly after rain, and the air outlet also acts as a relief in gusty winds, preventing the ‘sail effect’ and improving the stability of the cover. The result is a drier, healthier environment for the barbecue, even in humid climates.

⚙️ Secure and stable fit

Adjustable buckle straps secure the cover to the barbecue for a snug fit, even when the wind is blowing or when moving the equipment slightly within the patio. The Rogue series-specific cut ensures that the cover follows the silhouette of the lid and trolley, preventing pockets of fabric where water can accumulate. Designed for use with the side tables folded down, the set is more compact and stable, making it easier to move across balconies or narrow spaces without sacrificing full coverage.

🎣 Easy handling and storage

The lightweight but sturdy fabric makes daily handling easy: it can be put on and taken off effortlessly, folds easily and does not take up too much space when stored.
Its structure helps prevent it from sticking to the grill after rain, reducing pulling when removing it. When cooking, you can set it aside without getting it excessively dirty and put it back on as soon as the equipment has cooled down, maintaining a habit of constant protection that translates into a better-preserved grill.

🧩 Compatibility and actual coverage

Each variation is cut to cover the entire grill of your corresponding Rogue series with the side tables folded down, simplifying storage and use on balconies or terraces with tight walkways. The cover hugs the shape of the lid, protects the controls and shields the trolley, so dirt cannot find any entry points. This comprehensive cover prevents water and dust from accumulating in key areas and keeps components ready to go when it’s time to fire up.

🍖 Benefits for different cooking styles

Whether you’re doing quick weekday grills or slow, low-temperature smoking on the weekend, a dry, clean grill heats more predictably and saves time on prep. By reducing exposure to moisture and corrosive agents, you decrease the likelihood of surface rust or clogged burners and diffusers. This translates to more reliable ignition, more stable temperature control, and more consistent cooking results, from searing a steak to baking a pizza at maximum power.

🧯 Safety and ease of use

The ventilated design and non-cracking fabric help minimise risks associated with trapped moisture or premature material degradation. The strap fastening reduces unexpected movement caused by gusts of wind and prevents the cover from hitting the grill. To care for the cover, remember to always place it on the equipment when it is switched off and completely cool, and make sure to dry any water that may have accumulated on the surface of the cover before storing it to maintain its performance over time.

🏡 Applications outside the BBQ

In addition to protecting your barbecue, this cover can also be used to protect outdoor metal furniture of similar dimensions, side tables or outdoor kitchen units. In patios and porches, it helps to preserve finishes from dust, sun and light rain, and can serve as a temporary covering solution when maintenance or painting work is being carried out in the area, keeping surfaces clean until the next use.

Comparison table of variations

Variation Ref. Compatibility Dimensions (W×D×H) Material
Rogue 365 – Open shelves 61365 Rogue® 365 127 × 66 × 122 cm Polyester (high density)
Rogue 365 – Closed shelves 61366 Rogue® 365 / 365 XT 82 × 63 × 119 cm Polyester (high density)
Rogue 425 – Closed Shelves 61426 Rogue® 425 89 × 63 × 119 cm Polyester (high density)
Rogue 425 61427 Rogue® 425 140 × 64 × 123 cm Polyester (high density)
Rogue RXT/SE 525 61527 Rogue® XT/SE 525 168 × 64 × 123 cm 100% polyester (ext.), 100% PU (int.)
Rogue SE 625 61627 Rogue® SE 625 168 × 64 × 123 cm Polyester

Use and maintenance for better care

  1. Before covering
    • Turn off all burners, close the gas supply and let the barbecue (lid, grates and sides) cool completely.
    • Fold down the side tables so that the cover fits properly and is more stable in the wind.
    • Step a dry cloth over the lid and shelves to remove surface moisture after rain or cleaning; remove leaves, dust, or ash residue.
    • If you have been cooking, remove any grease splatters from the front and controls to prevent them from migrating to the fabric in the heat of the sun.
  2. Placement and adjustment
    • Stand in front of the grill and unroll the cover, identifying the top (lid area).
    • Place it from the lid towards the trolley, letting the sides fall without forcing them.
    • Ensure that the outline is aligned with the corners and wheels; avoid folds that form ‘pockets’.
    • Close and tighten the buckle straps until you achieve a snug fit but without overstretching the seams or eyelets.
    • Check that there is no loose fabric that could flap in the wind.
  3. Ventilation and condensation
    • Orient the ventilation openings towards the rear to allow hot air and moisture to escape.
    • Avoid covering if the inside of the grill is damp; let the lid open for a few minutes to let the condensation evaporate.
    • In very humid climates, uncover periodically (e.g. once a week) to air the unit and prevent mould.
  4. Cleaning the cover
    • Routine cleaning: warm water, mild soap and a soft sponge. Rinse with water and let dry on both sides.
    • Specific stains (pollen, resin, bird droppings): act promptly with a damp cloth; if the stain persists, repeat with mild soap.
    • Avoid bleach, solvents, hard brushes, pressure washing, washing machines and tumble dryers; these could damage fibres and coatings.
    • Note variation 525 (PU interior): do not use abrasive products or scouring pads on the back to preserve the polyurethane coating.
  5. Wind and storms
    • Tighten the straps and, if strong gusts are forecast, add an auxiliary cord under the front shelf or at the base of the trolley.
    • Keep the rear ventilation area clear so that air can escape and does not create a ‘sail effect’.
    • After a storm or hail, check that there is no accumulated water on the top; shake it gently to remove it.
    • In snow, remove the weight as soon as possible to prevent the cover or the edges of the lid from becoming deformed.
  6. Storage
    • When using the grill, use the hanging loops to prevent the cover from touching the ground or getting dirty.
    • To store: let dry completely, fold without creating sharp creases (it is better to roll than to fold at sharp angles).
    • Store in a breathable bag or protected shelf, away from direct heat sources and intense sunlight.
    • Avoid very humid enclosed spaces; if this is not possible, add a desiccant sachet inside the bag.
  7. Periodic checks
    • At the beginning/end of each season, inspect the seams, hems, buckles and straps; if you see any loose threads, carefully cut and seal them.
    • Check the interior: shake off fine dust and small metal particles that could cause abrasion to the enamel on the lid.
    • If you notice that water no longer lets itself bead on the surface, apply a waterproofing fabric spray following the product manufacturer's instructions.
  8. Troubleshooting
    • Puddles form on the top: remove the water by hand from the inside and adjust the straps to eliminate pockets.
    • Musty smell when opening: air the grill and cover in the sun for a few hours; improve ventilation and check that the grill is not covered when wet.
    • Stiffness in extreme cold: handle gently; let the material regain flexibility for a few minutes before folding.
    • Small scrapes or cuts: use an outdoor fabric patch on the inside of the cover; press and let cure according to instructions.

Use and maintenance for better care

  1. Before covering

    • Turn off all burners, close the gas valve, and allow the grill (lid, grates, and sides) to cool completely.

    • Fold down the side tables so that the cover fits properly and is more stable in the wind.

    • Wipe the lid and shelves with a dry cloth to remove surface moisture after rain or cleaning; remove leaves, dust or ash residue.

    • If you have been cooking, remove any grease splatters from the front and controls; this will prevent them from migrating to the fabric with the heat of the sun.

  2. Positioning and adjustment

    • Stand in front of the grill and unroll the cover, identifying the top (lid area).

    • Place it from the lid towards the trolley, letting the sides fall without forcing them.

    • Ensure that the outline is aligned with the corners and wheels; avoid creases that form ‘pockets’.

    • Close and tighten the buckle straps until you achieve a snug fit but without overstretching the seams or eyelets.

    • Check that there is no loose fabric that could flap in the wind.

  3. Ventilation and condensation

    • Orient the ventilation openings towards the rear to facilitate the escape of hot air and moisture.

    • Avoid covering the grill if the inside is damp; leave the lid open for a few minutes to allow the condensation to evaporate.

    • In very humid climates, uncover periodically (e.g. once a week) to air the unit and prevent mould.

  4. Cleaning the cover

    • Routine cleaning: warm water, mild soap and a soft sponge. Rinse with water and leave to air dry on both sides.

    • Specific stains (pollen, resin, bird droppings): act quickly with a damp cloth; if the stain persists, repeat with neutral soap. >

      Avoid bleach, solvents, hard brushes, pressure washing, washing machines and tumble dryers; these could damage fibres and coatings.

    • Note variation 525 (PU interior): do not use abrasive products or scouring pads on the reverse side to preserve the polyurethane coating.

  5. Wind and storms

    • Tighten the straps and, if strong gusts are forecast, add an auxiliary cord under the front shelf or around the base of the trolley.

    • Keep the rear ventilation area clear so that air can escape and does not create a ‘sail effect’.

    • After a storm or hail, check that there is no accumulated water on the top; shake it gently to remove it.

    • In the event of snow, remove the weight as soon as possible to prevent the cover or the edges of the lid from becoming deformed. ul>

    • Storage

      • When using the grill, use the hanging loops to prevent the cover from touching the ground and getting dirty.

      • To store: allow to dry completely, fold without creating sharp creases (it is better to roll than to fold at sharp angles).

      • Store in a breathable bag or protected shelf, away from direct heat sources and intense sunlight.

      • Avoid very humid enclosed spaces; if this is not possible, add a desiccant sachet to the bag.

    • Regular checks

      • At the beginning/end of each season, inspect seams, hems, buckles and straps; if you see loose threads, carefully cut and seal them.

      • Check the interior: shake out fine dust and small metal particles that could cause abrasion on the enamel of the lid.

      • If you notice that water no longer beads on the surface, apply a textile waterproofing spray following the product manufacturer's instructions.

    • Troubleshooting

      • Puddles form at the top: remove the water by hand from the inside and adjust the straps to eliminate pockets.

      • Musty smell when uncovered: air the grill and cover in the sun for a few hours; improve ventilation and ensure that the barbecue is not covered when wet.

      • Stiffness in extreme cold: handle gently; allow the material to regain flexibility for a few minutes before bending.

      • Small scrapes or cuts: use a textile patch for exteriors on the inside of the cover; press and allow to cure according to instructions.

Use and maintenance for better care

  1. Before covering

    • Turn off all burners, close the gas valve, and allow the grill (lid, grates, and sides) to cool completely.

    • Fold down the side tables so that the cover fits properly and is more stable in the wind.

    • Wipe the lid and shelves with a dry cloth to remove surface moisture after rain or cleaning; remove leaves, dust or ash residue.

    • If you have been cooking, remove any grease splatters from the front and controls; this will prevent them from migrating to the fabric with the heat of the sun.

  2. Positioning and adjustment

    • Stand in front of the grill and unroll the cover, identifying the top (lid area).

    • Place it from the lid towards the trolley, letting the sides fall without forcing them.

    • Ensure that the outline is aligned with the corners and wheels; avoid creases that form ‘pockets’.

    • Close and tighten the buckle straps until you achieve a snug fit but without overstretching the seams or eyelets.

    • Check that there is no loose fabric that could flap in the wind.

  3. Ventilation and condensation

    • Orient the ventilation openings towards the rear to facilitate the escape of hot air and moisture.

    • Avoid covering the grill if the inside is damp; leave the lid open for a few minutes to allow the condensation to evaporate.

    • In very humid climates, uncover periodically (e.g. once a week) to air the unit and prevent mould.

  4. Cleaning the cover

    • Routine cleaning: warm water, mild soap and a soft sponge. Rinse with water and leave to air dry on both sides.

    • Specific stains (pollen, resin, bird droppings): act quickly with a damp cloth; if the stain persists, repeat with neutral soap. >

      Avoid bleach, solvents, hard brushes, pressure washing, washing machines and tumble dryers; these could damage fibres and coatings.

    • Note variation 525 (PU interior): do not use abrasive products or scouring pads on the reverse side to preserve the polyurethane coating.

  5. Wind and storms

    • Tighten the straps and, if strong gusts are forecast, add an auxiliary cord under the front shelf or around the base of the trolley.

    • Keep the rear ventilation area clear so that air can escape and does not create a ‘sail effect’.

    • After a storm or hail, check that there is no accumulated water on the top; shake it gently to remove it.

    • In the event of snow, remove the weight as soon as possible to prevent the cover or the edges of the lid from becoming deformed. ul>

    • Storage

      • When using the grill, use the hanging loops to prevent the cover from touching the ground and getting dirty.

      • To store: allow to dry completely, fold without creating sharp creases (it is better to roll than to fold at sharp angles).

      • Store in a breathable bag or protected shelf, away from direct heat sources and intense sunlight.

      • Avoid very humid enclosed spaces; if this is not possible, add a desiccant sachet to the bag.

    • Regular checks

      • At the beginning/end of each season, inspect seams, hems, buckles and straps; if you see loose threads, carefully cut and seal them.

      • Check the interior: shake out fine dust and small metal particles that could cause abrasion on the enamel of the lid.

      • If you notice that water no longer beads on the surface, apply a textile waterproofing spray following the product manufacturer's instructions.

    • Troubleshooting

      • Puddles form at the top: remove the water by hand from the inside and adjust the straps to eliminate pockets.

      • Musty smell when uncovered: air the grill and cover in the sun for a few hours; improve ventilation and ensure that the barbecue is not covered when wet.

      • Stiffness in extreme cold: handle gently; allow the material to regain flexibility for a few minutes before bending.

      • Small scrapes or cuts: use a textile patch for exteriors on the inside of the cover; press and allow to cure according to instructions.

Use and maintenance for better care

  1. Before covering

    • Turn off all burners, close the gas valve, and allow the grill (lid, grates, and sides) to cool completely.

    • Fold down the side tables so that the cover fits properly and is more stable in the wind.

    • Wipe the lid and shelves with a dry cloth to remove surface moisture after rain or cleaning; remove leaves, dust or ash residue.

    • If you have been cooking, remove any grease splatters from the front and controls; this will prevent them from migrating to the fabric with the heat of the sun.

  2. Positioning and adjustment

    • Stand in front of the grill and unroll the cover, identifying the top (lid area).

    • Place it from the lid towards the trolley, letting the sides fall without forcing them.

    • Ensure that the outline is aligned with the corners and wheels; avoid creases that form ‘pockets’.

    • Close and tighten the buckle straps until you achieve a snug fit but without overstretching the seams or eyelets.

    • Check that there is no loose fabric that could flap in the wind.

  3. Ventilation and condensation

    • Orient the ventilation openings towards the rear to facilitate the escape of hot air and moisture.

    • Avoid covering the grill if the inside is damp; leave the lid open for a few minutes to allow the condensation to evaporate.

    • In very humid climates, uncover periodically (e.g. once a week) to air the unit and prevent mould.

  4. Cleaning the cover

    • Routine cleaning: warm water, mild soap and a soft sponge. Rinse with water and leave to air dry on both sides.

    • Specific stains (pollen, resin, bird droppings): act quickly with a damp cloth; if the stain persists, repeat with neutral soap. >

      Avoid bleach, solvents, hard brushes, pressure washing, washing machines and tumble dryers; these could damage fibres and coatings.

    • Note variation 525 (PU interior): do not use abrasive products or scouring pads on the reverse side to preserve the polyurethane coating.

  5. Wind and storms

    • Tighten the straps and, if strong gusts are forecast, add an auxiliary cord under the front shelf or around the base of the trolley.

    • Keep the rear ventilation area clear so that air can escape and does not create a ‘sail effect’.

    • After a storm or hail, check that there is no accumulated water on the top; shake it gently to remove it.

    • In the event of snow, remove the weight as soon as possible to prevent the cover or the edges of the lid from becoming deformed. ul>

    • Storage

      • When using the grill, use the hanging loops to prevent the cover from touching the ground and getting dirty.

      • To store: allow to dry completely, fold without creating sharp creases (it is better to roll than to fold at sharp angles).

      • Store in a breathable bag or protected shelf, away from direct heat sources and intense sunlight.

      • Avoid very humid enclosed spaces; if this is not possible, add a desiccant sachet to the bag.

    • Regular checks

      • At the beginning/end of each season, inspect seams, hems, buckles and straps; if you see loose threads, carefully cut and seal them.

      • Check the interior: shake out fine dust and small metal particles that could cause abrasion on the enamel of the lid.

      • If you notice that water no longer beads on the surface, apply a textile waterproofing spray following the product manufacturer's instructions.

    • Troubleshooting

      • Puddles form at the top: remove the water by hand from the inside and adjust the straps to eliminate pockets.

      • Musty smell when uncovered: air the grill and cover in the sun for a few hours; improve ventilation and ensure that the barbecue is not covered when wet.

      • Stiffness in extreme cold: handle gently; allow the material to regain flexibility for a few minutes before bending.

      • Small scrapes or cuts: use a textile patch for exteriors on the inside of the cover; press and allow to cure according to instructions.

Use and maintenance for better care

  1. Before covering

    • Turn off all burners, close the gas valve, and allow the grill (lid, grates, and sides) to cool completely.

    • Fold down the side tables so that the cover fits properly and is more stable in the wind.

    • Wipe the lid and shelves with a dry cloth to remove surface moisture after rain or cleaning; remove leaves, dust or ash residue.

    • If you have been cooking, remove any grease splatters from the front and controls; this will prevent them from migrating to the fabric with the heat of the sun.

  2. Positioning and adjustment

    • Stand in front of the grill and unroll the cover, identifying the top (lid area).

    • Place it from the lid towards the trolley, letting the sides fall without forcing them.

    • Ensure that the outline is aligned with the corners and wheels; avoid creases that form ‘pockets’.

    • Close and tighten the buckle straps until you achieve a snug fit but without overstretching the seams or eyelets.

    • Check that there is no loose fabric that could flap in the wind.

  3. Ventilation and condensation

    • Orient the ventilation openings towards the rear to facilitate the escape of hot air and moisture.

    • Avoid covering the grill if the inside is damp; leave the lid open for a few minutes to allow the condensation to evaporate.

    • In very humid climates, uncover periodically (e.g. once a week) to air the unit and prevent mould.

  4. Cleaning the cover

    • Routine cleaning: warm water, mild soap and a soft sponge. Rinse with water and leave to air dry on both sides.

    • Specific stains (pollen, resin, bird droppings): act quickly with a damp cloth; if the stain persists, repeat with neutral soap. >

      Avoid bleach, solvents, hard brushes, pressure washing, washing machines and tumble dryers; these could damage fibres and coatings.

    • Note variation 525 (PU interior): do not use abrasive products or scouring pads on the reverse side to preserve the polyurethane coating.

  5. Wind and storms

    • Tighten the straps and, if strong gusts are forecast, add an auxiliary cord under the front shelf or around the base of the trolley.

    • Keep the rear ventilation area clear so that air can escape and does not create a ‘sail effect’.

    • After a storm or hail, check that there is no accumulated water on the top; shake it gently to remove it.

    • In the event of snow, remove the weight as soon as possible to prevent the cover or the edges of the lid from becoming deformed. ul>

    • Storage

      • When using the grill, use the hanging loops to prevent the cover from touching the ground and getting dirty.

      • To store: allow to dry completely, fold without creating sharp creases (it is better to roll than to fold at sharp angles).

      • Store in a breathable bag or protected shelf, away from direct heat sources and intense sunlight.

      • Avoid very humid enclosed spaces; if this is not possible, add a desiccant sachet to the bag.

    • Regular checks

      • At the beginning/end of each season, inspect seams, hems, buckles and straps; if you see loose threads, carefully cut and seal them.

      • Check the interior: shake out fine dust and small metal particles that could cause abrasion on the enamel of the lid.

      • If you notice that water no longer beads on the surface, apply a textile waterproofing spray following the product manufacturer's instructions.

    • Troubleshooting

      • Puddles form at the top: remove the water by hand from the inside and adjust the straps to eliminate pockets.

      • Musty smell when uncovered: air the grill and cover in the sun for a few hours; improve ventilation and ensure that the barbecue is not covered when wet.

      • Stiffness in extreme cold: handle gently; allow the material to regain flexibility for a few minutes before bending.

      • Small scrapes or cuts: use a textile patch for exteriors on the inside of the cover; press and allow to cure according to instructions.

Use and maintenance for better care

  1. Before covering

    • Turn off all burners, close the gas valve, and allow the grill (lid, grates, and sides) to cool completely.

    • Fold down the side tables so that the cover fits properly and is more stable in the wind.

    • Wipe the lid and shelves with a dry cloth to remove surface moisture after rain or cleaning; remove leaves, dust or ash residue.

    • If you have been cooking, remove any grease splatters from the front and controls; this will prevent them from migrating to the fabric with the heat of the sun.

  2. Positioning and adjustment

    • Stand in front of the grill and unroll the cover, identifying the top (lid area).

    • Place it from the lid towards the trolley, letting the sides fall without forcing them.

    • Ensure that the outline is aligned with the corners and wheels; avoid creases that form ‘pockets’.

    • Close and tighten the buckle straps until you achieve a snug fit but without overstretching the seams or eyelets.

    • Check that there is no loose fabric that could flap in the wind.

  3. Ventilation and condensation

    • Orient the ventilation openings towards the rear to facilitate the escape of hot air and moisture.

    • Avoid covering the grill if the inside is damp; leave the lid open for a few minutes to allow the condensation to evaporate.

    • In very humid climates, uncover periodically (e.g. once a week) to air the unit and prevent mould.

  4. Cleaning the cover

    • Routine cleaning: warm water, mild soap and a soft sponge. Rinse with water and leave to air dry on both sides.

    • Specific stains (pollen, resin, bird droppings): act quickly with a damp cloth; if the stain persists, repeat with neutral soap. >

      Avoid bleach, solvents, hard brushes, pressure washing, washing machines and tumble dryers; these could damage fibres and coatings.

    • Note variation 525 (PU interior): do not use abrasive products or scouring pads on the reverse side to preserve the polyurethane coating.

  5. Wind and storms

    • Tighten the straps and, if strong gusts are forecast, add an auxiliary cord under the front shelf or around the base of the trolley.

    • Keep the rear ventilation area clear so that air can escape and does not create a ‘sail effect’.

    • After a storm or hail, check that there is no accumulated water on the top; shake it gently to remove it.

    • In the event of snow, remove the weight as soon as possible to prevent the cover or the edges of the lid from becoming deformed. ul>

    • Storage

      • When using the grill, use the hanging loops to prevent the cover from touching the ground and getting dirty.

      • To store: allow to dry completely, fold without creating sharp creases (it is better to roll than to fold at sharp angles).

      • Store in a breathable bag or protected shelf, away from direct heat sources and intense sunlight.

      • Avoid very humid enclosed spaces; if this is not possible, add a desiccant sachet to the bag.

    • Regular checks

      • At the beginning/end of each season, inspect seams, hems, buckles and straps; if you see loose threads, carefully cut and seal them.

      • Check the interior: shake out fine dust and small metal particles that could cause abrasion on the enamel of the lid.

      • If you notice that water no longer beads on the surface, apply a textile waterproofing spray following the product manufacturer's instructions.

    • Troubleshooting

      • Puddles form at the top: remove the water by hand from the inside and adjust the straps to eliminate pockets.

      • Musty smell when uncovered: air the grill and cover in the sun for a few hours; improve ventilation and ensure that the barbecue is not covered when wet.

      • Stiffness in extreme cold: handle gently; allow the material to regain flexibility for a few minutes before bending.

      • Small scrapes or cuts: use a textile patch for exteriors on the inside of the cover; press and allow to cure according to instructions.

Use and maintenance for better care

  1. Before covering

    • Turn off all burners, close the gas valve, and allow the grill (lid, grates, and sides) to cool completely.

    • Fold down the side tables so that the cover fits properly and is more stable in the wind.

    • Wipe the lid and shelves with a dry cloth to remove surface moisture after rain or cleaning; remove leaves, dust or ash residue.

    • If you have been cooking, remove any grease splatters from the front and controls; this will prevent them from migrating to the fabric with the heat of the sun.

  2. Positioning and adjustment

    • Stand in front of the grill and unroll the cover, identifying the top (lid area).

    • Place it from the lid towards the trolley, letting the sides fall without forcing them.

    • Ensure that the outline is aligned with the corners and wheels; avoid creases that form ‘pockets’.

    • Close and tighten the buckle straps until you achieve a snug fit but without overstretching the seams or eyelets.

    • Check that there is no loose fabric that could flap in the wind.

  3. Ventilation and condensation

    • Orient the ventilation openings towards the rear to facilitate the escape of hot air and moisture.

    • Avoid covering the grill if the inside is damp; leave the lid open for a few minutes to allow the condensation to evaporate.

    • In very humid climates, uncover periodically (e.g. once a week) to air the unit and prevent mould.

  4. Cleaning the cover

    • Routine cleaning: warm water, mild soap and a soft sponge. Rinse with water and leave to air dry on both sides.

    • Specific stains (pollen, resin, bird droppings): act quickly with a damp cloth; if the stain persists, repeat with neutral soap. >

      Avoid bleach, solvents, hard brushes, pressure washing, washing machines and tumble dryers; these could damage fibres and coatings.

    • Note variation 525 (PU interior): do not use abrasive products or scouring pads on the reverse side to preserve the polyurethane coating.

  5. Wind and storms

    • Tighten the straps and, if strong gusts are forecast, add an auxiliary cord under the front shelf or around the base of the trolley.

    • Keep the rear ventilation area clear so that air can escape and does not create a ‘sail effect’.

    • After a storm or hail, check that there is no accumulated water on the top; shake it gently to remove it.

    • In the event of snow, remove the weight as soon as possible to prevent the cover or the edges of the lid from becoming deformed. ul>

    • Storage

      • When using the grill, use the hanging loops to prevent the cover from touching the ground and getting dirty.

      • To store: allow to dry completely, fold without creating sharp creases (it is better to roll than to fold at sharp angles).

      • Store in a breathable bag or protected shelf, away from direct heat sources and intense sunlight.

      • Avoid very humid enclosed spaces; if this is not possible, add a desiccant sachet to the bag.

    • Regular checks

      • At the beginning/end of each season, inspect seams, hems, buckles and straps; if you see loose threads, carefully cut and seal them.

      • Check the interior: shake out fine dust and small metal particles that could cause abrasion on the enamel of the lid.

      • If you notice that water no longer beads on the surface, apply a textile waterproofing spray following the product manufacturer's instructions.

    • Troubleshooting

      • Puddles form at the top: remove the water by hand from the inside and adjust the straps to eliminate pockets.

      • Musty smell when uncovered: air the grill and cover in the sun for a few hours; improve ventilation and ensure that the barbecue is not covered when wet.

      • Stiffness in extreme cold: handle gently; allow the material to regain flexibility for a few minutes before bending.

      • Small scrapes or cuts: use a textile patch for exteriors on the inside of the cover; press and allow to cure according to instructions.

  • Compatibility: Rogue® 365 with open side tables

  • Dimensions (W × D × H): 127 × 66 × 122 cm

  • Material: Polyester (composition not stated)

  • Waterproof: Yes (water-resistant)

  • UV protection: Yes (UV inhibitors)

  • Integrated ventilation: Yes

  • Fastening system: Adjustable straps with buckle

  • Coverage: Lid, front and trolley

  • Orientation for use: Open shelves (‘shelves up’)

  • Compatibilidad: Rogue® 365 / 365 XT con mesas laterales plegadas

  • Dimensiones (An × Pr × Al): 82 × 63 × 119 cm

  • Material: N/D

  • Impermeabilidad: Sí (resistente al agua)

  • Protección UV: Sí (inhibidores UV)

  • Ventilación integrada:

  • Sistema de sujeción: Correas ajustables con hebilla

  • Cobertura: Tapa, frontal y carro

  • Orientación de uso: Estantes cerrados (“shelves down”)

  • Compatibilidad: Rogue® 425 con mesas laterales plegadas

  • Dimensiones (An × Pr × Al): 89 × 63 × 119 cm

  • Material: N/D

  • Impermeabilidad: Sí (resistente al agua)

  • Protección UV: Sí (inhibidores UV)

  • Ventilación integrada:

  • Sistema de sujeción: Correas ajustables con hebilla

  • Cobertura: Tapa, frontal y carro

  • Orientación de uso: Estantes cerrados

  • Protection: Durable, water-resistant fabric with UV inhibitors.
  • Support: Buckle straps and specific cut for each series.
  • Ventilation: Openings for air flow and mould reduction.
  • Handling: Hanging loops for storage while cooking.
  • Dimensions: 168 × 64 × 123 cm
  • Material: Polyester
  • Suitable for: Napoleon Rogue SE 625
  • Protection: Durable, water-resistant fabric with UV inhibitors.
  • Support: Buckle straps and specific cut for each series.
  • Ventilation: Openings for air flow and mould reduction.
  • Handling: Hanging loops for storage while cooking.
  • Dimensions: 168 × 64 × 123 cm
  • Material: 100% polyester (exterior), 100% polyurethane (interior)
  • Suitable for: Napoleon Rogue XT/SE 525
  • Protection: Durable, water-resistant fabric with UV inhibitors.
  • Support: Buckle straps and specific cut for each series.
  • Ventilation: Openings for air flow and mould reduction.
  • Handling: Hanging loops for storage while cooking.
  • Dimensions: 140 × 64 × 123 cm (W × D × H)
  • Material: Polyester
  • Suitable for: Napoleon Rogue 425

Classic crispy pizza

These barbecues heat up quickly and concentrate the heat under the dome, ideal for pizzas between 28–38 cm (depending on model). With a well-preheated stone and the lid closed, you can achieve a crispy base and bubbly cheese in 5–8 minutes.

Ingredients (for 2 medium pizzas)

  • 2 balls of pizza dough (230–250 g each)

  • 160–200 ml tomato sauce

  • 250–300 g grated or shredded mozzarella, drained

  • 40–60 g pepperoni or ham (optional)

  • 1–2 tablespoons grated Parmesan cheese

  • 1 tablespoon olive oil

  • Flour or fine semolina for rolling

  • Basil leaves (optional)

  • Pinch of salt and dried oregano

Steps to follow

  1. Preheat the grill to maximum heat with the stone in the centre and lid closed for 18–20 minutes.

  2. Prepare the dough: sprinkle flour/semolina, roll out each ball to 28–30 cm leaving a 1 cm edge.

  3. Cover with a thin layer of sauce, mozzarella, pepperoni/ham, Parmesan cheese and a drizzle of oil.

  4. Bake: slide the pizza onto the stone, close the lid and cook for 5–7 minutes. Rotate 180° halfway through. >

    Adjust heat if necessary: if the base browns too quickly, slightly lower the burner under the stone or open the lid for 5–10 seconds to reduce the temperature.

  5. Finish: remove, add basil, rest for 1 minute and cut.

Vegetarian variation (Margherita+)

  • Ingredients: replace cold meats with 10–12 halved cherry tomatoes and add 1 tbsp of pesto when removing from the oven.

  • Notes: same technique; if using fresh mozzarella, dry it well to avoid excess moisture.

Micro-calibrations and troubleshooting

  • Pale base / cheese already melted: turn up the burner under the stone by ¼ or extend the preheating time by +3 minutes for the next pizza.

  • Burnt base / unmelted cheese: lower the burner under the stone, keep the sides high for a dome; try raising the stone (high rack).

  • Pizza sticks to the peel: add 1 tablespoon of semolina and throw in less than 20 seconds after assembling.

  • Edge does not rise: dough too cold or overworked; allow 10–15 min of tempering before stretching.

  • Excess smoke: flour burning on the stone; sweep with a brush and blow gently with the lid open between pizzas.

  • Too much moisture on top: reduce sauce 10–15 g, drain cheese better and sauté vegetables beforehand.

Classic crispy pizza

These barbecues heat up quickly and concentrate the heat under the dome, ideal for pizzas between 28–38 cm (depending on model). With a well-preheated stone and the lid closed, you can achieve a crispy base and bubbly cheese in 5–8 minutes.

Ingredients (for 2 medium pizzas)

  • 2 balls of pizza dough (230–250 g each)

  • 160–200 ml tomato sauce

  • 250–300 g grated or shredded mozzarella, drained

  • 40–60 g pepperoni or ham (optional)

  • 1–2 tablespoons grated Parmesan cheese

  • 1 tablespoon olive oil

  • Flour or fine semolina for rolling

  • Basil leaves (optional)

  • Pinch of salt and dried oregano

Steps to follow

  1. Preheat the grill to maximum heat with the stone in the centre and lid closed for 18–20 minutes.

  2. Prepare the dough: sprinkle flour/semolina, roll out each ball to 28–30 cm leaving a 1 cm edge.

  3. Cover with a thin layer of sauce, mozzarella, pepperoni/ham, Parmesan cheese and a drizzle of oil.

  4. Bake: slide the pizza onto the stone, close the lid and cook for 5–7 minutes. Rotate 180° halfway through. >

    Adjust heat if necessary: if the base browns too quickly, slightly lower the burner under the stone or open the lid for 5–10 seconds to reduce the temperature.

  5. Finish: remove, add basil, rest for 1 minute and cut.

Vegetarian variation (Margherita+)

  • Ingredients: replace cold meats with 10–12 halved cherry tomatoes and add 1 tbsp of pesto when removing from the oven.

  • Notes: same technique; if using fresh mozzarella, dry it well to avoid excess moisture.

Micro-calibrations and troubleshooting

  • Pale base / cheese already melted: turn up the burner under the stone by ¼ or extend the preheating time by +3 minutes for the next pizza.

  • Burnt base / unmelted cheese: lower the burner under the stone, keep the sides high for a dome; try raising the stone (high rack).

  • Pizza sticks to the peel: add 1 tablespoon of semolina and throw in less than 20 seconds after assembling.

  • Edge does not rise: dough too cold or overworked; allow 10–15 min of tempering before stretching.

  • Excess smoke: flour burning on the stone; sweep with a brush and blow gently with the lid open between pizzas.

  • Too much moisture on top: reduce sauce 10–15 g, drain cheese better and sauté vegetables beforehand.

Classic crispy pizza

These barbecues heat up quickly and concentrate the heat under the dome, ideal for pizzas between 28–38 cm (depending on model). With a well-preheated stone and the lid closed, you can achieve a crispy base and bubbly cheese in 5–8 minutes.

Ingredients (for 2 medium pizzas)

  • 2 balls of pizza dough (230–250 g each)

  • 160–200 ml tomato sauce

  • 250–300 g grated or shredded mozzarella, drained

  • 40–60 g pepperoni or ham (optional)

  • 1–2 tablespoons grated Parmesan cheese

  • 1 tablespoon olive oil

  • Flour or fine semolina for rolling

  • Basil leaves (optional)

  • Pinch of salt and dried oregano

Steps to follow

  1. Preheat the grill to maximum heat with the stone in the centre and lid closed for 18–20 minutes.

  2. Prepare the dough: sprinkle flour/semolina, roll out each ball to 28–30 cm leaving a 1 cm edge.

  3. Cover with a thin layer of sauce, mozzarella, pepperoni/ham, Parmesan cheese and a drizzle of oil.

  4. Bake: slide the pizza onto the stone, close the lid and cook for 5–7 minutes. Rotate 180° halfway through. >

    Adjust heat if necessary: if the base browns too quickly, slightly lower the burner under the stone or open the lid for 5–10 seconds to reduce the temperature.

  5. Finish: remove, add basil, rest for 1 minute and cut.

Vegetarian variation (Margherita+)

  • Ingredients: replace cold meats with 10–12 halved cherry tomatoes and add 1 tbsp of pesto when removing from the oven.

  • Notes: same technique; if using fresh mozzarella, dry it well to avoid excess moisture.

Micro-calibrations and troubleshooting

  • Pale base / cheese already melted: turn up the burner under the stone by ¼ or extend the preheating time by +3 minutes for the next pizza.

  • Burnt base / unmelted cheese: lower the burner under the stone, keep the sides high for a dome; try raising the stone (high rack).

  • Pizza sticks to the peel: add 1 tablespoon of semolina and throw in less than 20 seconds after assembling.

  • Edge does not rise: dough too cold or overworked; allow 10–15 min of tempering before stretching.

  • Excess smoke: flour burning on the stone; sweep with a brush and blow gently with the lid open between pizzas.

  • Too much moisture on top: reduce sauce 10–15 g, drain cheese better and sauté vegetables beforehand.

Classic crispy pizza

These barbecues heat up quickly and concentrate the heat under the dome, ideal for pizzas between 28–38 cm (depending on model). With a well-preheated stone and the lid closed, you can achieve a crispy base and bubbly cheese in 5–8 minutes.

Ingredients (for 2 medium pizzas)

  • 2 balls of pizza dough (230–250 g each)

  • 160–200 ml tomato sauce

  • 250–300 g grated or shredded mozzarella, drained

  • 40–60 g pepperoni or ham (optional)

  • 1–2 tablespoons grated Parmesan cheese

  • 1 tablespoon olive oil

  • Flour or fine semolina for rolling

  • Basil leaves (optional)

  • Pinch of salt and dried oregano

Steps to follow

  1. Preheat the grill to maximum heat with the stone in the centre and lid closed for 18–20 minutes.

  2. Prepare the dough: sprinkle flour/semolina, roll out each ball to 28–30 cm leaving a 1 cm edge.

  3. Cover with a thin layer of sauce, mozzarella, pepperoni/ham, Parmesan cheese and a drizzle of oil.

  4. Bake: slide the pizza onto the stone, close the lid and cook for 5–7 minutes. Rotate 180° halfway through. >

    Adjust heat if necessary: if the base browns too quickly, slightly lower the burner under the stone or open the lid for 5–10 seconds to reduce the temperature.

  5. Finish: remove, add basil, rest for 1 minute and cut.

Vegetarian variation (Margherita+)

  • Ingredients: replace cold meats with 10–12 halved cherry tomatoes and add 1 tbsp of pesto when removing from the oven.

  • Notes: same technique; if using fresh mozzarella, dry it well to avoid excess moisture.

Micro-calibrations and troubleshooting

  • Pale base / cheese already melted: turn up the burner under the stone by ¼ or extend the preheating time by +3 minutes for the next pizza.

  • Burnt base / unmelted cheese: lower the burner under the stone, keep the sides high for a dome; try raising the stone (high rack).

  • Pizza sticks to the peel: add 1 tablespoon of semolina and throw in less than 20 seconds after assembling.

  • Edge does not rise: dough too cold or overworked; allow 10–15 min of tempering before stretching.

  • Excess smoke: flour burning on the stone; sweep with a brush and blow gently with the lid open between pizzas.

  • Too much moisture on top: reduce sauce 10–15 g, drain cheese better and sauté vegetables beforehand.
Classic crispy pizza

These barbecues heat up quickly and concentrate the heat under the dome, ideal for pizzas between 28–38 cm (depending on model). With a well-preheated stone and the lid closed, you can achieve a crispy base and bubbly cheese in 5–8 minutes.

Ingredients (for 2 medium pizzas)

  • 2 balls of pizza dough (230–250 g each)

  • 160–200 ml tomato sauce

  • 250–300 g grated or shredded mozzarella, drained

  • 40–60 g pepperoni or ham (optional)

  • 1–2 tablespoons grated Parmesan cheese

  • 1 tablespoon olive oil

  • Flour or fine semolina for rolling

  • Basil leaves (optional)

  • Pinch of salt and dried oregano

Steps to follow

  1. Preheat the grill to maximum heat with the stone in the centre and lid closed for 18–20 minutes.

  2. Prepare the dough: sprinkle flour/semolina, roll out each ball to 28–30 cm leaving a 1 cm edge.

  3. Cover with a thin layer of sauce, mozzarella, pepperoni/ham, Parmesan cheese and a drizzle of oil.

  4. Bake: slide the pizza onto the stone, close the lid and cook for 5–7 minutes. Rotate 180° halfway through. >

    Adjust heat if necessary: if the base browns too quickly, slightly lower the burner under the stone or open the lid for 5–10 seconds to reduce the temperature.

  5. Finish: remove, add basil, rest for 1 minute and cut.

Vegetarian variation (Margherita+)

  • Ingredients: replace cold meats with 10–12 halved cherry tomatoes and add 1 tbsp of pesto when removing from the oven.

  • Notes: same technique; if using fresh mozzarella, dry it well to avoid excess moisture.

Micro-calibrations and troubleshooting

  • Pale base / cheese already melted: turn up the burner under the stone by ¼ or extend the preheating time by +3 minutes for the next pizza.

  • Burnt base / unmelted cheese: lower the burner under the stone, keep the sides high for a dome; try raising the stone (high rack).

  • Pizza sticks to the peel: add 1 tablespoon of semolina and throw in less than 20 seconds after assembling.

  • Edge does not rise: dough too cold or overworked; allow 10–15 min of tempering before stretching.

  • Excess smoke: flour burning on the stone; sweep with a brush and blow gently with the lid open between pizzas.

  • Too much moisture on top: reduce sauce 10–15 g, drain cheese better and sauté vegetables beforehand.
Classic crispy pizza

These barbecues heat up quickly and concentrate the heat under the dome, ideal for pizzas between 28–38 cm (depending on model). With a well-preheated stone and the lid closed, you can achieve a crispy base and bubbly cheese in 5–8 minutes.

Ingredients (for 2 medium pizzas)

  • 2 balls of pizza dough (230–250 g each)

  • 160–200 ml tomato sauce

  • 250–300 g grated or shredded mozzarella, drained

  • 40–60 g pepperoni or ham (optional)

  • 1–2 tablespoons grated Parmesan cheese

  • 1 tablespoon olive oil

  • Flour or fine semolina for rolling

  • Basil leaves (optional)

  • Pinch of salt and dried oregano

Steps to follow

  1. Preheat the grill to maximum heat with the stone in the centre and lid closed for 18–20 minutes.

  2. Prepare the dough: sprinkle flour/semolina, roll out each ball to 28–30 cm leaving a 1 cm edge.

  3. Cover with a thin layer of sauce, mozzarella, pepperoni/ham, Parmesan cheese and a drizzle of oil.

  4. Bake: slide the pizza onto the stone, close the lid and cook for 5–7 minutes. Rotate 180° halfway through. >

    Adjust heat if necessary: if the base browns too quickly, slightly lower the burner under the stone or open the lid for 5–10 seconds to reduce the temperature.

  5. Finish: remove, add basil, rest for 1 minute and cut.

Vegetarian variation (Margherita+)

  • Ingredients: replace cold meats with 10–12 halved cherry tomatoes and add 1 tbsp of pesto when removing from the oven.

  • Notes: same technique; if using fresh mozzarella, dry it well to avoid excess moisture.

Micro-calibrations and troubleshooting

  • Pale base / cheese already melted: turn up the burner under the stone by ¼ or extend the preheating time by +3 minutes for the next pizza.

  • Burnt base / unmelted cheese: lower the burner under the stone, keep the sides high for a dome; try raising the stone (high rack).

  • Pizza sticks to the peel: add 1 tablespoon of semolina and throw in less than 20 seconds after assembling.

  • Edge does not rise: dough too cold or overworked; allow 10–15 min of tempering before stretching.

  • Excess smoke: flour burning on the stone; sweep with a brush and blow gently with the lid open between pizzas.

  • Too much moisture on top: reduce sauce 10–15 g, drain cheese better and sauté vegetables beforehand.

Classic crispy pizza

These barbecues heat up quickly and concentrate the heat under the dome, ideal for pizzas between 28–38 cm (depending on model). With a well-preheated stone and closed lid, you can achieve a crispy base and bubbly cheese in 5–8 minutes.

Ingredients (for 2 medium pizzas)

  • 2 balls of pizza dough (230–250 g each)
  • 160–200 ml tomato passata
  • 250–300 g grated or shredded mozzarella, drained
  • 40–60 g pepperoni or ham (optional)
  • 1–2 tablespoons grated Parmesan cheese
  • 1 tablespoon olive oil
  • Flour or fine semolina for rolling out
  • Basil leaves (optional)
  • Pinch of salt and dried oregano

Steps

  1. Preheat the grill to maximum with the stone in the centre and lid closed for 18–20 minutes.
  2. Prepare the dough: sprinkle with flour/semolina, roll out each ball to 28–30 cm, letting a 1 cm edge form.
  3. Cover with a thin layer of sauce, mozzarella, pepperoni/ham, Parmesan cheese and a drizzle of oil.
  4. Bake: slide the pizza onto the stone, close the lid and cook for 5–7 minutes. Rotate 180° halfway through.
  5. Adjust the heat if necessary: if the base sears too quickly, lower the burner under the stone slightly or open the lid for 5–10 seconds to reduce the temperature.
  6. Finish: remove, add basil, rest for 1 minute and cut.

Vegetarian variation (Margherita+)

  • Ingredients: replace the cold cuts with 10–12 halved cherry tomatoes and add 1 tablespoon of pesto when removing from the oven.
  • Notes: same technique; if using fresh mozzarella, dry it well to avoid excess moisture.

Micro-calibrations and troubleshooting

  • Pale base / cheese already covered: raise the burner under the stone by ¼ or extend the preheating time by +3 minutes for the next pizza.
  • Burnt base/cheese not covered: lower the burner under the stone, keep the sides high for a dome shape; try raising the stone (high rack).
  • Pizza sticks to the scoop: add 1 tablespoon of semolina and throw in less than 20 seconds after assembling.
  • Edge does not rise: dough too cold or overworked; let rest for 10–15 minutes before rolling out.
  • Excess smoke: flour burning on the stone; sweep with a brush and blow gently with the lid open between pizzas.
  • Too much moisture on top: reduce sauce by 10–15 g, drain cheese better and sauté vegetables beforehand.