Napoleon’s Reversible Porcelain Enameled Reversible Griddle transforms your grill into an ultra-versatile surface: smooth on one side for even searing and ridged on the other for perfect sear marks. Available in two variants optimised for size and compatibility, it holds heat superbly thanks to porcelain-enamelled cast iron and makes cleaning easy without sacrificing flavour. For users looking for “restaurant” performance in their home barbecue.
🔩 Materials and construction
Made of cast iron with porcelain enamel, it combines the thermal inertia of iron with a vitreous coating that is corrosion resistant and easier to clean. The enamel helps reduce sticking when properly preheated and cured, protecting the piece from moisture and acid splashes typical of sauces and marinades. In both models, the piece is solid and stable, designed to rest firmly on the grills, distribute the heat and avoid deformation.
♻️ 2-in-1 reversible surface
Each griddle offers two functional sides: the smooth side maximises contact for eggs, pancakes, smash burgers or chopped vegetables; the ridged side raises juices and creates evacuation channels, providing professional griddle-like griddle marks and reducing direct contact with fat. Switching faces allows you to adjust texture and browning in seconds without changing accessories.
⚡ Thermal performance and efficiency
Cast iron retains energy and delivers it consistently, ideal for fast cooking with powerful searing and for full breakfasts without temperature drops when adding multiple ingredients. The large surface format ensures large usable areas for cooking side dishes and proteins “at the same time”, reducing time and gas consumption. Usable dimensions: 33 × 45.1 cm in the Prestige/PRO/700 variant and 29.5 × 45.1 cm in the Rogue/Freestyle variant.
🎨 Grille design and aesthetics
The black porcelain finish matches the Napoleon grates, maintaining a clean, professional aesthetic even after multiple services. Drainage holes in the design help to evacuate fat in preparations such as bacon or chorizo, promoting crispiness without flooding the surface.
🔌 Compatibilities and a perfect fit
-
Prestige® (PRO) & 700-series variant: designed for 485, 500, 665, 605 and 730-series grills (includes Prestige/Prestige PRO 500 & 665). Surface 33 × 45.1 cm.
-
Rogue® & Freestyle variant: compatible with Rogue 425(-1), 525-1, 625-1 and Freestyle 365 & 425. Surface 29.5 × 45.1 cm.
🍳 Benefits for a variety of cooking styles
On the barbecue, it converts direct heat into a continuous platform for smashing burgers, prawns, fajitas or yakisoba without falling between the grates. In outdoor cooking it is the perfect base for full breakfasts, grilling sandwiches or searing delicate fish. In conventional cooking (on integrated module gas burners) it extends the usable surface for large portions and mixed cooking with sauces.
🧰 Accessories and ecosystem
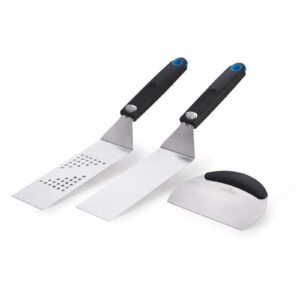
Works deluxe with egg rings, cheese melting hoods, wide spatulas and scrapers. Also fits long tongs, squeeze bottles for oils and domes to generate controlled steam in melts or minute finishes.
🛡️ Safety and ease of use
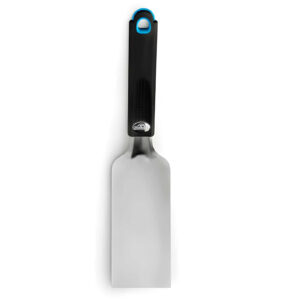
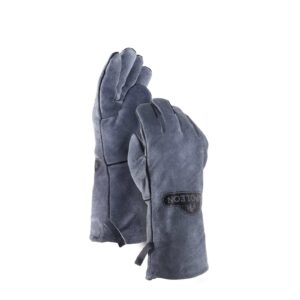
The thermal mass of the griddle stabilises heat peaks and helps minimise flare-ups by trapping and channelling juices. The porcelain enamel coating makes it easier to remove residue with less effort and, when properly preheated, reduces the likelihood of delicate foods breaking when turning. Use heat-resistant gloves and sturdy metal spatulas to manoeuvre safely.
🌍 Applications beyond the BBQ
In addition to the barbecue, the griddle performs in outdoor kitchen modules or integrated stations for sauces and side dishes, and as a regenerating surface for breads and tortillas achieving optimal texture and elasticity prior to service.
Use and Maintenance
To ensure your
enamelled cast-iron griddle performs at its best for years to come, it is essential to
prepare,
use and
maintain it properly. The enamel coating makes cleaning easier and provides protection, but optimal performance comes from good habits regarding preheating, managing fat and allowing the griddle to cool gradually. Here is a comprehensive guide.
Step-by-step guide
- Proper preheating
- Place the griddle on the grill racks and heat on medium-high for 10–12 minutes.
- The surface must be evenly hot before adding food; this will prevent sticking and ensure even browning.
- Initial oil film
- Just before cooking, spread a very thin layer of high-smoke-point oil (sunflower, peanut or rice) using kitchen paper.
- Avoid excess: a thin film improves release and reduces burnt residue.
- Zone cooking
- Make the most of the size to create working zones: a hotter one for searing and a medium one for finishing or keeping food warm.
- On the ribbed side, position the grooves towards the natural drain to allow fat to run off.
- Recommended equipment
- Metal spatulas with straight edges for scraping and turning, long tongs for control, domes for melting, and squeeze bottles for oils or sauces.
- Always wear heat-resistant gloves; the griddle retains a lot of heat even after switching off.
- Between batches
- Gently scrape off residue with the spatula; add a few drops of water or vinegar (at room temperature) to deglaze and remove stuck-on sugars.
- Dry with paper and apply a thin film of oil again if continuing.
- Cleaning at the end
- With the griddle warm, remove residue with a spatula, wipe with a damp cloth and dry immediately.
- Avoid highly abrasive scourers and thermal shocks (ice-cold water on a very hot surface).
- Protection and storage
- A thin layer of oil after cleaning minimises marks and makes the next use easier.
- Store in a dry place; if you take it out, avoid stacking heavy objects on top to prevent chipping the enamel.
- Common mistakes to avoid
- Not preheating sufficiently (main cause of food sticking).
- Pouring very cold liquids onto the griddle whilst it is boiling (risk of thermal shock).
- Using non-stick sprays with additives that carbonise and leave a sticky film.
- Regular maintenance
- Check for dents or micro-chips on the edges. If any appear, avoid using pointed tools in that area and work with a flat spatula.
- Check the screws/supports of the grill before placing the griddle on to ensure stable support.
- Safety
- Air circulation: leave space for juices to drain away without accumulating.
- Keep a damp cloth or coarse salt to hand to smother small flare-ups if you are cooking very fatty ingredients.
Use and Maintenance
To ensure that your enamelled cast iron perform at its best for years, it is essential to prepare it, operate it and care for it properly. The enamel coating makes cleaning easier and protects the pan, but optimal performance comes with good habits such as preheating, grease management and gradual cooling. Here is a complete plan.
Step-by-step guide
Proper preheating
Initial oil film
Just before cooking, spread a very thin layer of high-smoke-point oil (sunflower, peanut or rice) with kitchen paper.
Avoid excess: a thin film improves release and reduces burnt residue.
Zone cooking
Take advantage of the size to create working zones: a hotter one for searing and a medium one for finishing or keeping warm.
On the ribbed side, orient the channels towards the natural drainage to remove grease.
Recommended tools
Straight-edged metal spatulas for scraping and turning, long tongs for control, domes for melts and squeeze bottles for oils or sauces.
Always wear heat-resistant gloves; the grill retains a lot of heat even after it has been turned off.
Between batches
Gently scrape off any residue with a spatula; add a few drops of water or vinegar (at room temperature) to deglaze and remove any stuck-on sugar.
Dry with paper and apply a thin film of oil again if you are continuing.
Cleaning up afterwards
With the iron warm, remove residue with a spatula, wipe with a damp cloth and dry immediately.
Avoid using very abrasive scouring pads and thermal shocks (cold water on a very hot surface).
Protection and storage
A micro-layer of oil after cleaning minimises marks and facilitates the next service.
Store in a dry place; if you remove it, avoid stacking heavy objects on top of it to prevent chipping the enamel.
Common mistakes to avoid
Not preheating sufficiently (main cause of sticking).
Pouring very cold liquids into boiling water (risk of thermal shock).
Using non-stick sprays with additives that carbonise and leave a sticky film.
Regular maintenance
Check for dents or micro-chips on the edges. If any are found, avoid using pointed tools in that area and work with a flat spatula.
Check the grill's screws/supports before placing the plate on top to ensure stable support.
Safety
Use and Maintenance
To ensure that your enamelled cast iron iron to perform at its best for years, it is essential to prepare it, operate it and care for it properly. The enamel coating makes cleaning easier and protects the pan, but optimal performance comes with good habits such as preheating, managing grease and gradual cooling. Here is a comprehensive plan.
Step-by-step guide
Proper preheating
Initial oil film
Just before cooking, spread a very thin layer of high-smoke-point oil (sunflower, peanut or rice) with kitchen paper.
Avoid excess: a thin film improves release and reduces burnt residue.
Zone cooking
Take advantage of the size to create work zones: a hotter one for searing and a medium one for finishing or keeping warm.
On the ribbed side, orient the channels towards the natural drainage to remove grease.
Recommended tools
Straight-edged metal spatulas for scraping and turning, long tongs for control, domes for melts and squeeze bottles for oils or sauces.
Always wear heat-resistant gloves; the grill retains a lot of heat even after it has been turned off.
Between batches
Gently scrape off any residue with the spatula; add a few drops of water or vinegar (at room temperature) to deglaze and remove any stuck-on sugar.
Dry with paper and apply a thin film of oil again if you are continuing.
Cleaning up afterwards
With the iron warm, remove residue with a spatula, wipe with a damp cloth and dry immediately.
Avoid highly abrasive scouring pads and thermal shocks (cold water on a very hot surface).
Protection and storage
A micro-layer of oil after cleaning minimises marks and facilitates the next service.
Store in a dry place; if you remove it, avoid stacking heavy objects on top of it to prevent chipping the enamel.
Common mistakes to avoid
Not preheating sufficiently (main cause of sticking).
Pouring very cold liquids into boiling water (risk of thermal shock).
Using non-stick sprays with additives that carbonise and leave a sticky film.
Regular maintenance
Check for dents or micro-chips on the edges. If any are found, avoid using pointed tools in that area and work with a flat spatula.
Check the grill's screws/supports before placing the plate to ensure stable support.
Safety
Specifications
Prestige® (PRO) & 700-series
Compatibility: 485, 500, 665, 605 and 730 series (Prestige®/Prestige PRO™ 500 & 665).
Cooking surface: 33 × 45.1 cm (13‘ × 17 3/4’).
Material: cast iron with porcelain enamel coating.
Recipe – Rogue® & Freestyle Variation (56426) — Full Grilled Breakfast ‘Diner’
Introduction
The 29.5 × 45.1 cm surface allows you to organise different areas and work at different intensities. The ridged side drains fat for crispy bacon, while the smooth side ensures perfect eggs, golden hash browns and quick stir-fries.
Ingredients (4 servings)
8 slices of bacon or pancetta, 2 small fresh chorizos
4 eggs, 2 large potatoes, grated and drained
200 g sliced mushrooms, 2 ripe tomatoes, halved
4 thick slices of bread or 4 brioche buns
Butter, vegetable oil, salt, pepper and chives
Steps to follow
Smart preheating: Grill on medium-high; ridged side for meat, smooth side for eggs and potatoes.
Fats to your advantage: Start with the bacon/chorizo. They render and release useful fat; move them to a hot side to keep them crispy.
Hash browns: Mix the grated potatoes with salt; press onto the flat side to form thin patties. Cook untouched for 3–4 minutes; turn and repeat until golden brown.
Mushrooms and tomatoes: Sauté mushrooms with a knob of butter; brown tomatoes cut-side down until caramelised.
Eggs and bread: Grease a pan, crack the eggs and cook until done; toast the bread with the residual juices for extra flavour.
Assembly: Serve everything together, topped with chives and freshly ground black pepper.
Vegetarian variation
Replace bacon/chorizo with vegetarian sausages or strips of smoked tofu. Add strips of green pepper and quick-roasted beans heated in a corner of the griddle.
Recipe Wok-Style Street Food Stir-Fried Noodles on the Griddle
The smooth, wide and very stable surface of the Prestige/PRO/700 model allows you to simulate the dynamics of a flat wok: high temperatures, full contact and fast stir-frying. This recipe reproduces a stir-fry with noodles, crisp vegetables and strips of beef, with a smoky barbecue flavour.
Ingredients (4 servings)
320 g pre-cooked and drained wheat or rice noodles
350 g thinly sliced beef (chuck or silverside)
1 red pepper, julienned, 1 carrot, julienned, 150 g cabbage, chiffonade
150 g bean sprouts, 3 spring onions, 2 cloves garlic, chopped, and 1 small piece ginger, grated
3–4 tablespoons soy sauce, 1–2 tablespoons oyster sauce (optional), 1 tablespoon rice vinegar, 1 tablespoon honey
High-smoke vegetable oil (peanut, sunflower or rice)
Toasted sesame seeds and lime to finish
Steps to follow
Preheat: Heat the griddle smooth side for 10–12 minutes over medium-high heat. Lightly grease.
Sear the protein: Spread the beef in a single layer; do not move for 60–90 seconds to brown. Stir, cook for 1–2 minutes more and move to a hot side. >Aromatics and vegetables: Add a drizzle of oil, sauté garlic and ginger for 20 seconds; add pepper and carrot for 2–3 minutes; add cabbage for 1–2 minutes more. Keep crisp.
Noodles and sauce: Add the loose noodles. Mix soy sauce, oyster sauce, vinegar and honey; pour around so that it caramelises on contact. Stir fry with spatulas, using a ‘cut and fold’ technique so as not to break them up too much.
Combine and finish: Return the beef, add bean sprouts and spring onion; 30–60 seconds of final sautéing. Adjust seasoning with a touch of lime.
Serving: Sprinkle with sesame seeds. Serve piping hot, taking advantage of the light smokiness from the barbecue.
Vegetarian variation
Replace the beef with pressed and cubed firm tofu (or Heura/tempeh). First brown the tofu until it forms a crust, remove and continue as above. To intensify the flavour, add 1 teaspoon of miso diluted in the sauce.