Gas Barbecue Prestige Pro BIPRO – Napoleon

Price range: 2.899,00 € through 5.299,00 € (VAT inc.)

Natural gas and propane/butaneversions

SIZZLE ZONE™ infrared burners and grill back burners

9.5 mmWAVE™ stainless steel grates

SAFETY GLOW™ RGB™ interior lighting and controls

✅ Integrated smoking insert in top models

JETFIRE™ ignition system and electronic ignition

LIFT EASE™ Hoods and ACCU PROBE™Thermometer

✅ Designed in stainless steel with professional-grade materials.

✅ Napoleon® Presidential Limited Lifetime Warranty

Configure it to your liking

Clear selection

Complete your set

See more

Your selections

Total price

Métodos de pago

The Napoleon Prestige PRO BIPRO range represents the pinnacle of built-in barbecue design, designed for home chefs, food professionals and fire lovers looking to take outdoor cooking to the next level. This line offers an impressive combination of heat output, precision engineering, robust design and modern aesthetics, perfect for integration into high-end garden kitchens. With five models available – depending on gas type and number of burners – the versatility of the BIPRO series allows it to suit both residential spaces and demanding commercial projects.

🔩 Premium construction

Each Prestige PRO BIPRO unit is designed with an all 304 grade stainless steel construction, a material noted for its superior resistance to corrosion, extreme thermal changes and mechanical wear. The double-walled hood with LIFT EASE™ system is added to this, which provides an airtight seal, space-saving opening and highly efficient heat distribution. This hood is designed for even cooking in any climate.

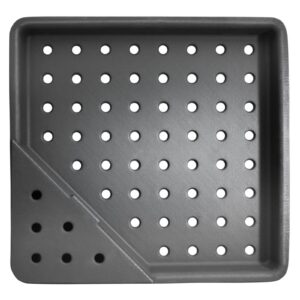
The iconic 9.5 mm solid stainless steel WAVE™ grids are designed not only for perfect grilling with defined grill marks but also to prevent small food items from falling through the gaps and to facilitate cleaning afterwards. The corrugated design improves temperature retention and provides more surface area in contact with the food, optimising the Maillard reaction.

This combination of materials and design makes the Prestige PRO BIPRO a long-term investment, capable of withstanding intensive use and the elements without losing functionality or aesthetics.

🔥 PProfessional-level cookingPower

One of the highlights of this range is its power: depending on the model, it offers from 21.7 kW to 33.3 kW, distributed between main tube burners, ceramic infrared burners and rotisserie back burners. This capacity not only makes it possible to reach high temperatures in seconds – ideal for searing meats and crispy crusts – but also to maintain constant low temperatures for slow cooking or indirect techniques.

Models equipped with the SIZZLE ZONE™ infrared zone use ceramic burners that reach temperatures of up to 980°C, which means fast, precise searing with no loss of juices. This is key for steakhouse-style steaks or caramelising vegetables without overcooking.

The arrangement of the burners, together with the stainless steel flame protection plates, ensures even heat distribution throughout the grill, eliminating cold spots and allowing multiple foods to be cooked at the same time without the risk of uneven cooking.

🌈 Intelligent Lighting and Total Control Safety

The Prestige PRO BIPRO series redefines the nighttime experience thanks to an advanced lighting system that integrates RGB SafetyGlow™ backlit control knobs, motion sensors, projected logo lighting on the floor and internal halogen lighting in the cooking chamber.

The SafetyGlow™ knobs change colour depending on the burner status: blue indicates off, red indicates gas flow. This provides an instant visual safety reading, useful both day and night. In addition, colours can be customised in spectrum or fixed mode (blue, white or green), with brightness adjustments from the control panel.

The integrated motion sensor automatically activates the lighting of controls and logo when someone comes within one metre. If there is no movement within 15 minutes, the lights turn themselves off to save energy. This is especially useful in dark environments or when accessing from poorly lit areas.

Meanwhile, the interior halogen lamps in the cooking chamber fully illuminate the grill surface, allowing the cooking point to be checked without the need to constantly open the lid or use external torches. All lighting is controlled from a single touch panel, which simplifies operation and provides a sense of luxury and state-of-the-art technology.

🌫️ Integrated Smoker Tray (Models 665 and 825)

The Prestige PRO 665 and PRO 825 models go one step further and incorporate a removable smoker tray with a dedicated burner hidden behind one of the controls. Simply pull the knob and slide the tray out to place wood chips (hickory, cherry, apple, walnut, etc.). The dedicated burner lights separately and heats the chips until they begin to smoke gently.

This functionality allows you to add a real smoked flavour profile without the need for additional equipment. Ideal for fish, ribs, vegetables or even desserts such as pineapple or roasted bananas with a woody aroma.

It’s a plus that turns these models into true outdoor cooking stations with the ability to perform combined cooking techniques: direct, indirect, infrared and smoking.

🛠️ Precision Integrated Installation

Prestige PRO BIPROs are designed for fixed installation in outdoor kitchen furniture made exclusively from non-combustible materials. Each model comes with exact installation specifications – height, depth and minimum distance to walls – to ensure safety, ventilation and proper heat dissipation.

They incorporate connection systems using rigid, flexible metallic or certified copper pipes, complying with European gas regulations (I3B/P, I3+, etc.). The ventilation and separation openings to house gas cylinders (when applicable) are also detailed in their technical manuals.

This level of precision and technical support allows the Prestige PRO BIPRO to be perfectly integrated into customised outdoor kitchens, guaranteeing both aesthetics and functional safety.

🔐 Active Ignition and Safety Systems

The main ignition system, JETFIRE™, uses a pilot flame to activate the burners safely and without failure, even in windy or wet conditions. This system avoids the need for multiple attempts or unsafe sparks.

In addition, models include independent electronic ignition for the rear burner and/or smoker zone, allowing these elements to be controlled separately, ignited instantly and extinguished safely.

Safety is further enhanced by sensors, non-return valves and certified elements that ensure safe operation at all times for both domestic users and commercial applications.

Bifunctional Design with Intelligent Control and Touch Technology

The entire Prestige PRO BIPRO range benefits from a central intelligent control panel, from which it is possible to manage lighting, colour spectrum mode, brightness level, switch on interior lights and more.

This design allows for a simplified, convenient and intuitive user experience, even for inexperienced users. The system remembers the settings before switching off and allows customised settings to be configured for different times of the day or cooking styles.

The result is a device that combines high performance with a modern, functional and highly visual user interface.

🧑‍🍳 Versatility for Professional Outdoor Kitchens

In addition to residential use, these models are fully capable for professional or semi-professional environments, such as restaurants with outdoor areas, high-end food trucks, mobile catering kitchens or villas with gourmet kitchens.

Their high thermal capacity, durability, variety of cooking techniques and ease of maintenance make them a reliable culinary partner for any chef who requires consistent results with style and technology.

📊 Master Model Comparator

With five variants available, the Napoleon Prestige PRO BIPRO series offers options for different needs, from compact residential projects to high-end outdoor kitchens. This comparison chart will help you understand which model best suits your space, your power source and your cooking style:

Model Gas Type No. of Burners (Total) Total Power Grill Area (cm) SIZZLE ZONE™ Smoker Tray No. of Chambers
Prestige PRO 500 Propane Propane/Butane 4 main + 1 rear 21,7 kW 71 x 45 1
Prestige PRO 500 GN Natural Gas 4 main + 1 rear 21,7 kW 71 x 45 1
Prestige PRO 665 Propane Propane/Butane 5 + 1 rear 27 kW 94 x 46 1
Prestige PRO 665 GN Natural Gas 5 + 1 rear 27 kW 94 x 46 1
Prestige PRO 825 Propane Propane 4 + 2 SIZZLE + 1 Rear 33,3 kW 72 + 47 x 46 2

🧰 Maintenance and Use

Optimise the lifespan and performance of your Napoleon grill with regular use and maintenance practices designed to ensure safety, efficiency and longevity.

🔧 Regular Maintenance for Greater Durability

The longevity of Napoleon grills is directly related to constant maintenance. It is recommended to thoroughly clean the grill after each use, including:

  • Cooking grates and warming grate: Use a bronze-bristled brush during preheating to remove any stuck-on residues. For persistent buildup, use an aluminium scouring pad.

  • Drip tray: Fat accumulation is a fire hazard. Always clean it after each cooking session to prevent unexpected flare-ups. Never cover it with aluminium foil or other materials.

  • External surfaces: Clean stainless steel parts with warm soapy water or non-abrasive cleaners, always following the grain of the metal to avoid scratches.

  • Inside of the bonnet: Use a metal brush to remove ingrained grease from the walls and lid.

Special note: Frequent use of sauces and salt during cooking can accelerate corrosion, especially if the grill is not cleaned immediately after use.

🔒 Safety Before Each Use

For a safe experience:

  • Annual inspection or after any modifications: Check for leaks, particularly at gas connections.

  • Hose inspection: Examine the condition of the gas hoses. If you notice cracks or wear, replace them immediately.

  • Safe ignition: Follow the specific instructions in the manual for the progressive ignition of the burners. Never do so with the lid closed or combine the rear burner with the main burners at the same time.

It is recommended to have a full inspection of the grill annually by qualified personnel.

🔥 Best Daily Use Practices

  • Preheating: Allow all burners to run on high for about 10 minutes before cooking.

  • Direct cooking: Ideal for grilled meats, burgers and vegetables.

  • Indirect cooking: Perfect for long roasts or foods that produce flare-ups, such as ribs or whole poultry.

  • Rear burner (if applicable): Use it with the rotisserie kit, and remember to remove the warming grate to avoid damage from intense heat.

  • Wind deflector: In areas with strong winds, install the included deflector to prevent flames from being blown back onto the control panel.

💡 Use of Lights and Electrical Components

  • Safety and ambient lights: These can be easily cleaned with soapy water and a soft cloth. Do not use abrasive cleaners that might scratch the lens.

  • Electrical precautions: Do not immerse cables, always use grounded plugs and disconnect the equipment before cleaning.

🧰 Maintenance and Use


Optimise the lifespan and performance of your Napoleon grill with regular use and maintenance practices designed to ensure safety, efficiency and longevity.


🔧 Regular Maintenance for Greater Durability


The longevity of Napoleon grills is directly related to constant maintenance. It is recommended to thoroughly clean the grill after each use, including:


  • Cooking grates and warming grate: Use a bronze-bristled brush during preheating to remove any stuck-on residues. For persistent buildup, use an aluminium scouring pad.


  • Drip tray: Fat accumulation is a fire hazard. Always clean it after each cooking session to prevent unexpected flare-ups. Never cover it with aluminium foil or other materials.


  • External surfaces: Clean stainless steel parts with warm soapy water or non-abrasive cleaners, always following the grain of the metal to avoid scratches.


  • Inside of the bonnet: Use a metal brush to remove ingrained grease from the walls and lid.


Special note: Frequent use of sauces and salt during cooking can accelerate corrosion, especially if the grill is not cleaned immediately after use.


🔒 Safety Before Each Use


For a safe experience:


  • Annual inspection or after any modifications: Check for leaks, particularly at gas connections.


  • Hose inspection: Examine the condition of the gas hoses. If you notice cracks or wear, replace them immediately.


  • Safe ignition: Follow the specific instructions in the manual for the progressive ignition of the burners. Never do so with the lid closed or combine the rear burner with the main burners at the same time.


It is recommended to have a full inspection of the grill annually by qualified personnel.


🔥 Best Daily Use Practices


  • Preheating: Allow all burners to run on high for about 10 minutes before cooking.


  • Direct cooking: Ideal for grilled meats, burgers and vegetables.


  • Indirect cooking: Perfect for long roasts or foods that produce flare-ups, such as ribs or whole poultry.


  • Rear burner (if applicable): Use it with the rotisserie kit, and remember to remove the warming grate to avoid damage from intense heat.


  • Wind deflector: In areas with strong winds, install the included deflector to prevent flames from being blown back onto the control panel.


💡 Use of Lights and Electrical Components


  • Safety and ambient lights: These can be easily cleaned with soapy water and a soft cloth. Do not use abrasive cleaners that might scratch the lens.


  • Electrical precautions: Do not immerse cables, always use grounded plugs and disconnect the equipment before cleaning.


Specifications

  • Type of Gas: Butane/Propane gas (30 mBar)
  • Burners:
    • Number of Main Burners: 4 stainless steel burners
    • Main Burner Material: Stainless steel
    • Rear Burner: Yes, stainless steel infrared type
  • Power:
    • Main Burners' Power: 16 kW
    • Rear Burner Power: 5.7 kW
    • Total Output: 21.7 kW
  • Grill Surface and Grates
    • Cooking Surface Dimensions: 71 cm (width) x 46 cm (depth)
    • Warming Grate Area: 72.5 cm x 22.5 cm
    • Grill Grate Material: Stainless steel in a 9.5 mm WAVE™ wavy design
    • Warming Grate Material: Stainless steel
    • Number of Cooking Chambers: 1
  • Dimensions and Weight
    • Lid Height: 32 cm
    • Overall Dimensions (W x D x H): 83 cm x 61 cm x 39 cm
    • Height with Lid Open: 52 cm
    • Item Weight: 65 kg
  • Installation Measurements
    • Installation Opening Width: 78.1 cm
    • Installation Opening Depth: 52.4 cm
    • Installation Opening Height: 22.5 cm
    • Minimum Distance from the Wall: 12.5 cm
  • Special Features
    • Main Ignition System: JETFIRE™ piezoelectric ignition system
    • Rear Burner Ignition: Electric
    • Control Knob with Illumination: Multicolour (RGB) SAFETY GLOW™
    • Interior Cooking Chamber Lighting: Yes, with halogen lamps
    • Required Power Outlet: Yes
    • Floor Lighting: Yes
  • Materials
    • Lid Material: Stainless steel with LIFT EASE™ system
    • Double-Walled Lid: Yes
    • Cooking Chamber Material: Cast aluminium
    • Grease Tray Material: Stainless steel, removable from the front
    • Flame Shield Plate Material: Stainless steel
  • Additional Equipment
    • Thermometer: Yes, ACCU PROBE™ model integrated into the lid
    • Electronic Ignition System: For the rear burner
    • JETFIRE™ Ignition System: Reliable ignition even in adverse conditions
    • Illuminated Knobs: Configurable RGB
    • SAFETY GLOW™ Security Lights: Blue (off) / Red (gas on)
    • Halogen Lamps: Located at the top corners of the cooking chamber

Specifications

  • Type of gas: Natural gas

  • Burners:
    • Number of main burners: 4 stainless steel burners

    • Main burner material: Stainless steel

    • Rear burner: Yes, stainless steel infrared type

  • Power:
    • Main burners' power: 16 kW

    • Rear burner power: 5.7 kW

    • Total output: 21.7 kW

  • Grill Surface and Grates:
    • Cooking surface dimensions: 71 cm (width) x 46 cm (depth)

    • Warming grate area: 72.5 cm x 22.5 cm

    • Grill grate material: Stainless steel in a 9.5 mm WAVE™ wavy design

    • Warming grate material: Stainless steel

    • Number of cooking chambers: 1

  • Dimensions and Weight:
    • Barbecue dimensions
      • Lid height: 32 cm

      • Overall dimensions (W x D x H): 83 cm x 61 cm x 39 cm

      • Height with lid open: 52 cm

    • Item weight: 65 kg

    • Installation Measurements:
      • Installation opening width: 78.1 cm

      • Installation opening depth: 52.4 cm

      • Installation opening height: 22.5 cm

      • Minimum distance from the wall: 12.5 cm

  • Special Features:
    • Main ignition system: JETFIRE™ piezoelectric ignition system

    • Rear burner ignition: Electric

    • Illuminated control knob: Multicolour (RGB) SAFETY GLOW™

    • Interior lighting of the cooking chamber: Yes, with halogen lamps

    • Required power socket: Yes

    • Floor lighting: Yes

  • Materials:
    • Lid material: Stainless steel with LIFT EASE™ system

    • Double-walled lid: Yes

    • Cooking chamber material: Cast aluminium

    • Grease tray material: Stainless steel, removable from the front

    • Flame protection plates material: Stainless steel

  • Additional Equipment:
    • Thermometer: Yes, ACCU PROBE™ model integrated into the lid

    • Electronic ignition system: For the rear burner

    • JETFIRE™ ignition system: Reliable ignition even in adverse conditions

    • Illuminated knobs: Configurable RGB

    • SAFETY GLOW™ security lights: Blue (off) / Red (gas on)

    • Halogen lamps: Located at the upper corners of the cooking chamber

Specifications

  • Type of Gas: Natural gas

  • Burners:
    • Number of Main Burners: 5 stainless steel burners

    • Main Burner Material: Stainless steel

    • Rear Burner: Yes, stainless steel infrared type

    • Incense Burner (for integrated smoker): 2.5 kW

  • Power:
    • Main Burners' Power: 19 kW

    • Rear Burner Power: 5.5 kW

    • Incense Burner Power: 2.5 kW

    • Total Output: 27 kW

  • Grill Surface and Grates:
    • Cooking Surface Dimensions: 94 cm (width) x 46 cm (depth)

    • Warming Grate Area: 94.5 cm x 22.5 cm

    • Grill Grate Material: Stainless steel in a 9.5 mm WAVE™ wavy design

    • Number of Cooking Chambers: 1

  • Dimensions and Weight:
    • Barbecue Dimensions
      • Lid Height: 32 cm

      • Overall Dimensions (W x D x H): 106 cm x 65 cm x 43 cm

      • Height with Lid Open: 55 cm

    • Item Weight: 89 kg

    • Installation Measurements:
      • Installation Opening Width: 96.5 cm

      • Installation Opening Depth: 52.4 cm

      • Installation Opening Height: 22.5 cm

      • Minimum Distance from the Wall: 12.5 cm

  • Special Features:
    • Main Ignition System: JETFIRE™ piezoelectric ignition system

    • Rear Burner Ignition: Electric

    • Illuminated Control Knob: Multicolour (RGB) SAFETY GLOW™

    • Interior Lighting of the Cooking Chamber: Yes, with halogen lamps

    • Required Power Socket: Yes

    • Floor Lighting: Yes

    • Motion Detector: Yes

  • Materials:
    • Lid Material: Stainless steel with LIFT EASE™ system

    • Double-walled Lid: Yes

    • Cooking Chamber Material: Cast aluminium

    • Grease Tray Material: Stainless steel, removable

    • Flame Protection Plates Material: Stainless steel

  • Additional Equipment:
    • Thermometer: Yes, ACCU PROBE™ model integrated into the lid

    • Electronic Ignition System: For the rear burner

    • JETFIRE™ Ignition System: Reliable ignition even in adverse conditions

    • Illuminated Knobs: Configurable RGB

    • SAFETY GLOW™ Security Lights: Blue (off) / Red (gas on)

    • Integrated Smoking Insert: Yes, with dedicated burner

    • Napoleon Logo Projection on the Floor: Yes

Specifications

  • Type of Gas: Propane/Butane (30 mBar)

  • Burners:
    • Number of Main Burners: 4 stainless steel burners + 2 infrared SIZZLE ZONE™

    • Main Burner Material: Stainless steel

    • Rear Burner: Yes, stainless steel infrared type

    • Incense Burner (for integrated smoker): 2.5 kW

    • Additional Burner for Keeping Warm: 2.5 kW

  • Power:
    • Main Burners' Power (Tube): 15.2 kW

    • SIZZLE ZONE™ Infrared Burners' Power: 7.6 kW

    • Rear Burner Power: 5.5 kW

    • Incense Burner Power: 2.5 kW

    • Power of the Burner for Keeping Warm: 2.5 kW

    • Total Output: 33.3 kW

  • Grill Surface and Grates:
    • Cooking Surface Dimensions: (72 + 47) cm x 46 cm (two cooking chambers)

    • Warming Grate Area: 72.5 cm x 22.5 cm + 42.5 cm x 22.5 cm

    • Grill Grate Material: Stainless steel in a 9.5 mm WAVE™ wavy design

    • Number of Cooking Chambers: 2

  • Dimensions and Weight:
    • Barbecue Dimensions
      • Lid Height: 32 cm

      • Overall Dimensions (W x D x H): 142 cm x 65 cm x 43 cm

      • Height with Lid Open: 55 cm

      • Item Weight: 114 kg

  • Installation Measurements:
    • Installation Opening Width: 133 cm

    • Installation Opening Depth: 52.4 cm

    • Installation Opening Height: 22.5 cm

    • Minimum Distance from the Wall: 12.5 cm

  • Special Features:
    • Main Ignition System: JETFIRE™ piezoelectric ignition system

    • Rear Burner Ignition: Electric

    • Illuminated Control Knob: Multicolour (RGB) SAFETY GLOW™

    • Interior Lighting of the Cooking Chamber: Yes, with halogen lamps

    • Required Power Socket: Yes

    • Floor Lighting: Yes

    • Motion Detector: Yes

  • Materials:
    • Lid Material: Stainless steel with LIFT EASE™ system

    • Double-walled Lid: Yes

    • Cooking Chamber Material: Cast aluminium

    • Grease Tray Material: Stainless steel, removable

    • Flame Protection Plates Material: Stainless steel

  • Additional Equipment:
    • Thermometer: Yes, ACCU PROBE™ model integrated into the lid

    • Electronic Ignition System: For the rear burner and the infrared burner

    • JETFIRE™ Ignition System: Reliable ignition even in adverse conditions

    • Illuminated Knobs: Configurable RGB

    • SAFETY GLOW™ Security Lights: Blue (off) / Red (gas on)

    • Integrated Smoking Insert: Yes, with a dedicated burner

    • SIZZLE ZONE™ Infrared Zone: Yes, two ceramic infrared burners for searing meats

    • Napoleon Logo Projection on the Floor: Yes

🍛 Chicken Curry with Coconut Milk in Papillote

  • 👨‍🍳 Level:Easy
  • ⏱ Total Time:30 minutes
  • 🔥 Recommended Technique:Indirect cooking
  • 👨‍👩‍👧‍👦 Servings:2–4 people

🛒 Ingredients

  • 2 boneless, skinless chicken breasts, cut into strips
  • 200 ml coconut milk
  • 1 tablespoon red or yellow curry paste (to taste)
  • 1 teaspoon ground turmeric
  • 1 teaspoon freshly grated ginger
  • 2 garlic cloves, chopped
  • 1 red onion, thinly sliced into julienne
  • 1 carrot, cut into batons
  • ½ red pepper, cut into strips
  • ½ courgette, thinly sliced
  • Juice of ½ lime
  • 1 teaspoon brown sugar
  • Fresh coriander, to taste
  • Olive oil or coconut oil
  • Salt and pepper
  • Thick aluminium foil or baking parchment

🔧 Necessary Utensils

  • Barbecue with lid (for indirect cooking)
  • Tongs
  • Mixing bowl
  • Knife and chopping board
  • Aluminium foil or baking paper

🔥 Cooking on the Napoleon Prestige PRO 500 Barbecue

1. Prepare the Papillote

In a large bowl, combine the coconut milk with the curry paste, ginger, garlic, turmeric, sugar, salt, pepper and lime juice. Add the chicken and allow it to marinate for at least 10 minutes (preferably 1 hour in the fridge).

On a large sheet of aluminium foil (or baking paper), lay down a bed of vegetables (onion, carrot, pepper, courgette). Top with the chicken and marinade. Seal the papillote tightly by folding the edges to ensure no steam escapes.

2. Preheat the Grill

Turn on 2 of the 4 side burners and leave the central burners off to create an area forindirect cooking. Preheat the barbecue to approximately180–200 °Cwith the lid closed for 10 minutes.

3. Cook the Papillote

Place the papillote in the indirect heat zone. Close the lid and cook for15 to 20 minutes, depending on the thickness of the pieces. The internal steam will cook the chicken evenly, keeping all the juices and flavours sealed within the packet.

4. Presentation

Carefully open the papillote (steam will escape). Serve directly with jasmine or basmati rice, garnish with fresh coriander and a little extra squeeze of lime.


✅ Advantages of Cooking This Recipe on Your Napoleon Prestige PRO 500

  • ✔️ Indirect cooking helps retain all the flavours and juices without risking overcooking the chicken.
  • ✔️ The grill grates remain clean thanks to the papillote.
  • ✔️ Ideal for cooking directly on the barbecue without the need for extra utensils.
  • ✔️ Can be adapted to use the rear burner to caramelise if the papillote is opened at the end.

🍑 Grilled Peaches with Brown Sugar and Vanilla Ice Cream

Easy and Elegant Grilled Dessert | Ready in 10–12 minutes

🔥 Ideal for:

  • Models:Napoleon Prestige PRO 500 (Propane or Natural Gas)
  • Technique:Direct cooking
  • Suggested Accessories:Main grate + tongs or a silicone spatula

🧾 Ingredients (for 4 people):

  • 2 ripe but firm peaches (yellow or white)
  • 2 tablespoons ofbrown sugar
  • 1 tablespoon ofmelted butter
  • 1 pinch ofcinnamon(optional)
  • 1 teaspoon ofvanilla extract
  • Vanilla ice cream (1 scoop per person)
  • Fresh mint leaves (for garnish)
  • Toasted walnuts or slivered almonds (optional)

🍴 Preparation:

  1. Prepare the Peaches:
    • Wash the peaches andcut them in half, removing the pit.
    • In a bowl, mix the butter, sugar, vanilla and cinnamon.
    • Generously brush thecut sideof the peaches with the mixture.
  2. Preheat the Barbecue:
    • Turn on themain burnersand preheat to medium-high heat (200–220 °C).
    • Oil and thoroughly clean the grates before placing the peaches.
  3. Grill the Peaches:
    • Place themcut side downon the grate.
    • Grill for 3–5 minutes until caramelised and grill marks appear.
    • Turn and cook for an additional 1–2 minutes on the skin side.
  4. Serve:
    • Serve hot witha scoop of vanilla ice cream.
    • Garnish withfresh mintand, optionally, toasted walnuts or a drizzle of honey.

💡 Grill Master's Tips:

  • You can substitute the peaches withnectarines, apricots or pears.
  • Use theinternal lightingto monitor the caramelisation.
  • Add a splash ofdark rum or amaretto liqueurfor a gourmet touch.

📸 Presentation Suggestion:

Serve on a rustic plate or slate board. The contrast between the hot peach and the melting ice cream creates a picture‐perfect dish.

🐟 Salmon with Miso and Sesame Crust on Cedar

Exclusive Recipe for Napoleon Prestige PRO 665

Elevate your outdoor cooking with this gourmet recipe that makes the most of thePrestige PRO 665. Thanks to its integrated smoker tray and precise temperature control, you can prepare this cedar salmon with a caramelised miso crust—crispy on the outside and juicy on the inside. A perfect fusion of Japanese technique and Canadian precision!

🧾 Ingredients (serves 4)

  • Salmon:1 large salmon fillet (approx. 800 g) with skin
  • 1 cedar wood plank (soaked for 1 hour)
  • 1 tablespoon sesame oil
  • Sea salt flakes, to taste
  • Miso Crust:
    • 3 tablespoons white miso (shiro miso)
    • 1 tablespoon honey
    • 1 tablespoon mirin (or a mild white wine)
    • 1 tablespoon light soy sauce
    • 1 teaspoon rice vinegar
    • ½ teaspoon freshly grated ginger
    • 1 tablespoon toasted sesame seeds

🔥 Preparation on the Napoleon Prestige PRO 665

  1. Preheat the Grill:Preheat the grill and place the cedar plank directly on the grates in theindirect zone. Wait 5 minutes until it starts to smoke.
  2. Adjust the burners to maintain a temperature of180–200 °C. If desired, addapplewood chipsinto the integrated smoker tray to enhance the aroma.
  3. In a bowl, mix all the ingredients for the crust until you obtain a homogeneous paste. Place the salmon fillet on the plank and generously spread the mixture over the top. Sprinkle the sesame seeds over it.
  4. Close the lid and cook for20–25 minutes. The miso will caramelise to form a delicious crust. Do not move or turn the salmon.
  5. Carefully remove the plank, allow to rest for 2–3 minutes and serve directly on the wood. Accompany with jasmine rice and grilled asparagus.

💡 Chef's Tip

For a more intense flavour, substitute white miso with red miso (akamiso). This recipe also works for individual portions: simply reduce the cooking time to 12–15 minutes.

🍑 Grilled Peaches with Brown Sugar and Vanilla Ice Cream

Easy and Elegant Grilled Dessert | Ready in 10–12 minutes

🔥 Ideal for:

  • Models:Napoleon Prestige PRO 500 (Propane or Natural Gas)
  • Technique:Direct cooking
  • Suggested Accessories:Main grate + tongs or a silicone spatula

🧾 Ingredients (for 4 people):

  • 2 ripe but firm peaches (yellow or white)
  • 2 tablespoons ofbrown sugar
  • 1 tablespoon ofmelted butter
  • 1 pinch ofcinnamon(optional)
  • 1 teaspoon ofvanilla extract
  • Vanilla ice cream (1 scoop per person)
  • Fresh mint leaves (for garnish)
  • Toasted walnuts or slivered almonds (optional)

🍴 Preparation:

  1. Prepare the Peaches:
    • Wash the peaches andcut them in half, removing the pit.
    • In a bowl, mix the butter, sugar, vanilla and cinnamon.
    • Generously brush thecut sideof the peaches with the mixture.
  2. Preheat the Barbecue:
    • Turn on themain burnersand preheat to medium-high heat (200–220 °C).
    • Oil and thoroughly clean the grates before placing the peaches.
  3. Grill the Peaches:
    • Place themcut side downon the grate.
    • Grill for 3–5 minutes until they caramelise and show grill marks.
    • Turn and cook for an additional 1–2 minutes on the skin side.
  4. Serve:
    • Serve hot witha scoop of vanilla ice cream.
    • Garnish withfresh mintand optionally with toasted walnuts or a drizzle of honey.

💡 Grill Master's Tips:

  • You can substitute the peaches withnectarines, apricots or pears.
  • Use theinternal lightingto monitor the degree of caramelisation.
  • Add a splash ofdark rum or amaretto liqueurfor a gourmet twist.

📸 Presentation Suggestion:

Serve on a rustic plate or slate board. The contrast between the hot peach and the melting ice cream creates a picture‐perfect dish.

🥩 Tomahawk Seared in SIZZLE ZONE™ and Finished with Butter

Recommended Model:Napoleon Prestige PRO 825

  • 🔥 SIZZLE ZONE™ for quick, powerful searing
  • 🔥 Main cooking chamber for indirect cooking
  • ✅ Ideal for thick cuts and mixed techniques

🍽️ Ingredients (serves 2)

  • 1 Tomahawk steak (1.2 – 1.5 kg, at least 4 cm thick)
  • Sea salt and black pepper, to taste
  • 2 garlic cloves (crushed)
  • 2 sprigs of fresh rosemary
  • 2 sprigs of thyme
  • 50 g unsalted butter
  • Extra virgin olive oil

🧈 Optional Aromatic Butter

  • 50 g unsalted butter
  • 1 teaspoon Dijon mustard
  • 1 garlic clove, grated
  • Zest of ½ lemon
  • 1 tablespoon chopped fresh parsley
  • Black pepper, to taste

Tip:Mix all the ingredients, shape into a roll using cling film, and refrigerate.

🔪 Pre-Cooking Preparation

  1. Pat the Tomahawk dry with absorbent paper.
  2. Generously season both sides with salt and pepper.
  3. Allow it to come to room temperature for 30 minutes before cooking.

🔥 Cooking Steps on the Prestige PRO 825

1. Preheat the SIZZLE ZONE™

Turn on the two ceramic burners and allow them to reach their maximum temperature (980 °C) for 5–8 minutes.

2. Sear the Tomahawk

Place the steak on the SIZZLE ZONE™ grate for 1.5 to 2 minutes per side. Rotate 90° to create diamond-shaped marks, and also sear the edges.

3. Indirect Cooking

  • Turn off the SIZZLE ZONE™ and transfer the Tomahawk to the main cooking chamber.
  • Use only the side burners, set to 120–140 °C.
  • Cook until the desired internal temperature is reached:
DonenessInternal Temperature
Rare50 °C
Medium54 °C–57 °C
Medium Well63 °C–65 °C

4. Finishing with Butter

During the final 5 minutes, add the garlic, thyme, rosemary, and butter on top of the meat. Use a spoon to baste the steak with the melted butter. Close the lid to infuse the flavours.

5. Resting

Remove the Tomahawk from the grill and let it rest for 10 minutes, loosely covered with aluminium foil. This allows the juices to redistribute.

✨ Result

A steak with a caramelised crust, a juicy interior, and an aromatic finish thanks to the butter and herbs. A true steakhouse delight.

🍷 Suggested Pairing

  • Wine:Cabernet Sauvignon, Syrah or Malbec
  • Beer:Imperial Stout or Red IPA