
Pizza Dough Proofing Tray – Gozney

49,99 € (VAT inc.)

✅ Let your pizza dough prove and organise it on a tray specifically designed to better control the proving process and ensure your portions are always ready.

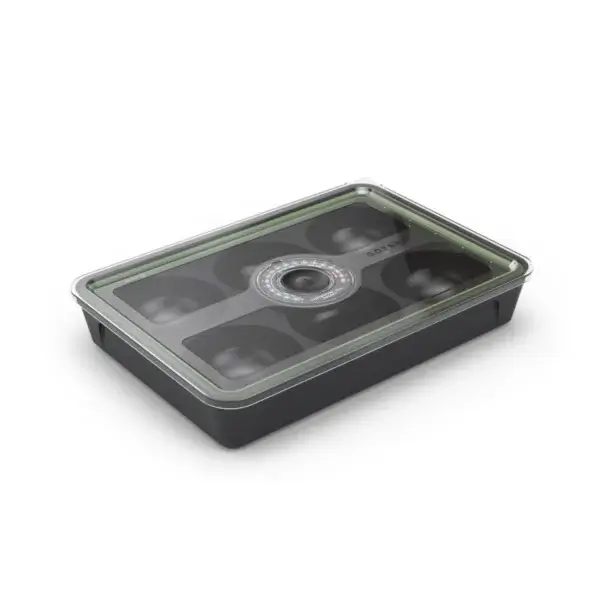
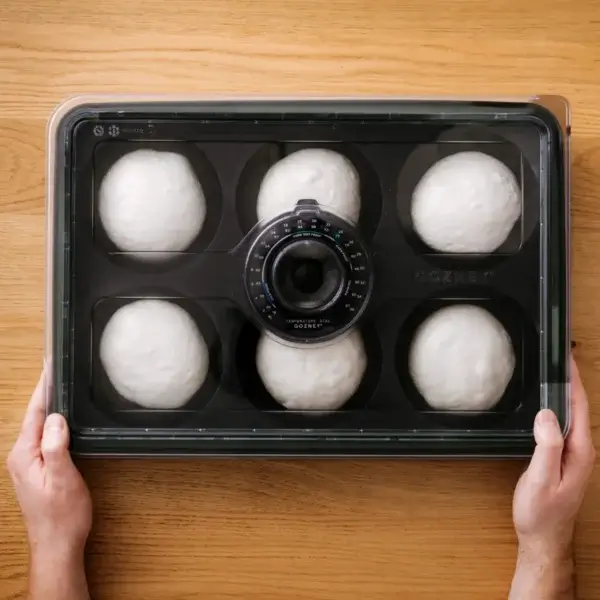
✅ Airtight seal with a pressure-release valve to keep the dough in a sealed environment during the proving process.

✅ Built-in temperature gauge to give you a clear indication of the conditions in which the dough is proving.

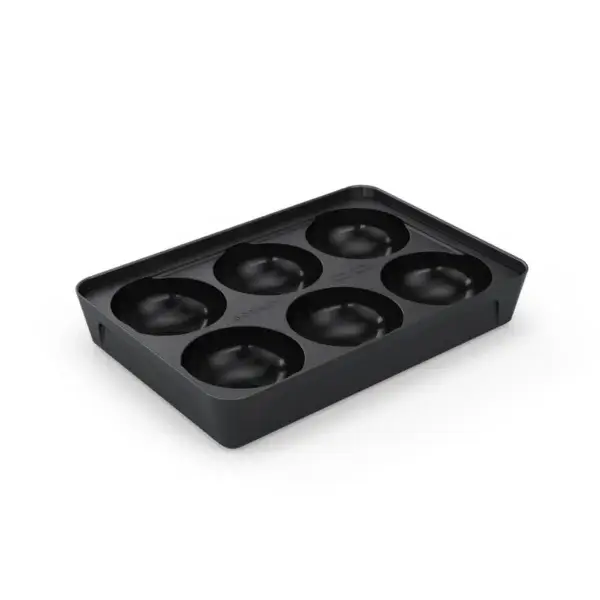
✅ Removable, non-stick silicone insert that helps the dough balls retain their shape and makes them easier to remove when it’s time to prepare the pizza.

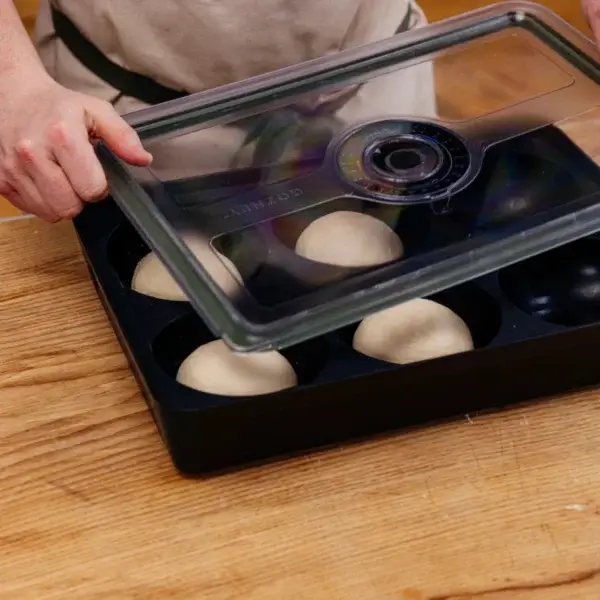
✅ Transparent, heat-resistant and durable lid so you can visually monitor the dough’s progress without losing sight of it.

✅ Lightweight and suitable for most domestic fridges, measuring 39 × 29 × 7 cm, ideal for organising dough and working comfortably with cold fermentation.

Out of stock

SKU: AD1646 Category:
Métodos de pago

The Gozney Dough Tray is a pizza dough proving tray designed for those who make their own dough and want to better organise one of the processes that most influences the final result.

Its design combines a dedicated dough container with various features intended to make it easier to monitor the process. It is particularly useful when you prepare several dough balls in advance, want to keep them organised, or are working with dough that needs to be transferred from the worktop to the fridge.

More than just a simple storage box, the Dough Tray brings together in a single system the area for the dough balls, a transparent lid and various features to help you better monitor their environment as they develop.

Airtight seal
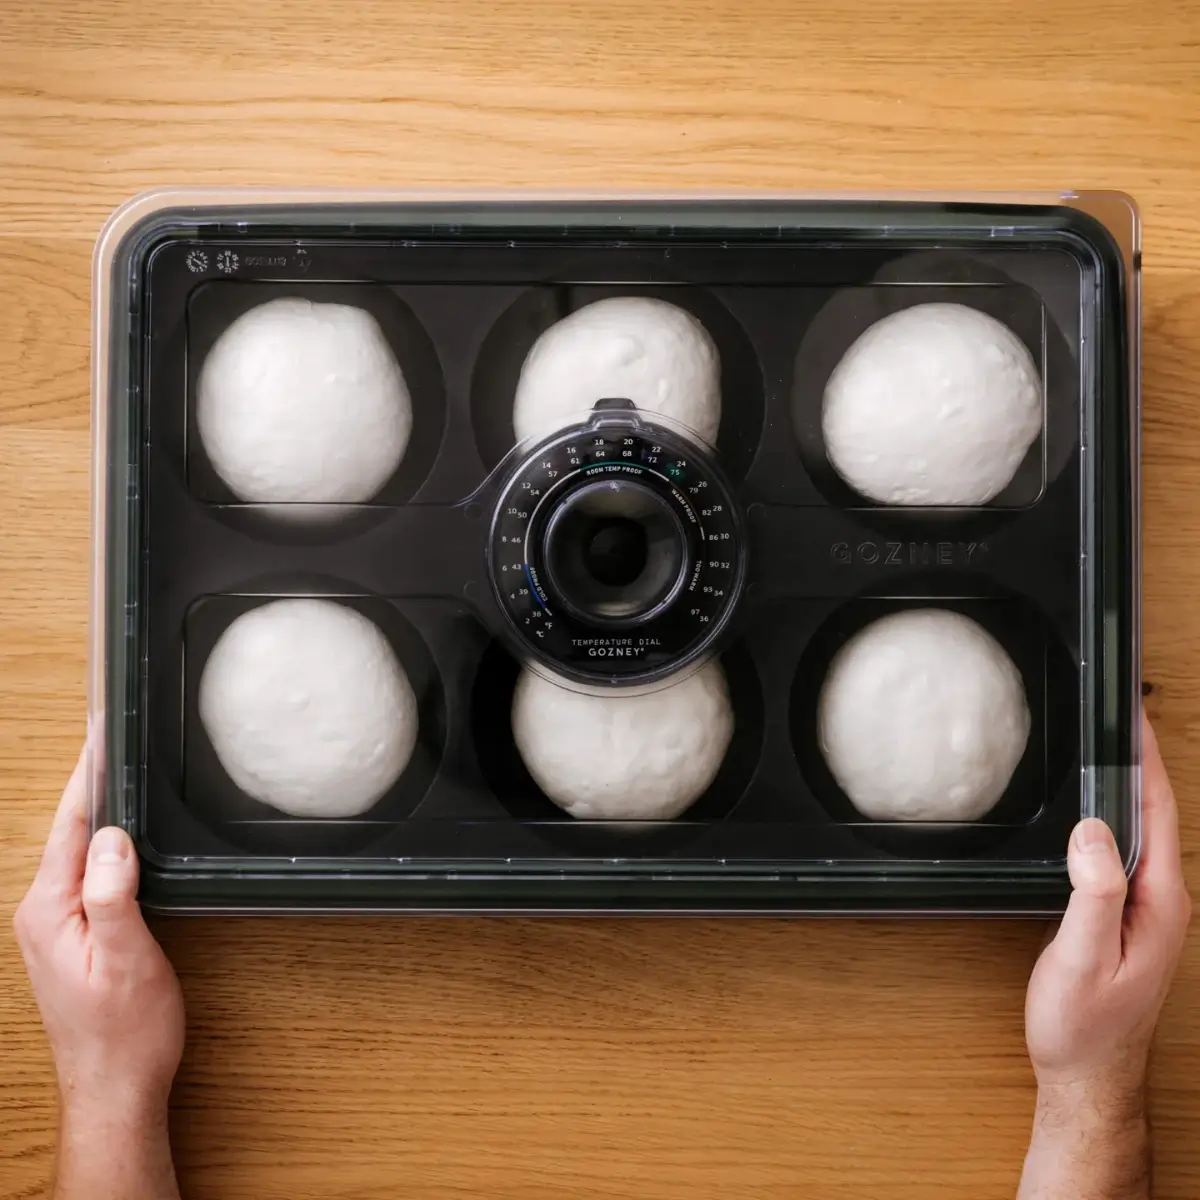
Bandeja Gozney cerrada con bolas de masa de pizza durante la fermentación

The lid features an airtight seal to keep the dough in a sealed environment whilst it proves. This is a significant difference compared to simply storing the dough balls in an open container or one covered in a makeshift manner.

The aim is to have a dedicated space for proving and fermentation, so that you can prepare the portions, place them on the tray and leave them to develop within the same container.

For those who make pizza regularly, this also makes organisation easier: the dough balls are kept together and ready for the next stage of preparation.

Pressure release valve

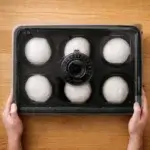
Bandeja Gozney cerrada con válvula central de liberación de presión

The system incorporates a pressure-release valve, integrated into the lid alongside the other components designed to better control the fermentation environment.

This allows you to manage the internal pressure without compromising the sealed container design provided by the airtight seal. Gozney combines both elements specifically with the dough proving process in mind.

It is one of those details that distinguishes a tray designed for dough fermentation from a conventional storage box.

Temperature indicator

The lid also features a temperature gauge. This provides an additional indication of the environment in which the dough is proving and allows you to monitor the process with more information than when using a conventional container.

Temperature is one of the parameters you can monitor whilst managing proving times, both when the Dough Tray is kept at room temperature and when you move it to the fridge.

The indicator is for checking the temperature; it should not be confused with an active cooling, heating or thermostatic control system.

Silicone insert for shaping and removing dough balls
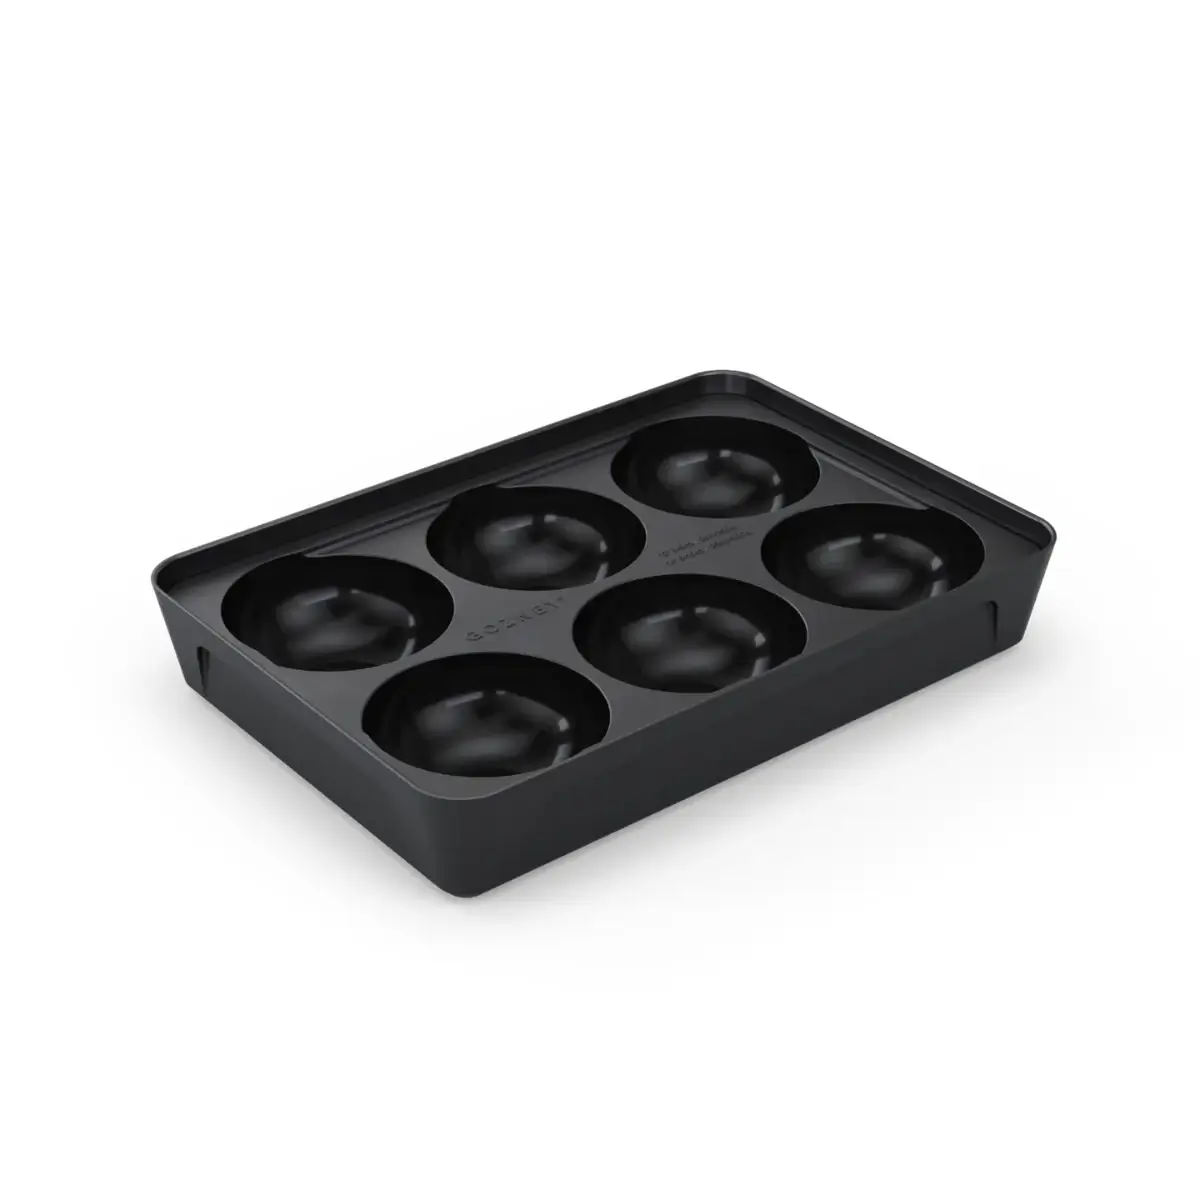
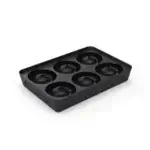
Bandeja Gozney abierta con inserto de silicona para bolas de masa de pizza

Inside, there is a removable, non-stick silicone insert designed to hold the dough balls. Its design helps them to take on a good shape during the proving process.

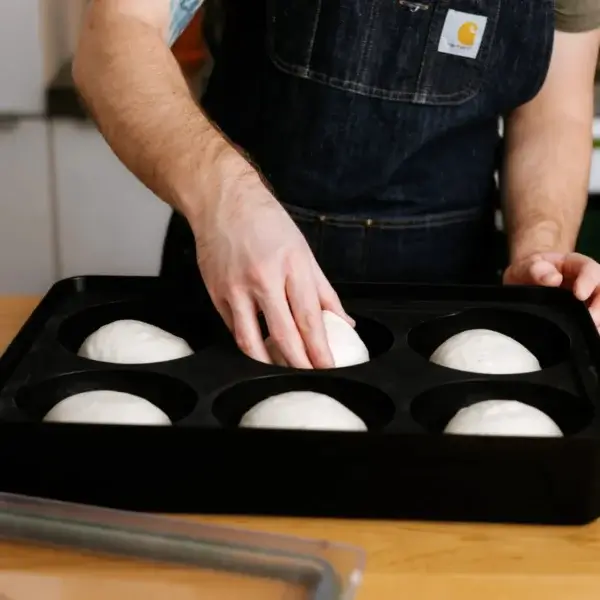
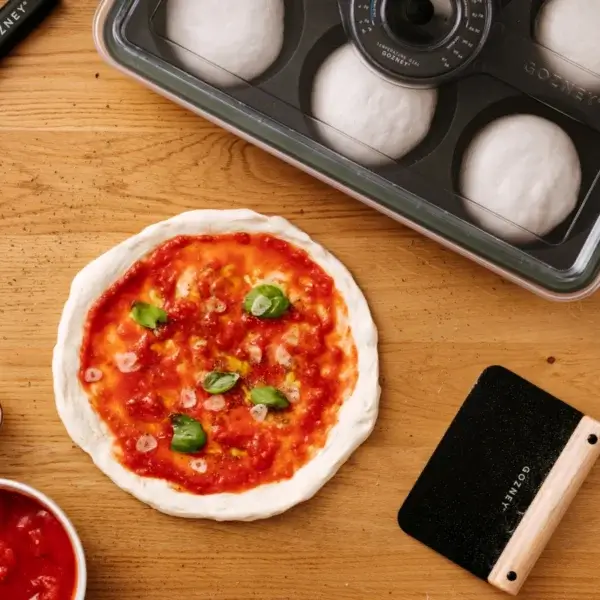
When it’s time to prepare the pizza, the silicone insert is designed to make it easy to remove the rounded portions. This is particularly handy when you’ve prepared the dough balls in advance and want to handle them as needed before rolling them out.

Furthermore, as it is removable, the insert and the base do not form a single permanent piece: the system is designed so that you can remove the inner tray whenever you need to.

Transparent, heat-resistant lid
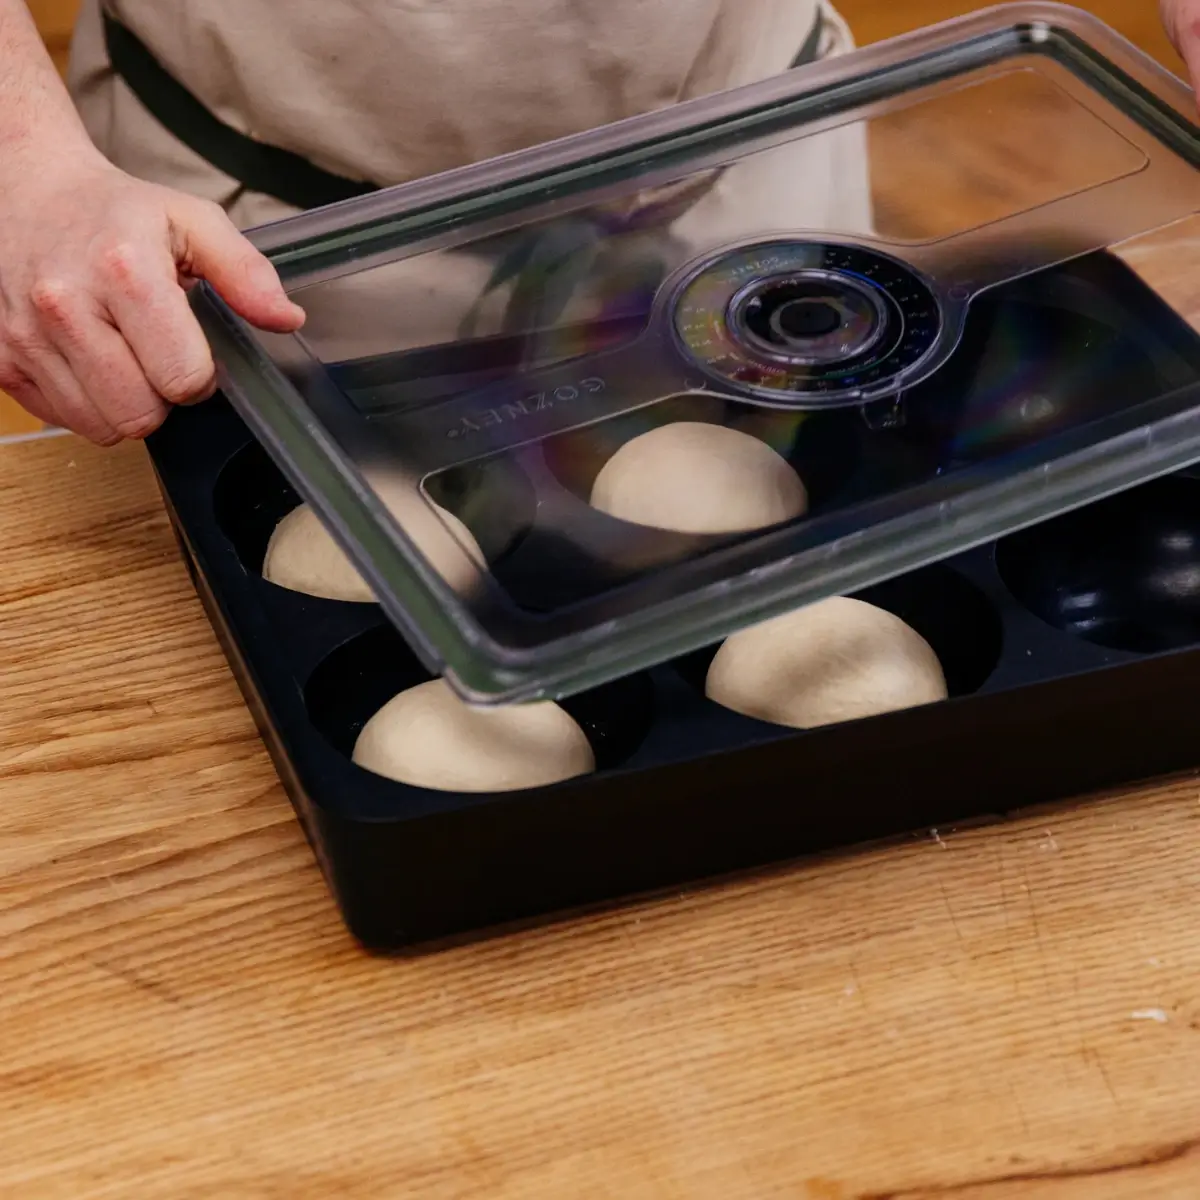
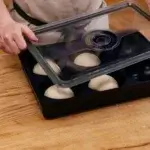
Manos abriendo la tapa transparente de una bandeja Gozney con bolas de masa

The transparent lid allows you to observe the dough balls without losing sight of how they’re developing. For a proving process that can last for hours, being able to visually check how they’re changing is much more convenient than working with an opaque cover.

Gozney also specifies that the lid is heat-resistant and durable, so it is not simply a transparent cover added to the set, but a component developed for the tray’s regular use.

The combination of visibility and sturdy construction works particularly well if you make pizza regularly and want to monitor the process without complicating it.

Sturdy yet lightweight base
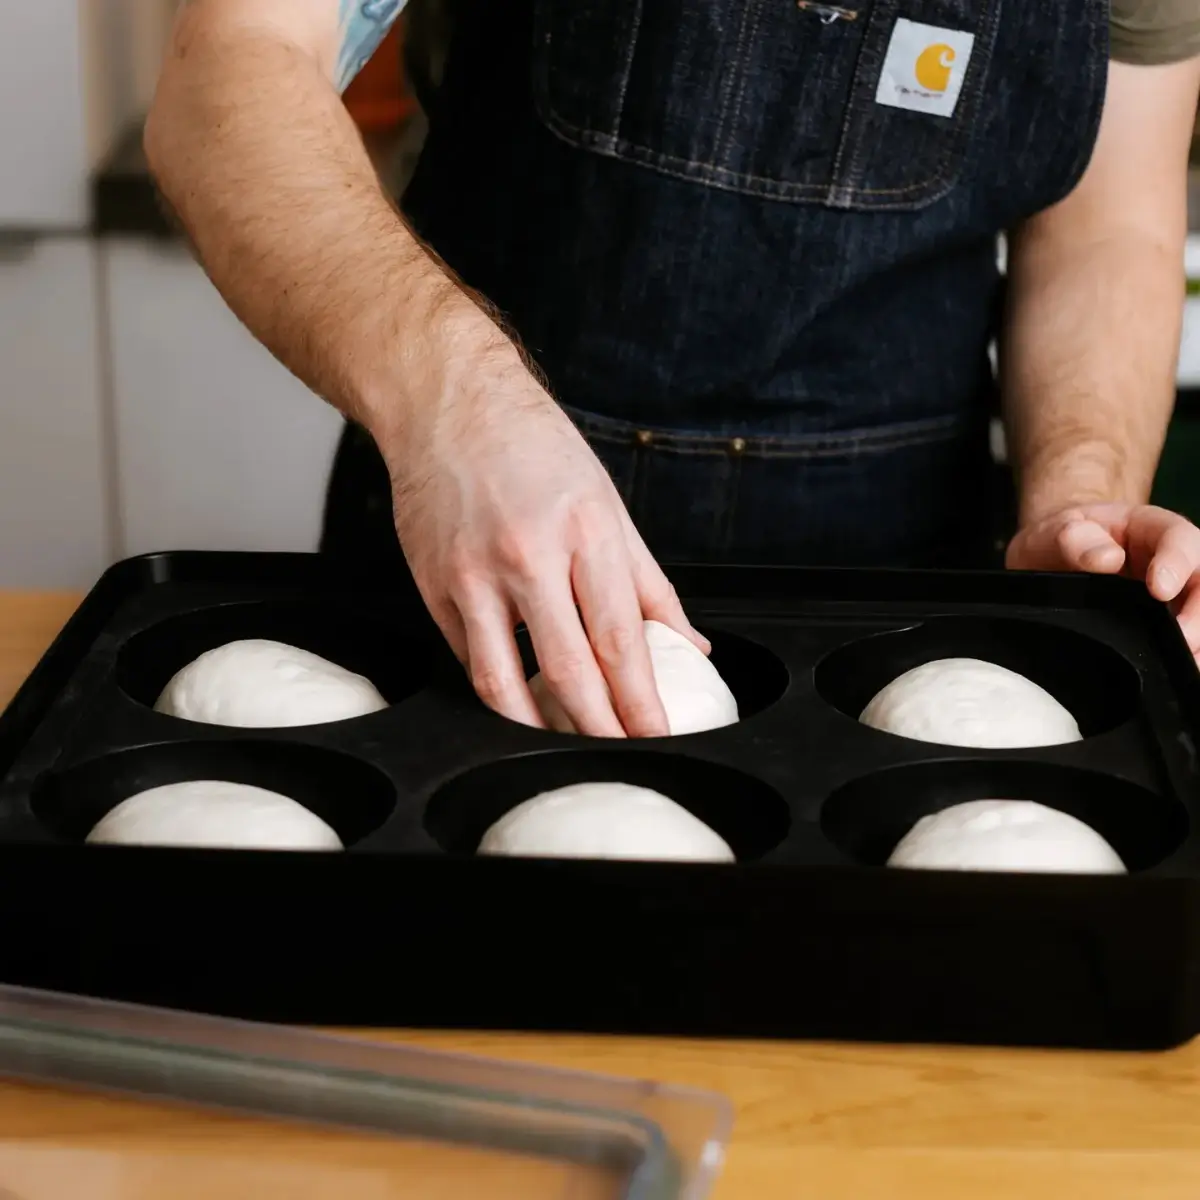
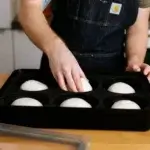
Persona manipulando una bola de masa junto a una bandeja de fermentación Gozney

Gozney describes the Dough Tray’s base as sturdy and lightweight – two qualities that are particularly useful in a container that may be moved several times between the preparation area and the place where you leave the dough to prove or rest.

A lightweight design makes this day-to-day handling easier, whilst the sturdy construction is designed to withstand the repeated use typical of those who make pizza dough regularly.

It can also be used to keep your dough organised whilst you wait for the next step in the recipe, even when you’re not currently cooking outdoors.

Designed to fit domestic fridges

According to the manufacturer, the Gozney pizza dough proving tray is designed to fit into most domestic fridges, measuring 39 × 29 × 7 cm. This is particularly useful when the recipe requires you to move the dough balls from the worktop to the fridge.

This allows you to incorporate the tray into your everyday routine without relying on large-format professional containers: you can prepare the portions, keep them together and place the whole lot in the fridge when your proving process requires it.
Use and maintenance of the Gozney Dough Tray

First use

  1. Familiarise yourself with the components. The Dough Tray consists of a lightweight base, a removable silicone insert for the dough balls and a transparent lid incorporating an airtight seal, pressure-release valve and temperature indicator.
  2. Check the assembly before filling it. Visually check that the insert is correctly positioned and that the lid, seal, valve and indicator are free from residue and show no visible signs of damage.
  3. Prepare the surface according to the recipe. In its official dough instructions, Gozney recommends placing the dough balls in a lightly oiled Dough Tray. Oiling does not need to be treated as a universal rule: apply it when specified by the recipe you are following.

During proofing

Dough balls proofing inside the closed Gozney Dough Tray
  1. Place the dough balls apart and close the lid. The silicone insert is designed to help the dough develop a rounded shape and make it easier to remove each portion afterwards.
  2. Keep the dough covered. Gozney recommends keeping dough covered while it proofs. The Dough Tray lid incorporates an airtight seal and pressure-release valve specifically designed for this process.
  3. Monitor the temperature. Use the integrated indicator as a reference for the proofing environment. A colder room slows the process, while a warmer room speeds it up, so the timing given in a recipe should be considered together with the temperature.
Important: the indicator allows you to check the temperature, but it does not heat or cool the tray. The Dough Tray also does not replace the proofing times and temperatures specified in each recipe.

After proofing

Removing a dough ball from the Gozney proofing tray
  1. Open the tray when the dough is ready. The correct timing will depend on the formula, the amount of yeast or sourdough starter, the temperature and the type of fermentation you are carrying out.
  2. Remove the dough balls carefully. The internal support is made from removable, non-stick silicone and is specifically designed to make it easier to remove the dough balls while helping them retain their shape.
  3. If you have cold-proofed the dough, follow the timings in your recipe. Some official Gozney recipes allow the dough balls to return towards room temperature for several hours before shaping, but the exact period varies from one dough to another.

Cleaning

The silicone insert is removable, allowing this component to be separated from the base whenever the assembly needs to be inspected or cleaned.

The official Gozney Dough Tray product information reviewed does not currently specify a particular washing procedure or confirm whether the product should be hand-washed or can be placed in a dishwasher. For this reason, we do not recommend assuming either method without first checking the instructions supplied with the unit.

Pay particular attention to ensuring that no dough residue remains around the insert, closing area, seal or integrated lid components before storing the product again.

Maintenance

  • Silicone insert: periodically check that it is correctly seated and shows no visible signs of damage.
  • Airtight seal: check that the closing area remains free from residue that could interfere with contact between the lid and base.
  • Pressure valve: keep it free from residue and do not force its mechanism.
  • Temperature indicator: use it as a reading device and avoid unnecessary impacts to the lid.
  • Transparent lid: check its overall condition before each new proofing cycle.

Storage

During cold proofing, Gozney states that the Dough Tray fits in most domestic refrigerators. Always check the available space in your refrigerator before loading the tray.

Between uses, store the assembly clean, free from dough residue and with all components protected from impacts or deformation. Avoid placing heavy objects on the lid, especially over the area containing the valve and temperature indicator.

  • Dough fermentation
    • Use
      • Fermentation and proving of pizza dough
      • Suitable for most domestic fridges according to Gozney
    • Closure system
      • Airtight seal
      • Pressure release valve
    • Control
      • Built-in temperature gauge
  • Construction and features
    • Dough ball insert
      • Silicone
      • Removable
      • Non-stick
    • Lid
      • Transparent
      • Heat-resistant
    • Base
      • Lightweight
  • Dimensions
    • Width
      • 35 cm
    • Height
      • 8 cm
    • Depth
      • 45 cm
  • Contents of the box
    • Gozney Dough Tray
      • Base
      • Lid
      • Removable silicone insert for dough balls
  • Warranty
    • Gozney accessory
      • Manufacturer’s warranty: 1 year
      • No registration required for this warranty

3 dough recipes to make the most of your Dough Tray

Good dough is not just about mixing flour, water and yeast. Time, temperature and the way you organise the fermentation process also play an important role. The Gozney Dough Tray is particularly useful when it is time to divide, ball and leave each portion to develop until it is ready to work with.

Here are three different ways to use it: a simple same-day dough, a long 24 to 48-hour fermentation and a sourdough pizza dough for those who want to explore fermentation in greater depth.

1. Simple same-day dough

A perfect recipe for getting started. There is no need to plan the dough several days in advance: prepare it, shape it into balls, place the portions in the tray and let time do the rest. The result is 6 dough balls of approximately 250 g, a very convenient quantity when you are planning a pizza session for several people.

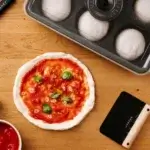
Preparing pizza dough balls in the Gozney proofing tray

Ingredients

  • 1,000 g 00 pizza flour
  • 600 g water
  • 30 g salt
  • 2 g fresh yeast or 1 g instant dry yeast
Yield: 6 dough balls of approximately 250 g.

Step by step

  1. Start with the water. Pour the 600 g of water into a large bowl, add the yeast and stir until it is fully dissolved.
  2. Add the first half of the flour. Add 500 g and mix by hand for around 30 seconds. There is no need to aim for a perfect dough yet: at this stage, you simply want to begin bringing the ingredients together.
  3. Complete the mixture. Add the other 500 g of flour, work it for another 30 seconds and finally add the 30 g of salt. Mix again until everything is incorporated.
  4. Now it is time to knead. Transfer the dough to the worktop and knead by hand for approximately 10 minutes. Gradually, you will notice it changing from an uneven mixture into a much more cohesive dough.
  5. Give it a short rest. Cover the dough with a cloth and leave it to rest for 10 minutes. Then shape it into a smooth ball, creating surface tension, cover it again and leave it to rest for another 45 minutes.
  6. Divide and ball. Use scales to divide the dough into portions of approximately 250 g. Shape each portion into a ball, aiming for a smooth, taut surface.
  7. Into the Dough Tray. Place the balls in the tray, close the lid and leave them to proof for approximately 8 hours at 18 °C. Once this period is complete, they will be ready for the next stage of your pizza preparation.
Who is this dough for? For anyone who is just getting started or simply wants an easy recipe to plan. Prepare the dough in the morning and organise the balls inside the Dough Tray while they complete their proofing.

2. Long-fermentation dough: 24 to 48 hours

If you enjoy taking your time when making pizza, this recipe completely changes the pace. It uses far less yeast and allows the fermentation to continue overnight and even develop further under refrigeration for one or two additional days. This is where the Dough Tray becomes particularly useful: once the dough has been balled, you can keep all the portions organised and transfer them together to the refrigerator.

Dough balls proofing inside the closed Gozney Dough Tray

Ingredients

  • 1,000 g 00 pizza flour
  • 600 g water
  • 30 g salt
  • 0.5 g fresh yeast or 0.2 g instant dry yeast
Yield: 6 dough balls of approximately 250 g. Flour: Gozney recommends strong 00 flour rated W310 or higher.

Step by step

  1. Dissolve the yeast. Put all the water into a large bowl and mix in the small amount of yeast until it is completely distributed.
  2. Add the flour in two stages. First add 500 g and mix for around 30 seconds. Then add the remaining 500 g and mix again.
  3. Add the salt. Add the 30 g and work the mixture until incorporated. Then transfer the dough to the worktop.
  4. Knead for 10 minutes. Work the dough by hand and, once kneading is complete, cover it and leave it to rest for another 10 minutes.
  5. Shape into a single ball and begin the long fermentation. Create surface tension, cover the dough well and leave it to ferment overnight. Gozney gives a maximum reference of 16 hours at 22 °C.
  6. The next day, divide. Separate the dough into 250 g portions, carefully shape each one into a ball and arrange them neatly in the Dough Tray.
  7. Now you can choose your route. You can leave the balls for around 8 hours at 22 °C to continue proofing at room temperature, or place the closed tray in the refrigerator for 1 or 2 additional days.
  8. If you choose cold proofing, plan when to take them out. Gozney recommends removing the dough balls from the refrigerator at least 6 hours before making the pizzas, allowing them to complete their conditioning at room temperature.
Why choose this recipe? Because it allows you to organise the dough in advance. Ball it once, place all the portions in the tray and move from room-temperature proofing to cold fermentation while keeping all the dough together in the same system.

3. Sourdough pizza dough

This is the option for anyone who wants to take things a step further. Commercial yeast is replaced by a mature sourdough starter. The process requires you to observe the fermentation, monitor the dough's development and allow for longer timings, but that is precisely what makes it an ideal recipe for those who enjoy preparing the dough just as much as cooking it afterwards.

Dough balls placed in the silicone insert of the Gozney tray

Ingredients

  • 400 g 00 pizza flour
  • 212 g strong flour or bread flour
  • 428 g water
  • 30 g mature sourdough starter
  • 18 g salt
Yield: 4 dough balls of approximately 270 g. Hydration stated by Gozney: 70%.

Step by step

  1. Start by waking up your sourdough starter. Gozney recommends feeding it at a 1:1:1 ratio. The aim is to use it once it has reached a good level of activity.
  2. Prepare the autolyse. Put the 428 g of water into a large bowl, add both flours and mix only until all the flour is hydrated. Cover the bowl and leave it to rest while the starter reaches its optimum point. As a reference, Gozney suggests around 3 to 4 hours.
  3. Add the sourdough starter. Spread the 30 g of mature starter over the dough and begin incorporating it. If working by hand, knead for around 10 minutes.
  4. Now add the salt. Add the 18 g and continue working the dough for approximately 3 minutes, until the salt is fully incorporated.
  5. Now it is time to observe. Cover the dough and leave it to rest for 1 hour. To monitor fermentation more precisely, Gozney's recipe suggests placing a small sample in a straight-sided container and marking its initial volume.
  6. Continue the bulk fermentation. Wait until the sample has increased by approximately 10–15% in volume. The timing will depend on the activity of your starter and the temperature. As a reference, Gozney suggests around 5 hours at 26 °C.
  7. Divide and ball. Once you have reached this point, divide the dough into 4 portions of 270 g and shape them into smooth, taut balls.
  8. Now it is time for the Dough Tray. Place the dough balls inside the tray and close it. When adapting the recipe to this product, this is the logical point to take advantage of its enclosed container and keep the portions organised during cold fermentation.
  9. Cold fermentation. Store the dough balls in the refrigerator for 24 to 48 hours.
  10. Return them to room temperature. Gozney recommends removing the dough balls from the refrigerator approximately 4 hours before use, extending this to around 6 hours in colder ambient conditions.
Who is this dough for? For anyone who is already comfortable with a direct dough and wants to start working with natural fermentation. Here, the clock is only a guide: the activity of the sourdough starter, the temperature and the visible development of the dough are what determine the pace.