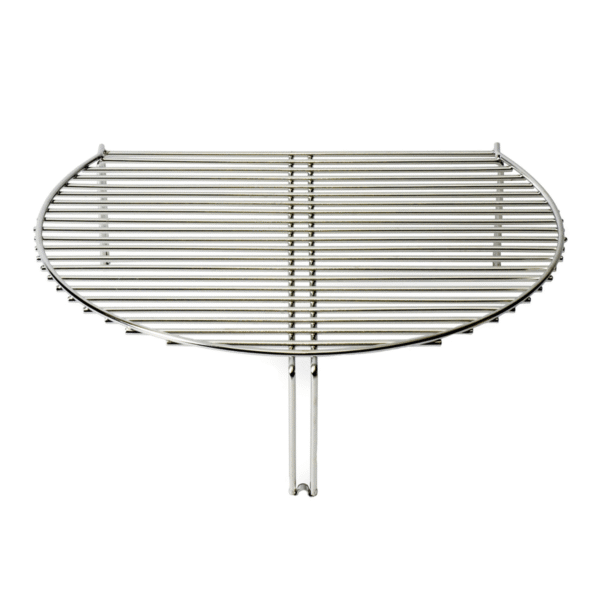
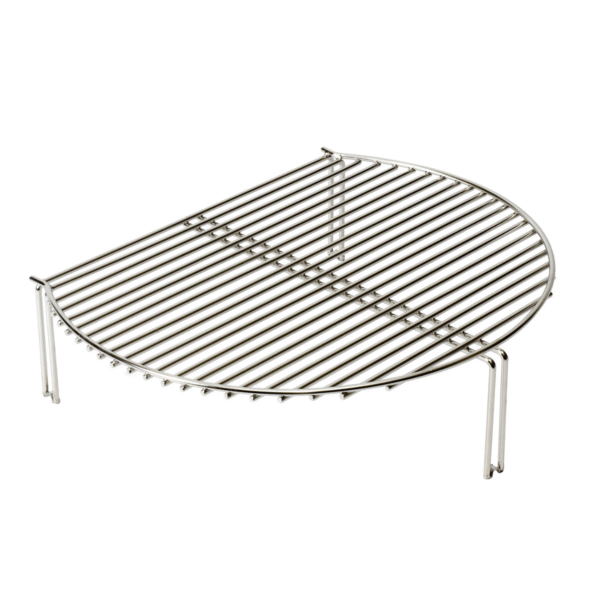
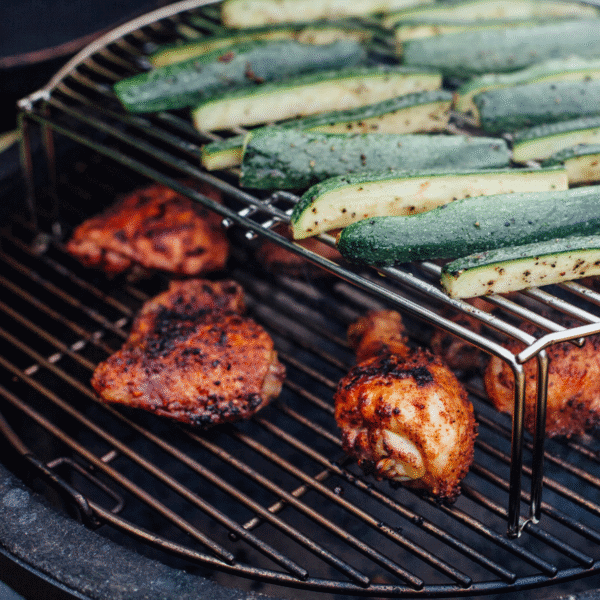
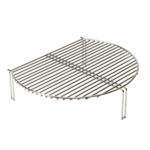
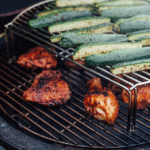
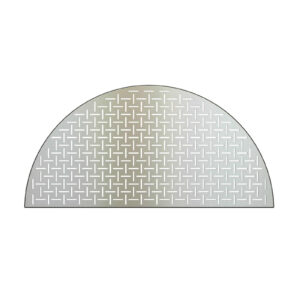
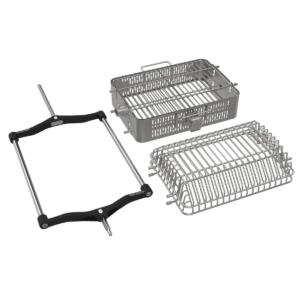
The Raised Cooking Grid elevates your cooking inside the kamado to gain useful space, soften direct heat and work on multiple levels without complications. It sits on top of the main grid with a 10 cm gap and can expand the cooking surface by up to 60%, with slotted legs for stability. Available for Classic Joe (46 cm) and Big Joe (61 cm), and compatible with models of equivalent diameter.
🔧 Materials and construction
The expander is designed to withstand the typical intensive use of the kamado and is dishwasher safe, simplifying maintenance after long sessions. The slotted legs fit securely onto the base grid to prevent movement when opening, closing or handling. The geometry leaves one straight side that improves access to the lower area without dismantling the assembly.
🧰 Key features
Its main function is to raise delicate foods or preparations that require gentler heat, and to split zones: top for vegetables, fish or glazing; bottom for searing or browning. The 10 cm separation creates a thermal cushion, and the straight edge allows easy access to the bottom rack.
⚙️ Performance and efficiency
Working at double height allows you to make better use of each ignition and organise the flow of dishes: browning below and finishing above; gentle smoking at the top and crispy texture at the bottom. The increase of up to 60% in effective surface area is especially noticeable in mixed grilling or batch cooking.
🎛️ Design and aesthetics
The clean, functional design combines a low profile with 10 cm of clearance so as not to compromise airflow. The straight side acts as an access ‘window’, and the slotted legs provide a solid feel when supporting and sliding utensils. It is designed to mix and match with other surfaces in your kamado system.
🔗 Compatibilities and accessories
Classic Joe™ version: compatible with Kamado Joe Classic Joe, Konnected Joe™, Big Green Egg Large and other 46 cm round charcoal grills.
Big Joe™ version: compatible with Kamado Joe Big Joe, Big Green Egg XL and other 61 cm round charcoal grills.
🍖 Benefits by cooking style
For direct grilling, it keeps thin, juicy cuts moist by moving them away from the hottest spot. For low & slow cooking, it provides an ideal top tray for glazing ribs or setting sauces. For fish and vegetables, it reduces the risk of breakage. In oven/pizza mode, it serves as a shelf to keep dishes warm without overcooking.
🛡️ Safety and ease of use
The slotted legs improve stability on the main grill, reducing movement when handling tongs or spatulas. Dishwasher safe cleaning promotes hygiene and extends the life of the accessory.
🏠 Applications outside the barbecue
This accessory is designed for kamados and charcoal grills. Alternative uses other than grilling are not recommended; for safety and durability, use only with compatible equipment.
Use and Maintenance
Before getting started, remember that this accessory is designed to
make your life easier: it provides
stability,
easy access to the bottom grate, and
simple cleaning. Following these guidelines will extend its useful life and maintain consistent performance.
Start-up
- Preheat the kamado and stabilise the desired temperature.
- Place the warming rack on the main grate, ensuring that the slotted legs are seated correctly.
During cooking
- Use the top level for gentler heat, glazing, resting and keeping food warm.
- Use the straight edge as a window to access the bottom grate without dismantling.
Cleaning
- Allow to cool completely before handling.
- Remove debris with a soft wire brush or aluminium foil ball.
- Dishwasher safe; for stubborn dirt, soak in hot water and mild detergent.
Care
- Avoid knocking or twisting the legs.
- Store in a dry place.
- Check for stability before each use and avoid overloading the top level.
Use and Maintenance
Before getting started, remember that this accessory is designed to
make your life easier: it provides
stability,
easy access to the bottom grate, and
simple cleaning. Following these guidelines will extend its useful life and maintain consistent performance.
Start-up
- Preheat the kamado and stabilise the desired temperature.
- Place the warming rack on the main grate, ensuring that the slotted legs are seated correctly.
During cooking
- Use the top level for gentler heat, glazing, resting and keeping food warm.
- Use the straight edge as a window to access the bottom grate without dismantling.
Cleaning
- Allow to cool completely before handling.
- Remove debris with a soft wire brush or aluminium foil ball.
- Dishwasher safe; for stubborn dirt, soak in hot water and mild detergent.
Care
- Avoid knocking or twisting the legs.
- Store in a dry place.
- Check for stability before each use and avoid overloading the top level.
Use and Maintenance
Before getting started, remember that this accessory is designed to
make your life easier: it provides
stability,
easy access to the bottom grate, and
simple cleaning. Following these guidelines will extend its useful life and maintain consistent performance.
Start-up
- Preheat the kamado and stabilise the desired temperature.
- Place the warming rack on the main grate, ensuring that the slotted legs are seated correctly.
During cooking
- Use the top level for gentler heat, glazing, resting and keeping food warm.
- Use the straight edge as a window to access the bottom grate without dismantling.
Cleaning
- Allow to cool completely before handling.
- Remove debris with a soft wire brush or aluminium foil ball.
- Dishwasher safe; for stubborn dirt, soak in hot water and mild detergent.
Care
- Avoid knocking or twisting the legs.
- Store in a dry place.
- Check for stability before each use and avoid overloading the top level.
🥩Recipe for mixed grill in batches
This is the strategy that gives you
perfect service flow: sear the food on the lower grill and use the
warming rack as a “waiting platform” and for gentle finishing. This prevents overcooking and ensures that everything arrives at the table hot, ideal for groups.
Ingredients (6–8 servings)
- 4 fresh chorizo sausages
- 4 boneless chicken thighs
- 2 filleted mackerels
- 2 courgettes
- 2 red peppers
- Olive oil, salt and pepper
- 1 lemon
Steps
- Lighting and temperature. Load generously with charcoal and stabilise at 220 °C.
- Heat zones. Create a hotter semicircle at the bottom; place the heating rack at the top for the gentle level.
- Chorizo sausages. Grill at the bottom for 8–10 minutes, then place them at the top to keep them from drying out.
- Chicken. Sear at the bottom for 6–7 minutes per side; move to the top for 10 minutes to finish juicy.
- Vegetables. Cook on top for 12–15 minutes, turning halfway through; if you want more colour, move to the bottom for 1–2 minutes at the end.
- Mackerel. Skin side down for 2–3 minutes to brown; move to the top for 2 minutes with lemon to finish.
- Pacing. Keep everything that is ready on the top level and serve in batches.
- Finishing touch. Raw oil, flaky salt and bread toasted for 1–2 minutes on the bottom rack.
Vegetarian variation
- Replace meat and fish with mushroom and firm tofu skewers, half-moon eggplant and provolone or halloumi cheese.
- Sear the tofu on the bottom for 2–3 minutes per side and move it to the top so it absorbs smoke without drying out.
- Thick vegetables (eggplant, courgette, peppers) benefit from starting top and finishing with a blast bottom for grill marks.
- Serve with parsley and lemon chimichurri.
This recipe works equally well on
Classic Joe (46 cm) and
Big Joe (61 cm): just adjust quantities to the size of your grill.
🥩Recipe for mixed grill in batches
This is the strategy that gives you
perfect service flow: sear the food on the lower grill and use the
warming rack as a “waiting platform” and for gentle finishing. This prevents overcooking and ensures that everything arrives at the table hot, ideal for groups.
Ingredients (6–8 servings)
- 4 fresh chorizo sausages
- 4 boneless chicken thighs
- 2 filleted mackerels
- 2 courgettes
- 2 red peppers
- Olive oil, salt and pepper
- 1 lemon
Steps
- Lighting and temperature. Load generously with charcoal and stabilise at 220 °C.
- Heat zones. Create a hotter semicircle at the bottom; place the heating rack at the top for the gentle level.
- Chorizo sausages. Grill at the bottom for 8–10 minutes, then place them at the top to keep them from drying out.
- Chicken. Sear at the bottom for 6–7 minutes per side; move to the top for 10 minutes to finish juicy.
- Vegetables. Cook on top for 12–15 minutes, turning halfway through; if you want more colour, move to the bottom for 1–2 minutes at the end.
- Mackerel. Skin side down for 2–3 minutes to brown; move to the top for 2 minutes with lemon to finish.
- Pacing. Keep everything that is ready on the top level and serve in batches.
- Finishing touch. Raw oil, flaky salt and bread toasted for 1–2 minutes on the bottom rack.
Vegetarian variation
- Replace meat and fish with mushroom and firm tofu skewers, half-moon eggplant and provolone or halloumi cheese.
- Sear the tofu on the bottom for 2–3 minutes per side and move it to the top so it absorbs smoke without drying out.
- Thick vegetables (eggplant, courgette, peppers) benefit from starting top and finishing with a blast bottom for grill marks.
- Serve with parsley and lemon chimichurri.
This recipe works equally well on
Classic Joe (46 cm) and
Big Joe (61 cm): just adjust quantities to the size of your grill.
🥩Recipe for mixed grill in batches
This is the strategy that gives you
perfect service flow: sear the food on the lower grill and use the
warming rack as a “waiting platform” and for gentle finishing. This prevents overcooking and ensures that everything arrives at the table hot, ideal for groups.
Ingredients (6–8 servings)
- 4 fresh chorizo sausages
- 4 boneless chicken thighs
- 2 filleted mackerels
- 2 courgettes
- 2 red peppers
- Olive oil, salt and pepper
- 1 lemon
Steps
- Lighting and temperature. Load generously with charcoal and stabilise at 220 °C.
- Heat zones. Create a hotter semicircle at the bottom; place the heating rack at the top for the gentle level.
- Chorizo sausages. Grill at the bottom for 8–10 minutes, then place them at the top to keep them from drying out.
- Chicken. Sear at the bottom for 6–7 minutes per side; move to the top for 10 minutes to finish juicy.
- Vegetables. Cook on top for 12–15 minutes, turning halfway through; if you want more colour, move to the bottom for 1–2 minutes at the end.
- Mackerel. Skin side down for 2–3 minutes to brown; move to the top for 2 minutes with lemon to finish.
- Pacing. Keep everything that is ready on the top level and serve in batches.
- Finishing touch. Raw oil, flaky salt and bread toasted for 1–2 minutes on the bottom rack.
Vegetarian variation
- Replace meat and fish with mushroom and firm tofu skewers, half-moon eggplant and provolone or halloumi cheese.
- Sear the tofu on the bottom for 2–3 minutes per side and move it to the top so it absorbs smoke without drying out.
- Thick vegetables (eggplant, courgette, peppers) benefit from starting top and finishing with a blast bottom for grill marks.
- Serve with parsley and lemon chimichurri.
This recipe works equally well on
Classic Joe (46 cm) and
Big Joe (61 cm): just adjust quantities to the size of your grill.