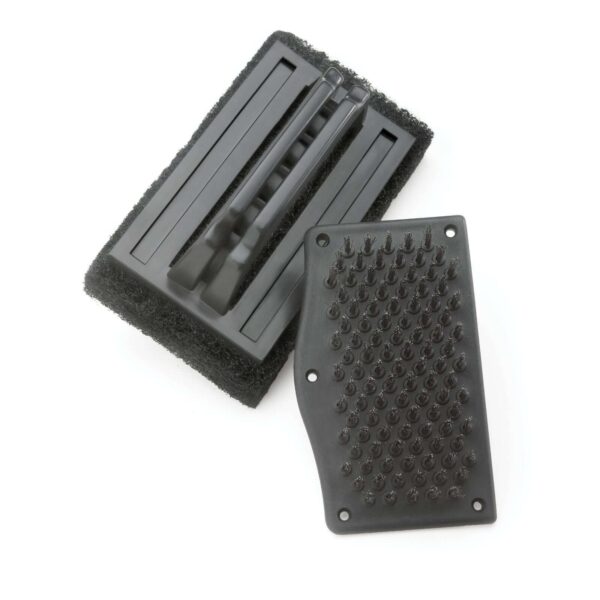
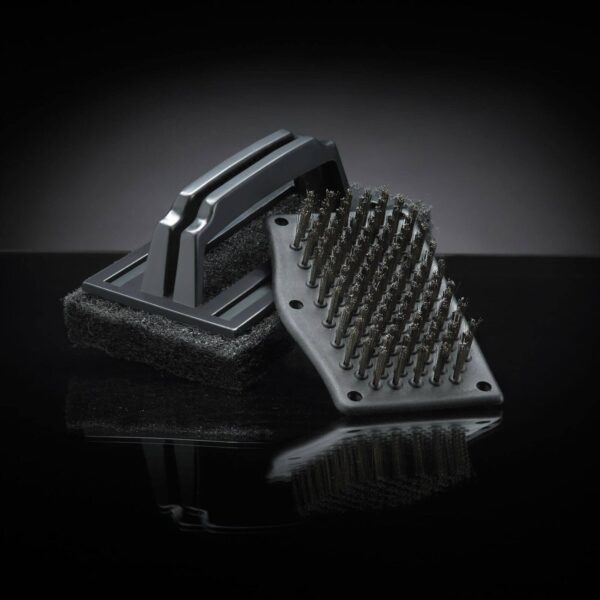
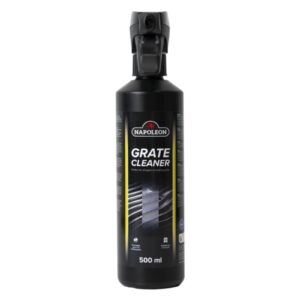
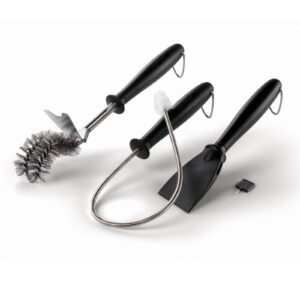
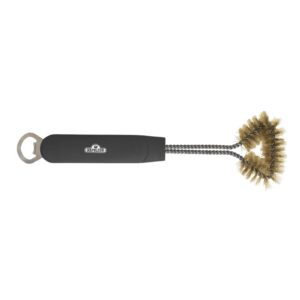
Keep your grill in shape without replacing the entire tool: this Napoleon PRO replacement head restores the cleaning power of your compatible brush in seconds, with stainless steel bristles to scrape away tough residue and an additional scourer/scrubber to pamper sensitive grates. What’s more, it’s a sustainable and economical solution because you only replace what wears out.
🧱 Materials and construction
The core of the head features stainless steel bristles designed to maintain their rigidity under pressure and cover the grid well, achieving controlled friction that removes charred debris without deforming. The pack includes a PRO abrasive scrubber designed for finishing tasks or more delicate surfaces, extending the life of your grates with balanced maintenance.
⚙️ Key features
The proposal focuses on quick head replacement: unscrew the used one, screw in the new one, and you’re done, without complications or special tools. This modularity allows you to alternate between bristles for heavy dirt and scouring pads for fine care, optimising the cleaning process from start to finish.
🚀 Performance and efficiency
Thanks to the density and hardness of the bristles, the head exerts a constant mechanical action that reduces repeated steps and, therefore, the total cleaning time. The scouring pad acts as a polishing stage, helping to remove fine grease flakes so that the grill is ready for the next use with less risk of residual flavours.
🎨 Design and ergonomics
The head format maintains an active surface area of 12.5 × 6.5 × 2.5 cm, with a geometry designed to reach most of the crevices and contact areas of standard grills. The scouring pad (15 × 8.8 × 2.4 cm) offers a larger support area for wide, uniform movements, promoting a consistent finish without excessive pressure.
🔗 Compatibility and included accessories
It is compatible with the Napoleon Pro Grill Brush #62035 and comes with an extra PRO scrubber/scourer to complete the maintenance set. This compatibility avoids duplicate purchases and ensures the correct fit of the head on the original system.
🍖 Benefits for different cooking styles
Whether you’re grilling at high temperatures, smoking, or baking stone-baked pizzas, a clean grill ensures stable heat transfer, better searing, and less sticking. With the bristle head, you can tackle post-sealing carbon build-up; with the scouring pad, you can finish off fish, vegetables, or dough that benefit from a spotless surface.
🛡️ Safety and ease of use
The replacement prevents the use of worn brushes that lose their effectiveness. The change is immediate and reduces the temptation to ‘force’ a worn tool, helping to maintain safe cleaning routines with the fire off and the grill cold. The scouring pad offers a gentler alternative when the surface requires it.
🌍 Sustainability and impact
Replacing only the head reduces waste and unnecessary expense: you keep the handle and body of the brush and renew only the consumable part, a simple practice with a direct effect on cost and material footprint.
🛠️ Use and Maintenance (practical guide)
Keeping the head in good condition is key to effective and safe cleaning. Always work with the grill cold and on a stable surface. In this guide, you will see how to
assemble the replacement part,
clean with bristles when there are encrustations,
finish with the scouring pad on sensitive grills, and
preserve both elements to extend their useful life. At the end, you will find
recommended routines,
precautions, and a
troubleshooting section to keep your brush performing like new.
Assembling the head
- Ensure that the grill is completely turned off and cool.
- Place the brush on a stable surface to work comfortably.
- Hold the handle with one hand and the head with the other to prevent twisting.
- Unscrew the worn head from the compatible handle (#62035).
- Clean the thread and handle housing to remove grease or carbon deposits.
- Screw on the PRO replacement until it feels tight, without over-tightening.
- Run it over the grill briefly to check that there is no play.
Cleaning with bristles (encrusted dirt)
- Remove loose debris with a dry cloth or plastic spatula.
- Always brush in the direction of the bars of the grill to follow the direction of the grating.
- Maintain even pressure; avoid sudden transverse movements.
- Shake the head or tap it gently against an edge to remove particles.
- Repeat on problem areas until the surface looks clean and smooth.
- Wipe with a slightly damp cloth to remove fine dust and soot.
- Dry the grill before cooking to avoid unwanted vapours.
Finishing with a scouring pad (sensitive grills)
- Place the PRO scourer/scouring pad and, if you prefer, dampen it slightly.
- Use long, gentle steps to even out the surface without scratching.
- On areas with polymerised grease, use circular movements with moderate pressure.
- Remove residue with a damp cloth and dry to let the grill be ready for next use.
Maintenance of the head and scouring pad
- After each use, shake the head to remove debris and clean the bristles by hand if necessary.
- If grease builds up, use a small brush to comb the bristles and let them air dry.
- Periodically check the alignment and firmness of the bristles.
- Replace the head when you notice a loss of rigidity, marked deformations or damaged thread.
- Rinse the scouring pad when it becomes saturated with grease; let it dry completely before storing.
- Store the set in a dry place, away from moisture and heat sources.
Safety precautions
- Only use the brush when the grill is turned off and cool.
- Wear work gloves to protect your hands during cleaning.
- Avoid unnecessary contact of the bristles with very delicate enamel surfaces.
- After brushing, wipe the grill with a damp cloth to ensure that no loose particles remain.
- Keep the brush and replacement parts out of the reach of children and pets.
Recommended routine
- After each use: remove loose debris, brush lightly and wipe with a cloth.
- Weekly (frequent use): thorough brushing + finishing with a scouring pad.
- Monthly or after intensive cooking: inspection of bristles and thread, thorough cleaning of the scouring pad and general check of the whole unit.
Troubleshooting
- The head comes loose: clean the thread, screw it back on until it is secure without forcing it; if the problem persists, check the housing for wear.
- Flattened bristles: reduce pressure when brushing; if they do not regain their shape, replace the head.
- Saturated scouring pad: rinse and let it air dry; if it loses its abrasive capacity, replace it.
- Marks on sensitive grids: reduce pressure and prioritise the use of the scouring pad for finishing.
Delicate fish barbecue (serves 4)
A
clean, well-preheated barbecue is your best ally for cooking delicate fish without it sticking or breaking apart. With a spotless, lightly oiled grill, you'll get
defined marks, crispy skin and juicy flesh that flakes off perfectly. This recipe balances a
citrus and herb marinade with a quick finish of lemon and capers to enhance the flavour without masking it.
Ingredients
- 4 portions (160–200 g each) of delicate fish with skin: sea bass, sea bream or thick sole
- 2 tablespoons extra virgin olive oil
- Zest and juice of 1 lemon
- 2 cloves garlic, finely chopped
- 1 tablespoon chopped fresh parsley
- 1 tablespoon chopped fresh dill (optional)
- 1 teaspoon fine salt + flaky salt for finishing
- ½ teaspoon freshly ground black pepper
- 1 pinch sugar (helps with searing, optional)
- 1–2 tablespoons drained capers
- 30 g butter (or 2 extra tablespoons of oil if you prefer dairy-free)
- 1 extra lemon, thinly sliced
- Oil for the grill
- (Optional) Fish basket or perforated griddle, thin spatula and probe thermometer
Steps to follow
- Preheat and prepare the grill. Turn on to medium-high heat and create two zones (direct and indirect). Aim for 220–240 °C in the direct zone. With the grill rack clean, brush it very lightly with oil.
- Dry and marinate. Dry the fish with kitchen paper. Mix the oil, lemon zest and juice, garlic, parsley, dill, salt, pepper and a pinch of sugar. Coat the fish and let it stand for 15–20 minutes (no longer, so that the acid does not “cook” the flesh).
- Prepare the base. Place 2–3 thin slices of lemon on the grill or in the basket: they serve as an aromatic “cushion” and help prevent sticking.
- First cooking: skin side down. Place the fish skin side down in the direct heat zone. Do not move it for 2–4 minutes (depending on thickness). You will know it is ready to turn when the skin comes off on its own and you see the flesh is opaque up to a third of its height.
- Turn and finish. Turn with a thin spatula. Cook for another 1–2 minutes in direct heat. If the fillet is thick, step it to indirect heat and close the lid for 2–5 minutes until it reaches:
- 52–55 °C in the centre for a juicy finish, or
- 60–63 °C for a well-done finish.
- Quick sauce. Cover the butter in a small saucepan or in a corner of the griddle; add capers and a dash of lemon juice. Gently NAPA the fish when removing it.
- Rest and finish. Let rest for 2 minutes off the heat. Finish with flaked salt, pepper and a drizzle of oil. Serve with more lemon slices.
Key tips: very hot and clean grill, well-dried fish, do not pierce with a fork, and turn
only once. If the fillet is very thin or the fish is very fragile, use a
fish basket or a
perforated griddle.
Vegetarian variation with halloumi and lemon and dill vegetables
Serves 4
Ingredients
- 400–500 g halloumi cheese (or firm paneer), cut into ~2 cm cubes
- 1 courgette, sliced or cut into thick half-moons
- 1 red pepper, cut into bite-sized chunks
- 1 red onion, cut into wedges
- 200 g mushrooms (oyster or small whole mushrooms)
- 200 g cherry tomatoes on skewers (optional)
- Skewers (if using wooden skewers, soak them for 20–30 minutes)
- Oil for the grill
Citrus and herb marinade
- 3 tablespoons extra virgin olive oil
- Zest and juice of 1 lemon
- 1 clove garlic, finely chopped
- 1 tablespoon chopped fresh parsley
- 1 tablespoon chopped fresh dill (or 1 teaspoon dried)
- 1 teaspoon fine salt
- ½ teaspoon black pepper
- 1 teaspoon honey or syrup (optional, helps with searing)
Steps
- Prepare and marinate. Mix the marinade ingredients. Dry the halloumi with kitchen paper, mix with half the marinade and let it stand for 15–20 minutes. Coat the vegetables with the remaining marinade and let them stand for 10–15 minutes.
- Preheat the grill. Medium-high heat and two zones (direct and indirect). Aim for 220–240 °C in the direct zone. Clean and lightly oil the grill rack.
- Assemble the skewers. Alternate halloumi and vegetables on the skewers. Shake off excess marinade to avoid flare-ups.
- Direct grilling. Grill over direct heat for 2–3 minutes per side (¼ turn between turns) until you see clear grill marks and golden edges. If any pieces brown too quickly, move them to indirect heat.
- Finish and even out. Move all skewers to indirect heat for 2–4 minutes with the lid closed so that the inside heats through without drying out.
- Fresh finish. Remove and drizzle with a few extra drops of lemon juice, more chopped parsley/dill and a pinch of flaked salt.
- Serve. Accompany with pita bread or a yoghurt sauce with lemon and herbs (or a plant-based alternative) and lemon wedges.
Notes and tips
- Halloumi does not melt, making it perfect for grilling. If using paneer, handle with care as it is more fragile.
- For small pieces (mushrooms or cherry tomatoes), a perforated grill pan prevents them from falling through the grates.
- If you like a more citrusy flavour, add thin slices of lemon to the grill and roast briefly to flavour the skewers.