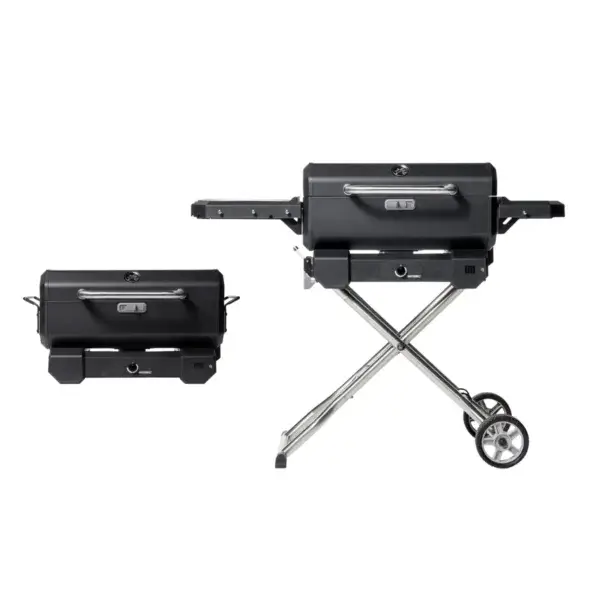
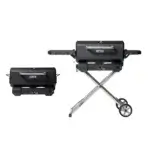
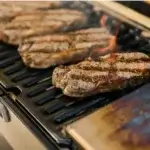
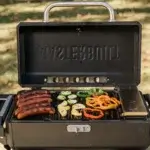
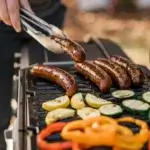
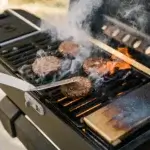
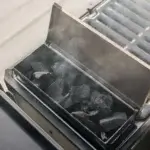
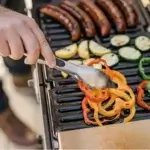
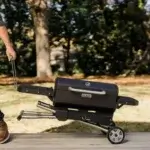
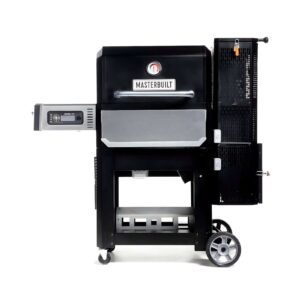
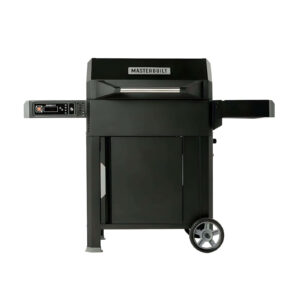
The Masterbuilt Portable Charcoal Barbecue and Smoker combines the flavour of charcoal with electrically assisted temperature control. Its Charcoal MiniHopper™ feeds the fire with a compact load of charcoal, while the SteadyTemp™ Dial regulates airflow to maintain stable temperatures over long sessions. Available in two versions: with QuickCollapse™ cart (with side shelves) and without cart (ultra-portable tabletop).
🛠️ Materials and construction
The compact body is specifically designed to work with charcoal and briquettes, concentrating the heat in a robust cooking chamber for thermal stability. The MiniHopper™ hopper is integrated with the regulator to minimise energy losses during combustion and improve firing consistency. The lockable lid secures the assembly during transport and during breaks between batches, reducing unintentional venting and helping to conserve temperature and smoke. An integrated thermometer on the lid allows for direct reading without the need to lift it, thereby avoiding oxygen peaks that could affect the firing curve. The grids and interior have been dimensioned to withstand repeated thermal cycles, while the external frame maintains a rigid geometry that resists the frequent handling typical of portable use.
🎛️ Outstanding features
The SteadyTemp™ Dial acts on the air intake and intermittently controls the internal fan to maintain the thermal setpoint. This system allows cooking sessions of up to ≈4 hours per fuel load, with a predictable response to changes such as lid opening or food loading. The control can be powered by cable or run on 4 AA batteries, making it operational both in areas with electrical outlets and in fully off-grid locations. The lockable lid adds a practical layer: after cooking, the unit can be moved with the lid secured, avoiding ash handling at the point of service and facilitating logistics on campsites or terraces. The set is optimised to operate with small lump charcoal or briquettes, maintaining the right airflow for each format.
🔥 Performance and efficiency
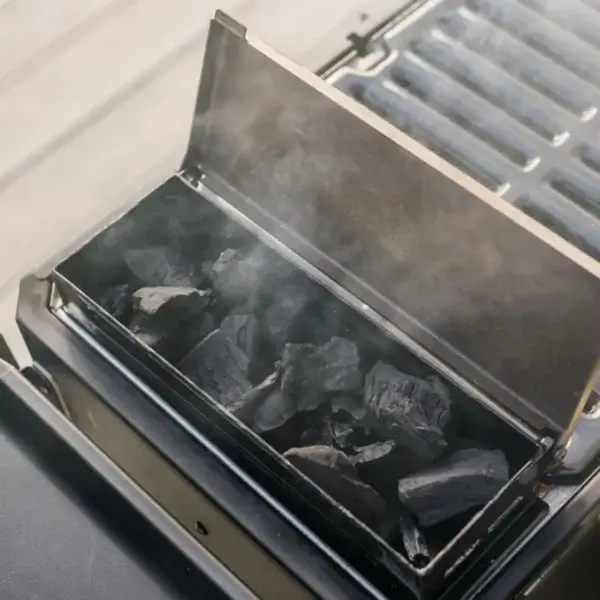
With 1,290 cm² of usable surface area and a working range of 110-260 °C, the grill covers everything from mild smoking to high-intensity direct searing. The MiniHopper™ holds 700 g of briquettes or 450 g of small lump charcoal, an amount calibrated to sustain stable curves for approximately 4 hours without reloading. This capacity, along with the SteadyTemp™ air control, reduces abrupt variations and helps reproduce results: temperatures of 110-130°C for extended indirect cooking, ≈150-190°C for multi-purpose roasts and ≈220-260°C for quick marks, all within the intended operating range of this portable model.
🧠 Design and aesthetics
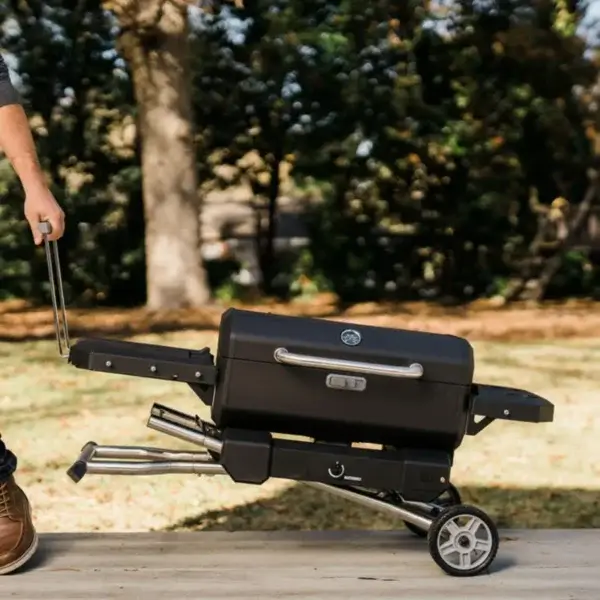
The version without trolley prioritises the minimal footprint with carrying handles and a body of approximately 71 × 43 × 38 cm (w × l × h), ideal for a tabletop, boot or motorhome. The QuickCollapse™ trolley variant provides working ergonomics and stability: it integrates two side shelves with beverage holders for preparation and service, and a folding mechanism that allows the set to be raised or lowered with clear locking steps. In the extended position, the unit reaches approximately 114 × 48 × 91 cm, offering a comfortable working height and better seating on uneven floors. In both cases, the aesthetics are functional and sober, with a focus on ease of transport, set-up and regular cleaning.
🧩 Compatibilities and included accessories
The equipment is compatible with briquettes and lump charcoal. It is supplied with a set of cables for powering the controller, while maintaining the possibility of using AA batteries when there is no mains access. The trolley version adds its own QuickCollapse™ trolley with two integrated side shelves and beverage holders, designed for quick folding, easy transport and storage. The version without a trolley dispenses with these elements to maximise portability in environments where volume and overall weight are critical.
🍳 Cooking styles it enhances
Stable SteadyTemp™ control enables low-temperature indirect smoking, medium-intensity grilling and direct cooking for quick searing, all within the 110-260 °C range. The lockable lid helps preserve the chamber microclimate between openings, while the in-lid thermometer readout allows fine adjustments without interrupting the thermal cycle. Thanks to the MiniHopper™ and its autonomy per load, it is possible to plan complete sessions with a single hopper, optimising fuel consumption and reducing mid-firing interventions.
🛡️ Safety and ease of use
The lockable lid increases safety when moving and minimises the risk of accidental opening when there is still residual heat. The integrated thermometer simplifies monitoring and avoids unnecessary opening of the chamber. Dual power supply (cable or 4×AA) keeps the control operational even in unpowered environments, and the QuickCollapse™ trolley – in the corresponding version – incorporates an up/down locking system for stability during handling. In both models, the internal architecture favours the orderly evacuation of ash and access to essential components for cleaning and periodic maintenance.
📊 Comparison table
| Attribute |
With trolley (QuickCollapse™) |
Without a trolley (tabletop) |
| Cooking surface |
1 290 cm² 1 290 cm² 1 290 cm² 1 290 cm² 1 290 cm² 1 290 cm² 1 290 cm |
1 290 cm² (1 290 cm²) |
| Working range |
110-260 °C |
110-260 °C |
| Capacity MiniHopper™ |
700 g briquettes / 450 g small lump charcoal |
700 g briquettes / 450 g coals in small lumps |
| Autonomy per charge |
≈4 h |
≈4 h |
| Temperature control |
SteadyTemp™ Dial (electrically controlled air intake) |
SteadyTemp™ Dial (electrically governed air intake) |
| Control the power supply |
Cable or 4×AA |
Cable or 4×AA |
| Lockable cover |
Yes |
Yes |
| Thermometer in the lid |
Yes |
Yes |
| Approx. dimensions (w × l × h) |
114 × 48 × 91 cm |
71 × 43 × 38 cm |
| Distinguishing features |
QuickCollapse™ trolley, 2 shelves with beverage holders, assisted folding and transferring |
Carrying handles, ultra-portable table-top format |
Use and Maintenance
⚠️ Essential safety before you start
-
Outdoor use only, in a well-ventilated area. Do not use indoors, in vehicles, garages, tents or enclosed spaces due to the risk of CO. Keep a clear 3 m gap to walls, railings and combustible structures on all sides. Do not use under combustible awnings/overhangs.
-
Stable, non-combustible surface. Do not place on wood or soft asphalt. The unit must sit on the ground (not on tables or worktops). Keep away from flammable vapours or liquids.
-
The temperature for moving. Do not move until it is below 45 °C (115 °F). Wear heat-resistant gloves.
-
Safe lighting. Do not use lighter fluid or instant-light charcoal. If using firelighters, they must comply with EN 1860-3. Keep hair and loose clothing clear of the flame.
🧪 Initial seasoning (pre-seasoning)
Do this before first use to burn off manufacturing oils and protect surfaces:
-
Start the barbecue (see “Start-up”). Set a medium temperature and let one full hopper burn through.
-
Shut down following “Shut-down” and allow to cool completely.
-
With a paper towel, apply a thin coat of cooking oil to the charcoal grate, inside of the lid, manifold and bowl.
-
Repeat the heat-and-oil cycle a second time.
Frequent seasoning prevents corrosion; if rust appears, brush it off, oil and reheat.
🚀 Start-up
-
Open the hopper for charcoal.
-
Temporarily remove the charcoal grate and place a food-safe firelighter (block or twisted kitchen paper) in the lighting slot beneath the grate. Light it; wait 30–60 s to ensure the firelighter is burning. Refit the grate. (For faster starts, the manufacturer recommends 2 firelighters.)
-
Pour in the charcoal over the firelighter. Wait approx. 1 min until it smokes.
-
Turn SteadyTemp™ to the desired position and allow 4 min for the burn to establish; close the hopper lid.
-
Close the cooking lid. Set the chimney/top vent to ¾ closed to stabilise.
Controller power (batteries/lead)
-
Runs on mains lead or 4×AA. Plugging in the lead switches to mains mode; unplugging switches to battery mode. Removing the lead switches off the barbecue if no batteries are fitted.
-
Battery life (ideal): approx. 16 h of controller operation. Remove the silicone bung to access the power port.
🌡️ Temperature control and regulation
-
Powering the controller: turn the dial clockwise to switch on and set the temperature; anti-clockwise to switch off or lower.
-
The probe beneath the cooking grate controls the fan’s ON/OFF to hold the setpoint. The dial position ↔ temperature relationship varies with ambient temperature, food load and charcoal type. Suggested approach: turn to high, reach your target, then lower the dial until the fan switches off; the barbecue will tend to hold that temperature. Readjust after loading food.
♻️ Refuelling during cooking
-
Turn the dial to OFF before opening the hopper.
-
Wearing gloves, open the hopper lid (it will be hot).
-
Add charcoal.
-
Close the hopper and reset the dial to your setpoint.
⛔ Proper shutdown
-
Switch off the controller.
-
Open the hopper and let the remaining charcoal burn before the next step.
-
Close the hopper and the lid.
-
Close the top vent to choke the airflow.
🧼 Cleaning (after cooking)
Only when the unit is cool to the touch.
-
Empty ash from the hopper after every use to prolong life; dispose of cold ash in a non-combustible container (wrap in foil and dampen).
-
Remove and clean the charcoal grate, cooking grates, manifold and grease cup.
-
Regularly inspect fixings and components.
-
Clean surfaces with a mild detergent and a damp cloth; avoid oven cleaners. Dry completely.
-
Wipe a light coat of cooking oil inside to prevent rust.
-
Cover and store in a dry area when not in use; periodically check for condensation.
🧰 Preventive and corrective maintenance
Lid Lock — replacement
-
Remove the cooking grate, manifold and hopper.
-
Lift out the body liner and rest it on the left ledge.
-
Remove the 4 screws from the lid lock and replace them with the new ones.
-
Do not disconnect the capillary wire; seat it in the left-hand corner cut-out.
-
Reinstall the liner, hopper, manifold and grate.
Base + fan + probe assembly (removal and refit)
-
Key removal:
-
Remove grates, manifold, hopper and liner.
-
Remove the probe bracket and withdraw the probe through the liner.
-
Separate the body from the base; disconnect the fan cable and remove the fan and the tube.
-
Unlock and remove the trolley and its bracket from the base if fitted.
-
Key refit:
10) Connect the fan to the base and secure it.
12) Fit the legs/trolley to the base.
14–15) Thread the probe through the body (“GRILL PROBE” access) and refit the probe and bracket to the liner.
16–18) Fix the body to the base, reinstall the liner, grate, manifold and hopper.
Controller, PCB and wiring
-
Controller/PCB (full procedure):
1–6) Remove the liner, bracket and probe; take off the knobs and front panel; undo the control rear panels.
10–12) Remove the leg assembly and the trolley latch; take out the fan and tube.
13–14) Open the bottom cover of the base, remove the battery box and the PCB cover; disconnect all connectors and remove the PCB.
15) Feed the probe and fan cables and remove the controller.
Reassembly: fit the new controller and PCB, route the cables, close the base, refit the fan, trolley, panels and knob; reinstall the probe, bracket and liner.
-
Battery box + PCB kit (quick swap):
-
Remove the battery box cover.
-
Undo 3 screws and take out the box.
-
Disconnect 4 leads and remove the PCB (there is adhesive on the back; take care).
5–6) Connect the new box + PCB, screw in and replace the cover.
QuickCollapse™ trolley (raising/lowering and transport)
-
Raising from a low position: foot on the lower leg, release the catch, pull the side using the shelf and lock the upper leg. Do not remove your foot until it is locked up.
-
Lowering from a high position: lock the lid, foot on the lower leg, pull the side while releasing the catch and lower until it engages; deploy and lock the tow handle for transport.
🧯 Troubleshooting
-
Won’t reach temperature: charcoal unlit or low; ash build-up in the hopper or manifold; dial set too low; low batteries; faulty fan. Actions: repeat lighting, add charcoal, clear ash, raise the dial, replace batteries, and check the fan.
-
Fan not spinning: the setpoint may already be reached; loose wiring; thermostat or power issue. Actions: turn the dial up, test mains vs batteries to isolate the source, check connections, replace the faulty component.
-
Dial unresponsive: check wiring and the thermostat; replace if applicable.
-
Batteries: check polarity, replace if depleted, or replace the battery box if the wiring is faulty.
Use and Maintenance
⚠️ Essential safety before you start
Outdoor use only, in a well-ventilated area. Do not use indoors, in vehicles, garages, tents or enclosed spaces due to the risk of CO. Keep a clear 3 m gap to walls, railings and combustible structures on all sides. Do not use under combustible awnings/overhangs.
Stable, non-combustible surface. Do not place on wood or soft asphalt. The unit must sit on the ground (not on tables or worktops). Keep away from flammable vapours or liquids.
The temperature for moving. Do not move until it is below 45 °C (115 °F). Wear heat-resistant gloves.
Safe lighting. Do not use lighter fluid or instant-light charcoal. If using firelighters, they must comply with EN 1860-3. Keep hair and loose clothing clear of the flame.
🧪 Initial seasoning (pre-seasoning)
Do this before first use to burn off manufacturing oils and protect surfaces:
Start the barbecue (see “Start-up”). Set a medium temperature and let one full hopper burn through.
Shut down following “Shut-down” and allow to cool completely.
With a paper towel, apply a thin coat of cooking oil to the charcoal grate, inside of the lid, manifold and bowl.
Repeat the heat-and-oil cycle a second time.
Frequent seasoning prevents corrosion; if rust appears, brush it off, oil and reheat.
🚀 Start-up
Open the hopper for charcoal.
Temporarily remove the charcoal grate and place a food-safe firelighter (block or twisted kitchen paper) in the lighting slot beneath the grate. Light it; wait 30–60 s to ensure the firelighter is burning. Refit the grate. (For faster starts, the manufacturer recommends 2 firelighters.)
Pour in the charcoal over the firelighter. Wait approx. 1 min until it smokes.
Turn SteadyTemp™ to the desired position and allow 4 min for the burn to establish; close the hopper lid.
Close the cooking lid. Set the chimney/top vent to ¾ closed to stabilise.
Controller power (batteries/lead)
Runs on mains lead or 4×AA. Plugging in the lead switches to mains mode; unplugging switches to battery mode. Removing the lead switches off the barbecue if no batteries are fitted.
Battery life (ideal): approx. 16 h of controller operation. Remove the silicone bung to access the power port.
🌡️ Temperature control and regulation
Powering the controller: turn the dial clockwise to switch on and set the temperature; anti-clockwise to switch off or lower.
The probe beneath the cooking grate controls the fan’s ON/OFF to hold the setpoint. The dial position ↔ temperature relationship varies with ambient temperature, food load and charcoal type. Suggested approach: turn to high, reach your target, then lower the dial until the fan switches off; the barbecue will tend to hold that temperature. Readjust after loading food.
♻️ Refuelling during cooking
Turn the dial to OFF before opening the hopper.
Wearing gloves, open the hopper lid (it will be hot).
Add charcoal.
Close the hopper and reset the dial to your setpoint.
⛔ Proper shutdown
Switch off the controller.
Open the hopper and let the remaining charcoal burn before the next step.
Close the hopper and the lid.
Close the top vent to choke the airflow.
🧼 Cleaning (after cooking)
Only when the unit is cool to the touch.
Empty ash from the hopper after every use to prolong life; dispose of cold ash in a non-combustible container (wrap in foil and dampen).
Remove and clean the charcoal grate, cooking grates, manifold and grease cup.
Regularly inspect fixings and components.
Clean surfaces with a mild detergent and a damp cloth; avoid oven cleaners. Dry completely.
Wipe a light coat of cooking oil inside to prevent rust.
Cover and store in a dry area when not in use; periodically check for condensation.
🧰 Preventive and corrective maintenance
Lid Lock — replacement
Remove the cooking grate, manifold and hopper.
Lift out the body liner and rest it on the left ledge.
Remove the 4 screws from the lid lock and replace them with the new ones.
Do not disconnect the capillary wire; seat it in the left-hand corner cut-out.
Reinstall the liner, hopper, manifold and grate.
Base + fan + probe assembly (removal and refit)
Key removal:
Remove grates, manifold, hopper and liner.
Remove the probe bracket and withdraw the probe through the liner.
Separate the body from the base; disconnect the fan cable and remove the fan and the tube.
Unlock and remove the trolley and its bracket from the base if fitted.
Key refit:
10) Connect the fan to the base and secure it.
12) Fit the legs/trolley to the base.
14–15) Thread the probe through the body (“GRILL PROBE” access) and refit the probe and bracket to the liner.
16–18) Fix the body to the base, reinstall the liner, grate, manifold and hopper.
Controller, PCB and wiring
Controller/PCB (full procedure):
1–6) Remove the liner, bracket and probe; take off the knobs and front panel; undo the control rear panels.
10–12) Remove the leg assembly and the trolley latch; take out the fan and tube.
13–14) Open the bottom cover of the base, remove the battery box and the PCB cover; disconnect all connectors and remove the PCB.
15) Feed the probe and fan cables and remove the controller.
Reassembly: fit the new controller and PCB, route the cables, close the base, refit the fan, trolley, panels and knob; reinstall the probe, bracket and liner.
Battery box + PCB kit (quick swap):
Remove the battery box cover.
Undo 3 screws and take out the box.
Disconnect 4 leads and remove the PCB (there is adhesive on the back; take care).
5–6) Connect the new box + PCB, screw in and replace the cover.
QuickCollapse™ trolley (raising/lowering and transport)
Raising from a low position: foot on the lower leg, release the catch, pull the side using the shelf and lock the upper leg. Do not remove your foot until it is locked up.
Lowering from a high position: lock the lid, foot on the lower leg, pull the side while releasing the catch and lower until it engages; deploy and lock the tow handle for transport.
🧯 Troubleshooting
Won’t reach temperature: charcoal unlit or low; ash build-up in the hopper or manifold; dial set too low; low batteries; faulty fan. Actions: repeat lighting, add charcoal, clear ash, raise the dial, replace batteries, and check the fan.
Fan not spinning: the setpoint may already be reached; loose wiring; thermostat or power issue. Actions: turn the dial up, test mains vs batteries to isolate the source, check connections, replace the faulty component.
Dial unresponsive: check wiring and the thermostat; replace if applicable.
Batteries: check polarity, replace if depleted, or replace the battery box if the wiring is faulty.
Use and Maintenance
⚠️ Essential safety before you start
Outdoor use only, in a well-ventilated area. Do not use indoors, in vehicles, garages, tents or enclosed spaces due to the risk of CO. Keep a clear 3 m gap to walls, railings and combustible structures on all sides. Do not use under combustible awnings/overhangs.
Stable, non-combustible surface. Do not place on wood or soft asphalt. The unit must sit on the ground (not on tables or worktops). Keep away from flammable vapours or liquids.
The temperature for moving. Do not move until it is below 45 °C (115 °F). Wear heat-resistant gloves.
Safe lighting. Do not use lighter fluid or instant-light charcoal. If using firelighters, they must comply with EN 1860-3. Keep hair and loose clothing clear of the flame.
🧪 Initial seasoning (pre-seasoning)
Do this before first use to burn off manufacturing oils and protect surfaces:
Start the barbecue (see “Start-up”). Set a medium temperature and let one full hopper burn through.
Shut down following “Shut-down” and allow to cool completely.
With a paper towel, apply a thin coat of cooking oil to the charcoal grate, inside of the lid, manifold and bowl.
Repeat the heat-and-oil cycle a second time.
Frequent seasoning prevents corrosion; if rust appears, brush it off, oil and reheat.
🚀 Start-up
Open the hopper for charcoal.
Temporarily remove the charcoal grate and place a food-safe firelighter (block or twisted kitchen paper) in the lighting slot beneath the grate. Light it; wait 30–60 s to ensure the firelighter is burning. Refit the grate. (For faster starts, the manufacturer recommends 2 firelighters.)
Pour in the charcoal over the firelighter. Wait approx. 1 min until it smokes.
Turn SteadyTemp™ to the desired position and allow 4 min for the burn to establish; close the hopper lid.
Close the cooking lid. Set the chimney/top vent to ¾ closed to stabilise.
Controller power (batteries/lead)
Runs on mains lead or 4×AA. Plugging in the lead switches to mains mode; unplugging switches to battery mode. Removing the lead switches off the barbecue if no batteries are fitted.
Battery life (ideal): approx. 16 h of controller operation. Remove the silicone bung to access the power port.
🌡️ Temperature control and regulation
Powering the controller: turn the dial clockwise to switch on and set the temperature; anti-clockwise to switch off or lower.
The probe beneath the cooking grate controls the fan’s ON/OFF to hold the setpoint. The dial position ↔ temperature relationship varies with ambient temperature, food load and charcoal type. Suggested approach: turn to high, reach your target, then lower the dial until the fan switches off; the barbecue will tend to hold that temperature. Readjust after loading food.
♻️ Refuelling during cooking
Turn the dial to OFF before opening the hopper.
Wearing gloves, open the hopper lid (it will be hot).
Add charcoal.
Close the hopper and reset the dial to your setpoint.
⛔ Proper shutdown
Switch off the controller.
Open the hopper and let the remaining charcoal burn before the next step.
Close the hopper and the lid.
Close the top vent to choke the airflow.
🧼 Cleaning (after cooking)
Only when the unit is cool to the touch.
Empty ash from the hopper after every use to prolong life; dispose of cold ash in a non-combustible container (wrap in foil and dampen).
Remove and clean the charcoal grate, cooking grates, manifold and grease cup.
Regularly inspect fixings and components.
Clean surfaces with a mild detergent and a damp cloth; avoid oven cleaners. Dry completely.
Wipe a light coat of cooking oil inside to prevent rust.
Cover and store in a dry area when not in use; periodically check for condensation.
🧰 Preventive and corrective maintenance
Lid Lock — replacement
Remove the cooking grate, manifold and hopper.
Lift out the body liner and rest it on the left ledge.
Remove the 4 screws from the lid lock and replace them with the new ones.
Do not disconnect the capillary wire; seat it in the left-hand corner cut-out.
Reinstall the liner, hopper, manifold and grate.
Base + fan + probe assembly (removal and refit)
Key removal:
Remove grates, manifold, hopper and liner.
Remove the probe bracket and withdraw the probe through the liner.
Separate the body from the base; disconnect the fan cable and remove the fan and the tube.
Unlock and remove the trolley and its bracket from the base if fitted.
Key refit:
10) Connect the fan to the base and secure it.
12) Fit the legs/trolley to the base.
14–15) Thread the probe through the body (“GRILL PROBE” access) and refit the probe and bracket to the liner.
16–18) Fix the body to the base, reinstall the liner, grate, manifold and hopper.
Controller, PCB and wiring
Controller/PCB (full procedure):
1–6) Remove the liner, bracket and probe; take off the knobs and front panel; undo the control rear panels.
10–12) Remove the leg assembly and the trolley latch; take out the fan and tube.
13–14) Open the bottom cover of the base, remove the battery box and the PCB cover; disconnect all connectors and remove the PCB.
15) Feed the probe and fan cables and remove the controller.
Reassembly: fit the new controller and PCB, route the cables, close the base, refit the fan, trolley, panels and knob; reinstall the probe, bracket and liner.
Battery box + PCB kit (quick swap):
Remove the battery box cover.
Undo 3 screws and take out the box.
Disconnect 4 leads and remove the PCB (there is adhesive on the back; take care).
5–6) Connect the new box + PCB, screw in and replace the cover.
QuickCollapse™ trolley (raising/lowering and transport)
Raising from a low position: foot on the lower leg, release the catch, pull the side using the shelf and lock the upper leg. Do not remove your foot until it is locked up.
Lowering from a high position: lock the lid, foot on the lower leg, pull the side while releasing the catch and lower until it engages; deploy and lock the tow handle for transport.
🧯 Troubleshooting
Won’t reach temperature: charcoal unlit or low; ash build-up in the hopper or manifold; dial set too low; low batteries; faulty fan. Actions: repeat lighting, add charcoal, clear ash, raise the dial, replace batteries, and check the fan.
Fan not spinning: the setpoint may already be reached; loose wiring; thermostat or power issue. Actions: turn the dial up, test mains vs batteries to isolate the source, check connections, replace the faulty component.
Dial unresponsive: check wiring and the thermostat; replace if applicable.
Batteries: check polarity, replace if depleted, or replace the battery box if the wiring is faulty.
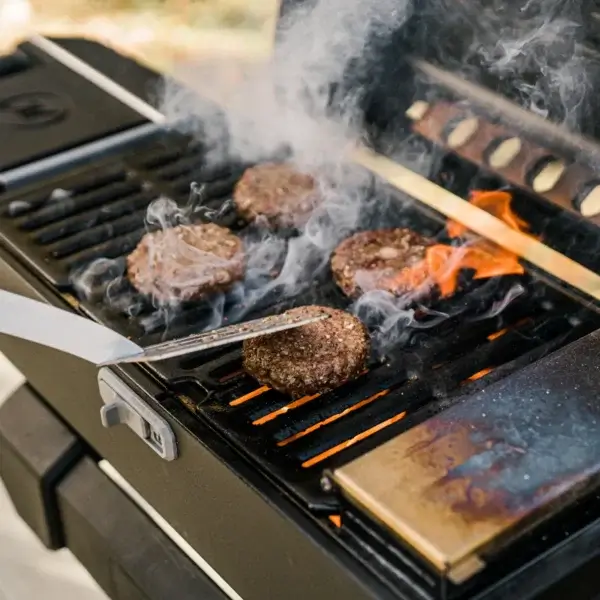
Thin, deeply browned and juicy burgers with melted cheese and toasted buns, cooked on a portable barbecue without a trolley using the SteadyTemp™ control. All done in one continuous service with an efficient workflow.
Servings, timings and kit
Servings: 4 burgers (double smash optional).
Total time: 20–30 min (5–8 min set-up + 8–12 min cooking + assembly).
Kit: Portable barbecue without trolley, cast-iron griddle or cooking grate, rigid metal spatula with a thin edge, instant-read thermometer (optional), tongs.
Fuel and setting: 450 g lump charcoal in the MiniHopper™; dial at 220–230 °C.
Ingredients (for 4 smash)
Minced beef 80/20 (80% lean / 20% fat): 360 g (4 balls of 90 g).
Burger buns: 4.
Sliced cheese: 4–8 slices (1–2 per burger).
Fine salt: 4 g (≈ 1 g per ball).
Freshly ground black pepper: 1 g (to taste).
Oil for cooking or clarified butter: 10–15 ml (to grease the griddle or buns).
Optional toppings: sliced gherkins (40 g), very finely chopped onion (40 g), sauce of choice (60 ml).
Prep (mise en place)
Form the balls: divide the meat into 4 portions of 90 g and form compact balls without overworking. Keep chilled until searing.
Split and prep the buns: cut the buns and brush very lightly with 5–7 ml total of oil or clarified butter (just for toasting).
Have the seasonings ready: keep salt, pepper, cheese, gherkins and sauce to hand for a quick assembly.
Barbecue set-up
Load the MiniHopper™ with 450 g lump charcoal.
Set SteadyTemp™ to 220–230 °C and close the lid. Wait until the thermometer sits in range.
Griddle or grate:
Griddle (recommended for smash): Place the griddle and preheat for 3–4 minutes within range so it stores heat.
Grate: set a thin plate on top or use a double spatula so you can press without the meat pushing through the grate.
Step-by-step cooking
Season the tops of the balls with salt and pepper (≈ 1 g salt per ball + a pinch of pepper).
Sear and smash: place 2 balls on the hot griddle; immediately press with the spatula (or spatula + press) into a disc about 12–13 cm wide and 3–5 mm thick. Hold firm pressure for 10–12 s for good contact.
Brown first side: leave for 45–60 s without moving. You want a lacy, crispy edge.
Flip and cheese: flip with a thin-edged spatula (scraping well) and add 1–2 slices of cheese. Cook for 20–30 s to melt.
Repeat with the other 2 balls. Working in batches of 2 keeps the heat steady and avoids long openings.
Toast the buns: between batches, open the lid just enough to add the buns for 30–45 s (cut face to the heat) until lightly golden.
Assembly
Base bun + sauce (≈ 15 ml).
Burger with cheese + gherkins (≈ 10 g) and onion (≈ 10 g) if you like.
Top bun. Press lightly to settle.
Doneness and safety
Food safety (minced beef): for maximum safety, aim for ≥ 71 °C at the centre of the burger.
Optimal smash texture: given the very thin profile, the timings above deliver a juicy centre with crisp edges within the chamber range of 220–230 °C. If you prefer a firmer centre, extend 10–15 s after the flip.
Workflow for 4 burgers
Batch 1: 2 smash → cheese → brief rest in a cooler zone or on the upper rack if fitted.
Toast 2 buns.
Batch 2: 2 smash → cheese.
Toast 2 buns.
Quickly assemble all 4.
This pace keeps the chamber temperature within range and avoids long openings.
Fine adjustments for conditions
If the temperature dips when adding cold meat, close the lid for 20–30 s between batches so the control restores 220–230 °C.
If the meat sticks to the griddle, you need more preheat, or a thinner spatula to get under the crust.
If you’re missing crust: hold the “smash” pressure for 2–3 s longer and avoid moving the meat during the first browning.
If the cheese is slow to melt, briefly cover with a metal cloche or move the burger to a hotter spot.
Serving and moving the unit
Serve immediately to preserve the contrast of crisp edge / juicy centre.
At the end, lock the lid and move the unit if you need to clear the serving area. Wait for it to cool before cleaning.
Quick clean after service
Let the temperature drop using the dial and close the lid.
With the griddle still warm, scrape residue with the spatula and remove scraps to a container.
Once cool, remove ash and wipe with a damp cloth. Dry and lightly oil the griddle to prevent rust.
Variations (keeping the 220–230 °C setting)
Griddled onion: add 15–20 g finely chopped onion to the meat just before flipping; it adheres and caramelises.
Double smash: two thin patties per burger with 1 slice between them when stacking; extra crust and a juicy centre.
Brioche or potato rolls: both toast nicely in 30–45 s and add softness.
Thin, deeply browned and juicy burgers with melted cheese and toasted buns, cooked on a portable barbecue without a trolley using the SteadyTemp™ control. All done in one continuous service with an efficient workflow.
Servings, timings and kit
Servings: 4 burgers (double smash optional).
Total time: 20–30 min (5–8 min set-up + 8–12 min cooking + assembly).
Kit: Portable barbecue without trolley, cast-iron griddle or cooking grate, rigid metal spatula with a thin edge, instant-read thermometer (optional), tongs.
Fuel and setting: 450 g lump charcoal in the MiniHopper™; dial at 220–230 °C.
Ingredients (for 4 smash)
Minced beef 80/20 (80% lean / 20% fat): 360 g (4 balls of 90 g).
Burger buns: 4.
Sliced cheese: 4–8 slices (1–2 per burger).
Fine salt: 4 g (≈ 1 g per ball).
Freshly ground black pepper: 1 g (to taste).
Oil for cooking or clarified butter: 10–15 ml (to grease the griddle or buns).
Optional toppings: sliced gherkins (40 g), very finely chopped onion (40 g), sauce of choice (60 ml).
Prep (mise en place)
Form the balls: divide the meat into 4 portions of 90 g and form compact balls without overworking. Keep chilled until searing.
Split and prep the buns: cut the buns and brush very lightly with 5–7 ml total of oil or clarified butter (just for toasting).
Have the seasonings ready: keep salt, pepper, cheese, gherkins and sauce to hand for a quick assembly.
Barbecue set-up
Load the MiniHopper™ with 450 g lump charcoal.
Set SteadyTemp™ to 220–230 °C and close the lid. Wait until the thermometer sits in range.
Griddle or grate:
Griddle (recommended for smash): Place the griddle and preheat for 3–4 minutes within range so it stores heat.
Grate: set a thin plate on top or use a double spatula so you can press without the meat pushing through the grate.
Step-by-step cooking
Season the tops of the balls with salt and pepper (≈ 1 g salt per ball + a pinch of pepper).
Sear and smash: place 2 balls on the hot griddle; immediately press with the spatula (or spatula + press) into a disc about 12–13 cm wide and 3–5 mm thick. Hold firm pressure for 10–12 s for good contact.
Brown first side: leave for 45–60 s without moving. You want a lacy, crispy edge.
Flip and cheese: flip with a thin-edged spatula (scraping well) and add 1–2 slices of cheese. Cook for 20–30 s to melt.
Repeat with the other 2 balls. Working in batches of 2 keeps the heat steady and avoids long openings.
Toast the buns: between batches, open the lid just enough to add the buns for 30–45 s (cut face to the heat) until lightly golden.
Assembly
Base bun + sauce (≈ 15 ml).
Burger with cheese + gherkins (≈ 10 g) and onion (≈ 10 g) if you like.
Top bun. Press lightly to settle.
Doneness and safety
Food safety (minced beef): for maximum safety, aim for ≥ 71 °C at the centre of the burger.
Optimal smash texture: given the very thin profile, the timings above deliver a juicy centre with crisp edges within the chamber range of 220–230 °C. If you prefer a firmer centre, extend 10–15 s after the flip.
Workflow for 4 burgers
Batch 1: 2 smash → cheese → brief rest in a cooler zone or on the upper rack if fitted.
Toast 2 buns.
Batch 2: 2 smash → cheese.
Toast 2 buns.
Quickly assemble all 4.
This pace keeps the chamber temperature within range and avoids long openings.
Fine adjustments for conditions
If the temperature dips when adding cold meat, close the lid for 20–30 s between batches so the control restores 220–230 °C.
If the meat sticks to the griddle, you need more preheat, or a thinner spatula to get under the crust.
If you’re missing crust: hold the “smash” pressure for 2–3 s longer and avoid moving the meat during the first browning.
If the cheese is slow to melt, briefly cover with a metal cloche or move the burger to a hotter spot.
Serving and moving the unit
Serve immediately to preserve the contrast of crisp edge / juicy centre.
At the end, lock the lid and move the unit if you need to clear the serving area. Wait for it to cool before cleaning.
Quick clean after service
Let the temperature drop using the dial and close the lid.
With the griddle still warm, scrape residue with the spatula and remove scraps to a container.
Once cool, remove ash and wipe with a damp cloth. Dry and lightly oil the griddle to prevent rust.
Variations (keeping the 220–230 °C setting)
Griddled onion: add 15–20 g finely chopped onion to the meat just before flipping; it adheres and caramelises.
Double smash: two thin patties per burger with 1 slice between them when stacking; extra crust and a juicy centre.
Brioche or potato rolls: both toast nicely in 30–45 s and add softness.
Thin, deeply browned and juicy burgers with melted cheese and toasted buns, cooked on a portable barbecue without a trolley using the SteadyTemp™ control. All done in one continuous service with an efficient workflow.
Servings, timings and kit
-
Servings: 4 burgers (double smash optional).
-
Total time: 20–30 min (5–8 min set-up + 8–12 min cooking + assembly).
-
Kit: Portable barbecue without trolley, cast-iron griddle or cooking grate, rigid metal spatula with a thin edge, instant-read thermometer (optional), tongs.
-
Fuel and setting: 450 g lump charcoal in the MiniHopper™; dial at 220–230 °C.
Ingredients (for 4 smash)
-
Minced beef 80/20 (80% lean / 20% fat): 360 g (4 balls of 90 g).
-
Burger buns: 4.
-
Sliced cheese: 4–8 slices (1–2 per burger).
-
Fine salt: 4 g (≈ 1 g per ball).
-
Freshly ground black pepper: 1 g (to taste).
-
Oil for cooking or clarified butter: 10–15 ml (to grease the griddle or buns).
-
Optional toppings: sliced gherkins (40 g), very finely chopped onion (40 g), sauce of choice (60 ml).
Prep (mise en place)
-
Form the balls: divide the meat into 4 portions of 90 g and form compact balls without overworking. Keep chilled until searing.
-
Split and prep the buns: cut the buns and brush very lightly with 5–7 ml total of oil or clarified butter (just for toasting).
-
Have the seasonings ready: keep salt, pepper, cheese, gherkins and sauce to hand for a quick assembly.
Barbecue set-up
-
Load the MiniHopper™ with 450 g lump charcoal.
-
Set SteadyTemp™ to 220–230 °C and close the lid. Wait until the thermometer sits in range.
-
Griddle or grate:
-
Griddle (recommended for smash): Place the griddle and preheat for 3–4 minutes within range so it stores heat.
-
Grate: set a thin plate on top or use a double spatula so you can press without the meat pushing through the grate.
Step-by-step cooking
-
Season the tops of the balls with salt and pepper (≈ 1 g salt per ball + a pinch of pepper).
-
Sear and smash: place 2 balls on the hot griddle; immediately press with the spatula (or spatula + press) into a disc about 12–13 cm wide and 3–5 mm thick. Hold firm pressure for 10–12 s for good contact.
-
Brown first side: leave for 45–60 s without moving. You want a lacy, crispy edge.
-
Flip and cheese: flip with a thin-edged spatula (scraping well) and add 1–2 slices of cheese. Cook for 20–30 s to melt.
-
Repeat with the other 2 balls. Working in batches of 2 keeps the heat steady and avoids long openings.
-
Toast the buns: between batches, open the lid just enough to add the buns for 30–45 s (cut face to the heat) until lightly golden.
Assembly
-
Base bun + sauce (≈ 15 ml).
-
Burger with cheese + gherkins (≈ 10 g) and onion (≈ 10 g) if you like.
-
Top bun. Press lightly to settle.
Doneness and safety
-
Food safety (minced beef): for maximum safety, aim for ≥ 71 °C at the centre of the burger.
-
Optimal smash texture: given the very thin profile, the timings above deliver a juicy centre with crisp edges within the chamber range of 220–230 °C. If you prefer a firmer centre, extend 10–15 s after the flip.
Workflow for 4 burgers
-
Batch 1: 2 smash → cheese → brief rest in a cooler zone or on the upper rack if fitted.
-
Toast 2 buns.
-
Batch 2: 2 smash → cheese.
-
Toast 2 buns.
-
Quickly assemble all 4.
This pace keeps the chamber temperature within range and avoids long openings.
Fine adjustments for conditions
-
If the temperature dips when adding cold meat, close the lid for 20–30 s between batches so the control restores 220–230 °C.
-
If the meat sticks to the griddle, you need more preheat, or a thinner spatula to get under the crust.
-
If you’re missing crust: hold the “smash” pressure for 2–3 s longer and avoid moving the meat during the first browning.
-
If the cheese is slow to melt, briefly cover with a metal cloche or move the burger to a hotter spot.
Serving and moving the unit
-
Serve immediately to preserve the contrast of crisp edge / juicy centre.
-
At the end, lock the lid and move the unit if you need to clear the serving area. Wait for it to cool before cleaning.
Quick clean after service
-
Let the temperature drop using the dial and close the lid.
-
With the griddle still warm, scrape residue with the spatula and remove scraps to a container.
-
Once cool, remove ash and wipe with a damp cloth. Dry and lightly oil the griddle to prevent rust.
Variations (keeping the 220–230 °C setting)
-
Griddled onion: add 15–20 g finely chopped onion to the meat just before flipping; it adheres and caramelises.
-
Double smash: two thin patties per burger with 1 slice between them when stacking; extra crust and a juicy centre.
-
Brioche or potato rolls: both toast nicely in 30–45 s and add softness.