

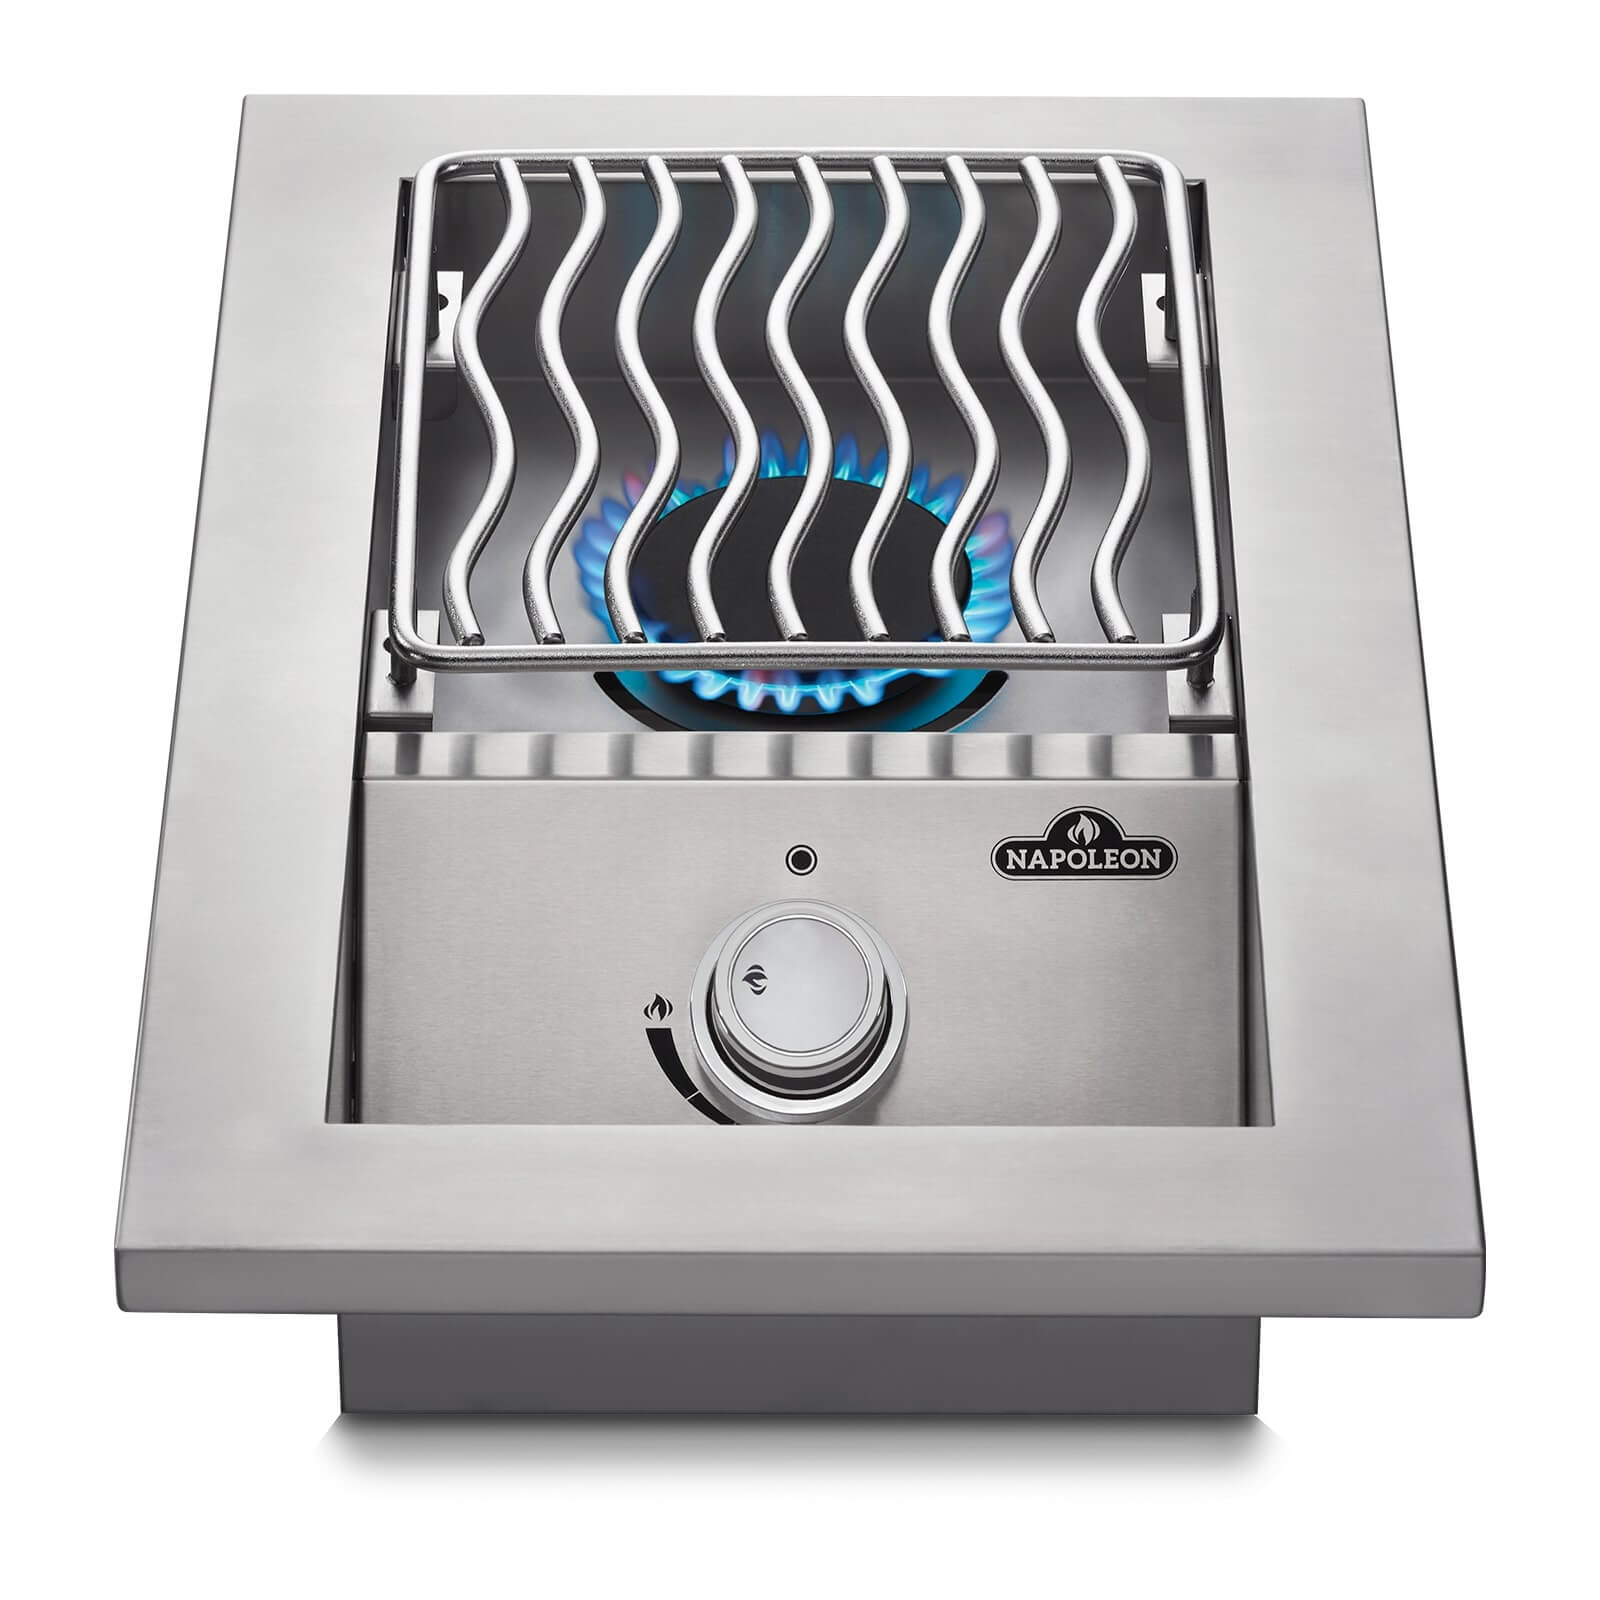


The 500 Series Gas Burner is an essential addition to any outdoor kitchen looking to effectively combine functionality and style. This built-in side burner is compatible with the 500 Series barbecues, providing an ideal solution for those who want an additional cooking area without sacrificing space on the main grill. Manufactured from high quality stainless steel, this burner not only offers remarkable power, but also ensures superior durability and weather resistance, making it a long-term investment for your outdoor kitchen.
Powerful 3.5 kW Burner for Versatile Cooking
With an impressive 3.5 kW of power, the 500 Series side burner is designed to handle a wide range of outdoor cooking tasks, from roasting meats and vegetables at high temperatures to simmering stews and sauces. Its ring burner design allows for even heat distribution across the entire cooking surface, which is essential to ensure consistent, professional results. This feature is especially useful for amateur and professional chefs who need precision cooking of different dishes simultaneously, such as boiling pasta while meat is grilling on the main grill.
WAVE Stainless Steel Grills: Precision and Durability
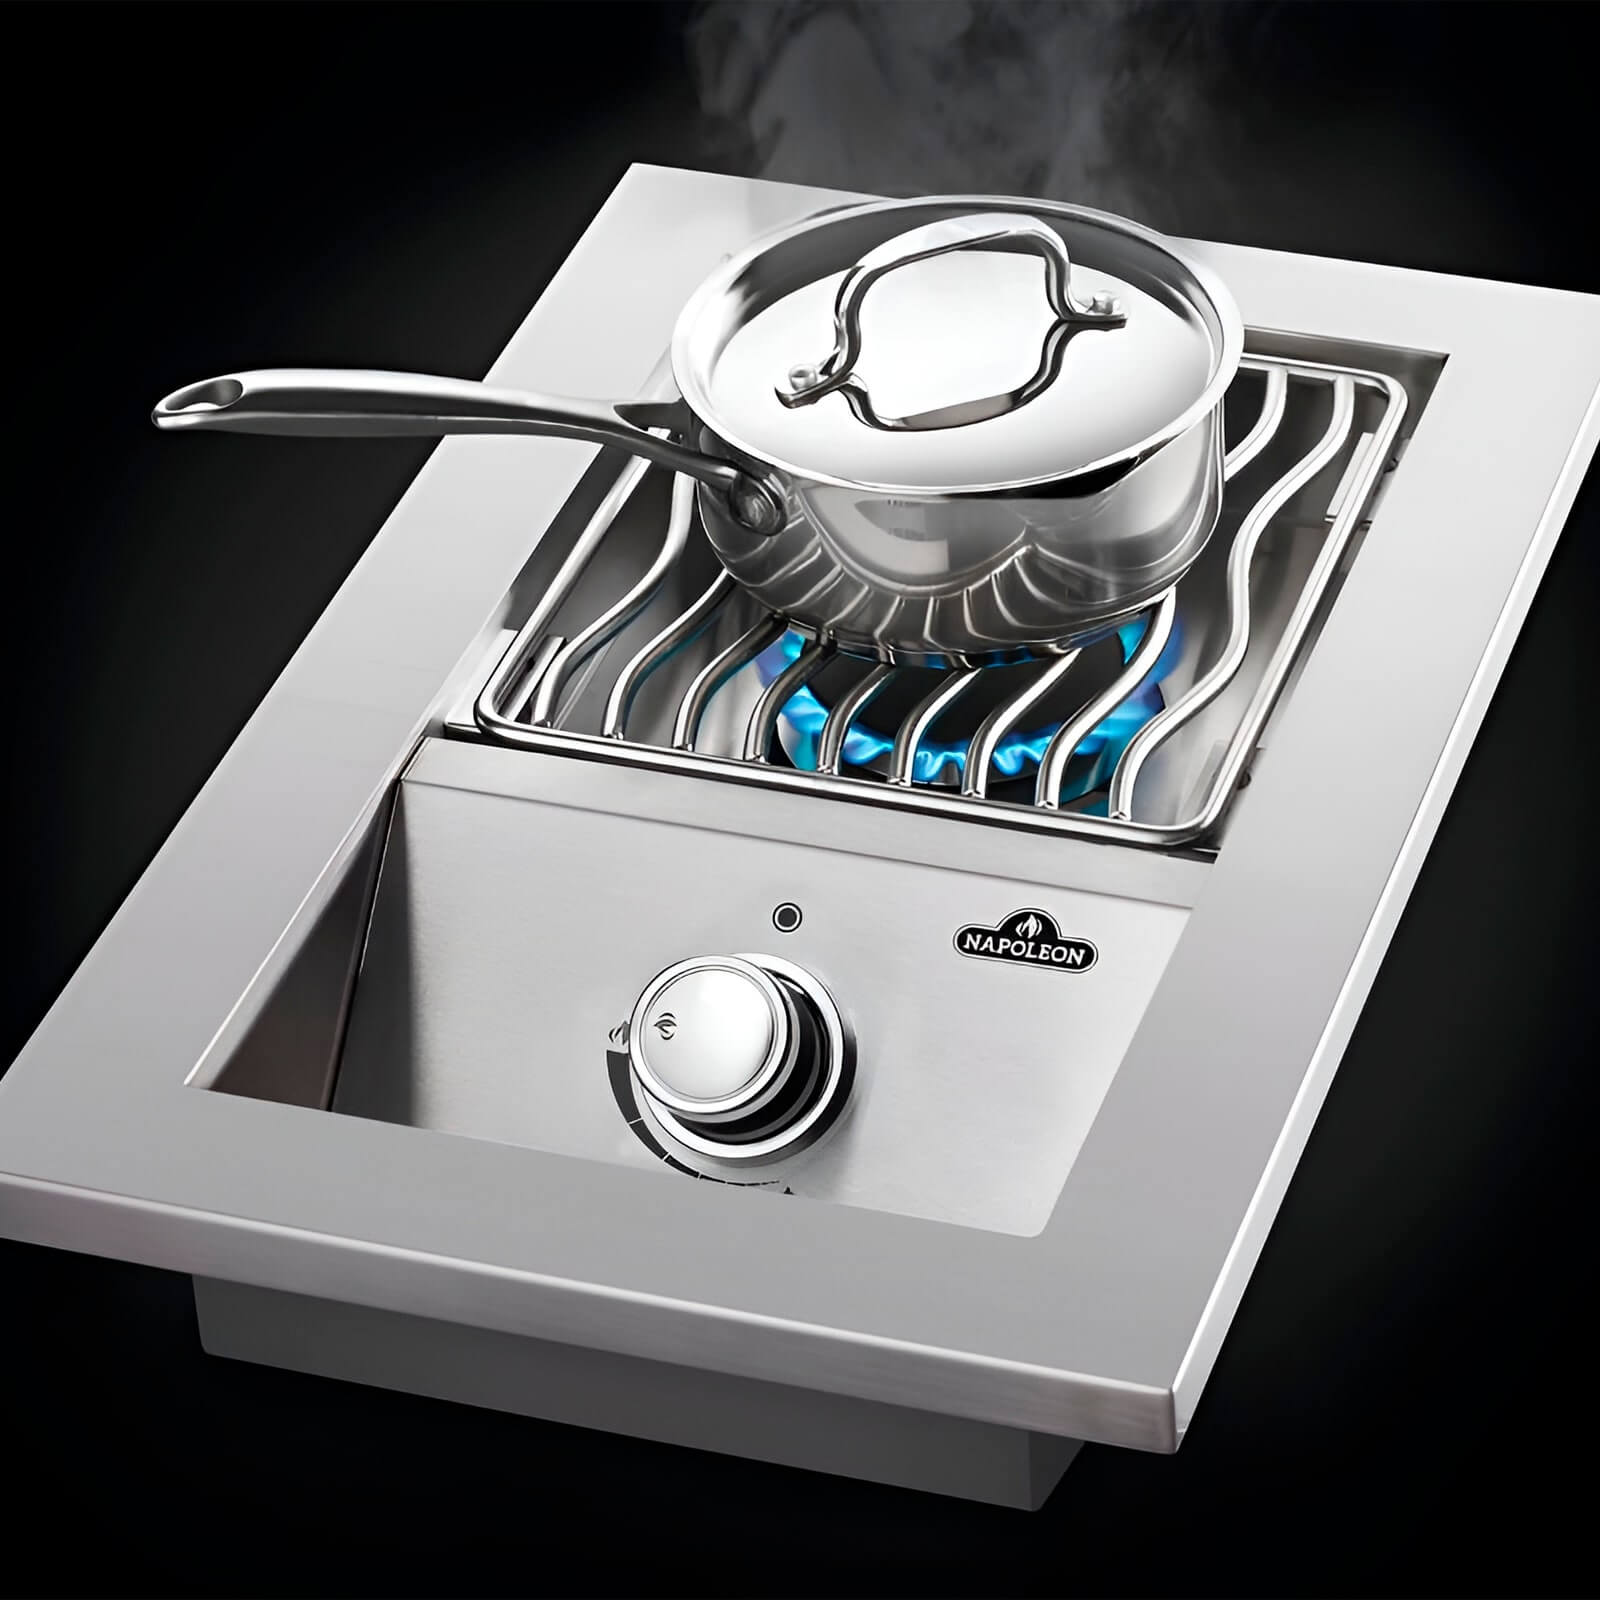
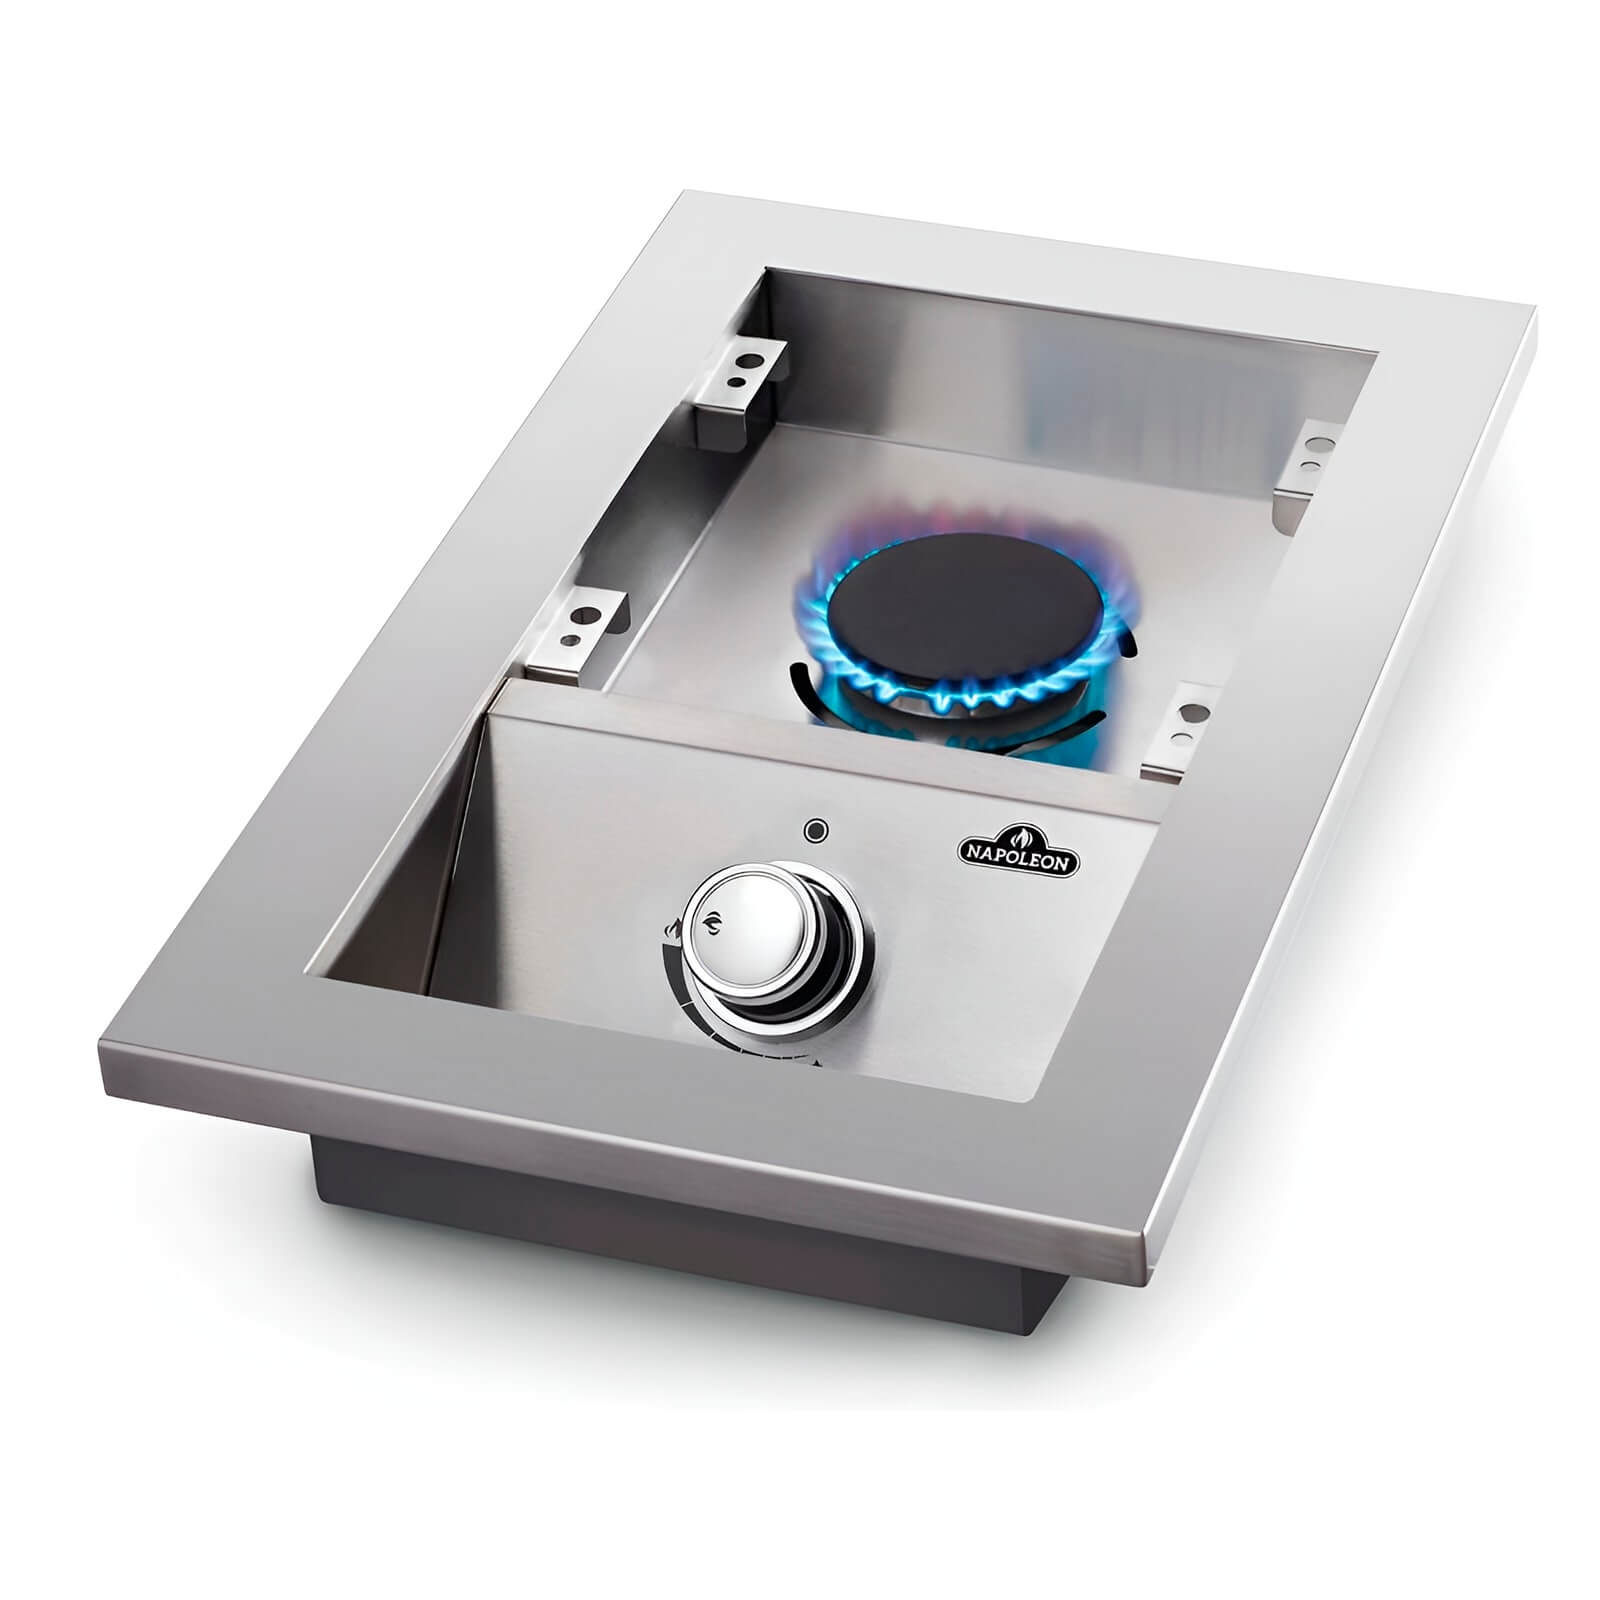
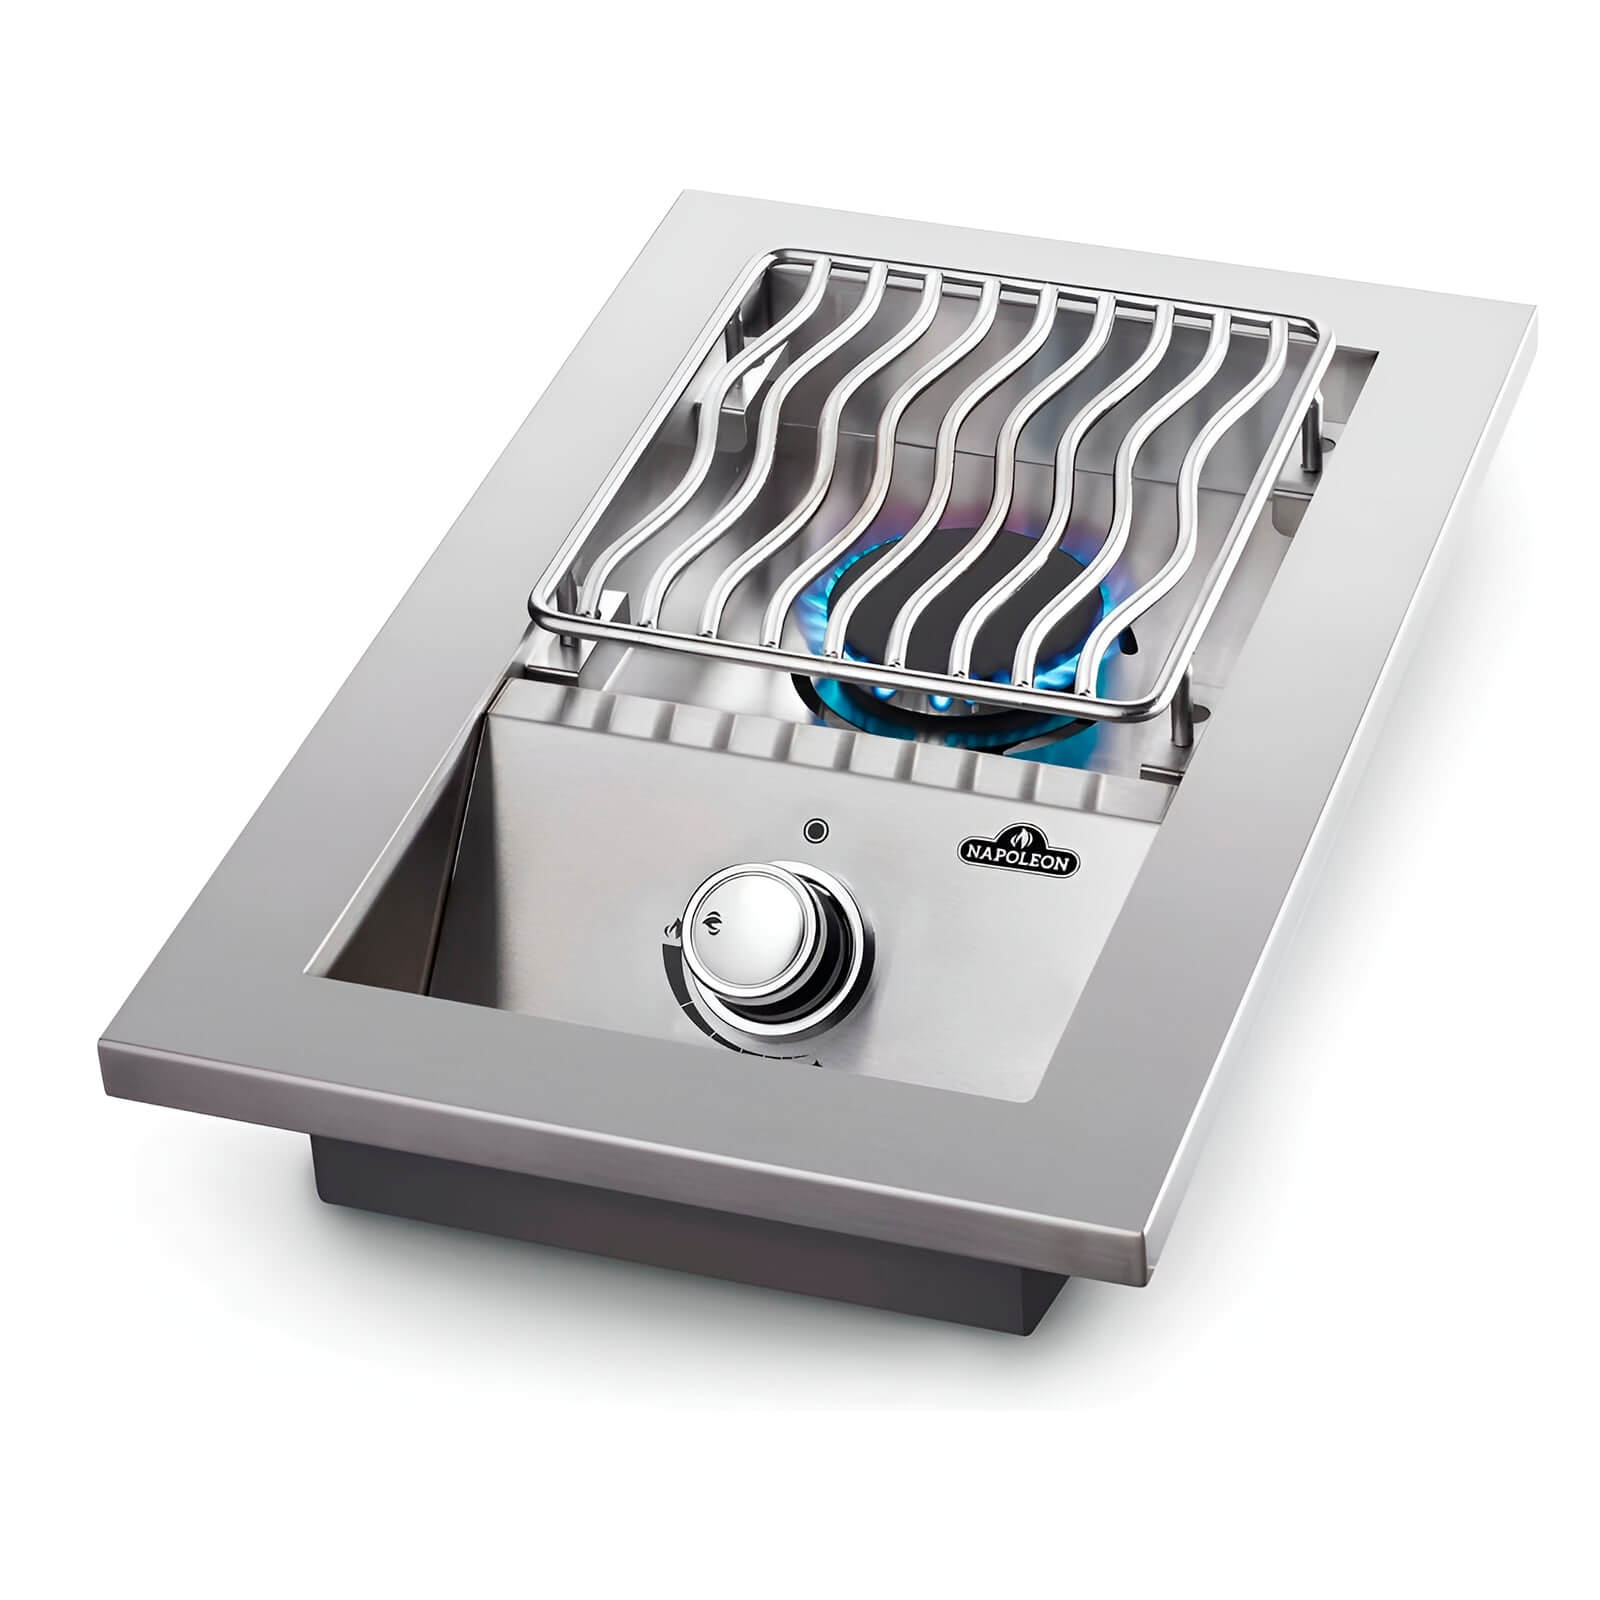
The 500 Series Burner comes equipped with 7.5 mm thick WAVE bar grates made of shot-blasted stainless steel, which ensures exceptional heat and corrosion resistance. The wave design of the grids not only provides optimal heat distribution, but also enhances the aesthetics of the appliance and the cooking experience by preventing small food items from falling through the grids. This configuration is ideal for cooking delicate foods such as seafood or small vegetables, and their extra thickness ensures superior heat retention, allowing for perfect food marking. In addition, the grates are height adjustable, giving greater control over the distance between the food and the heat source, and are easy to clean, minimising maintenance time.
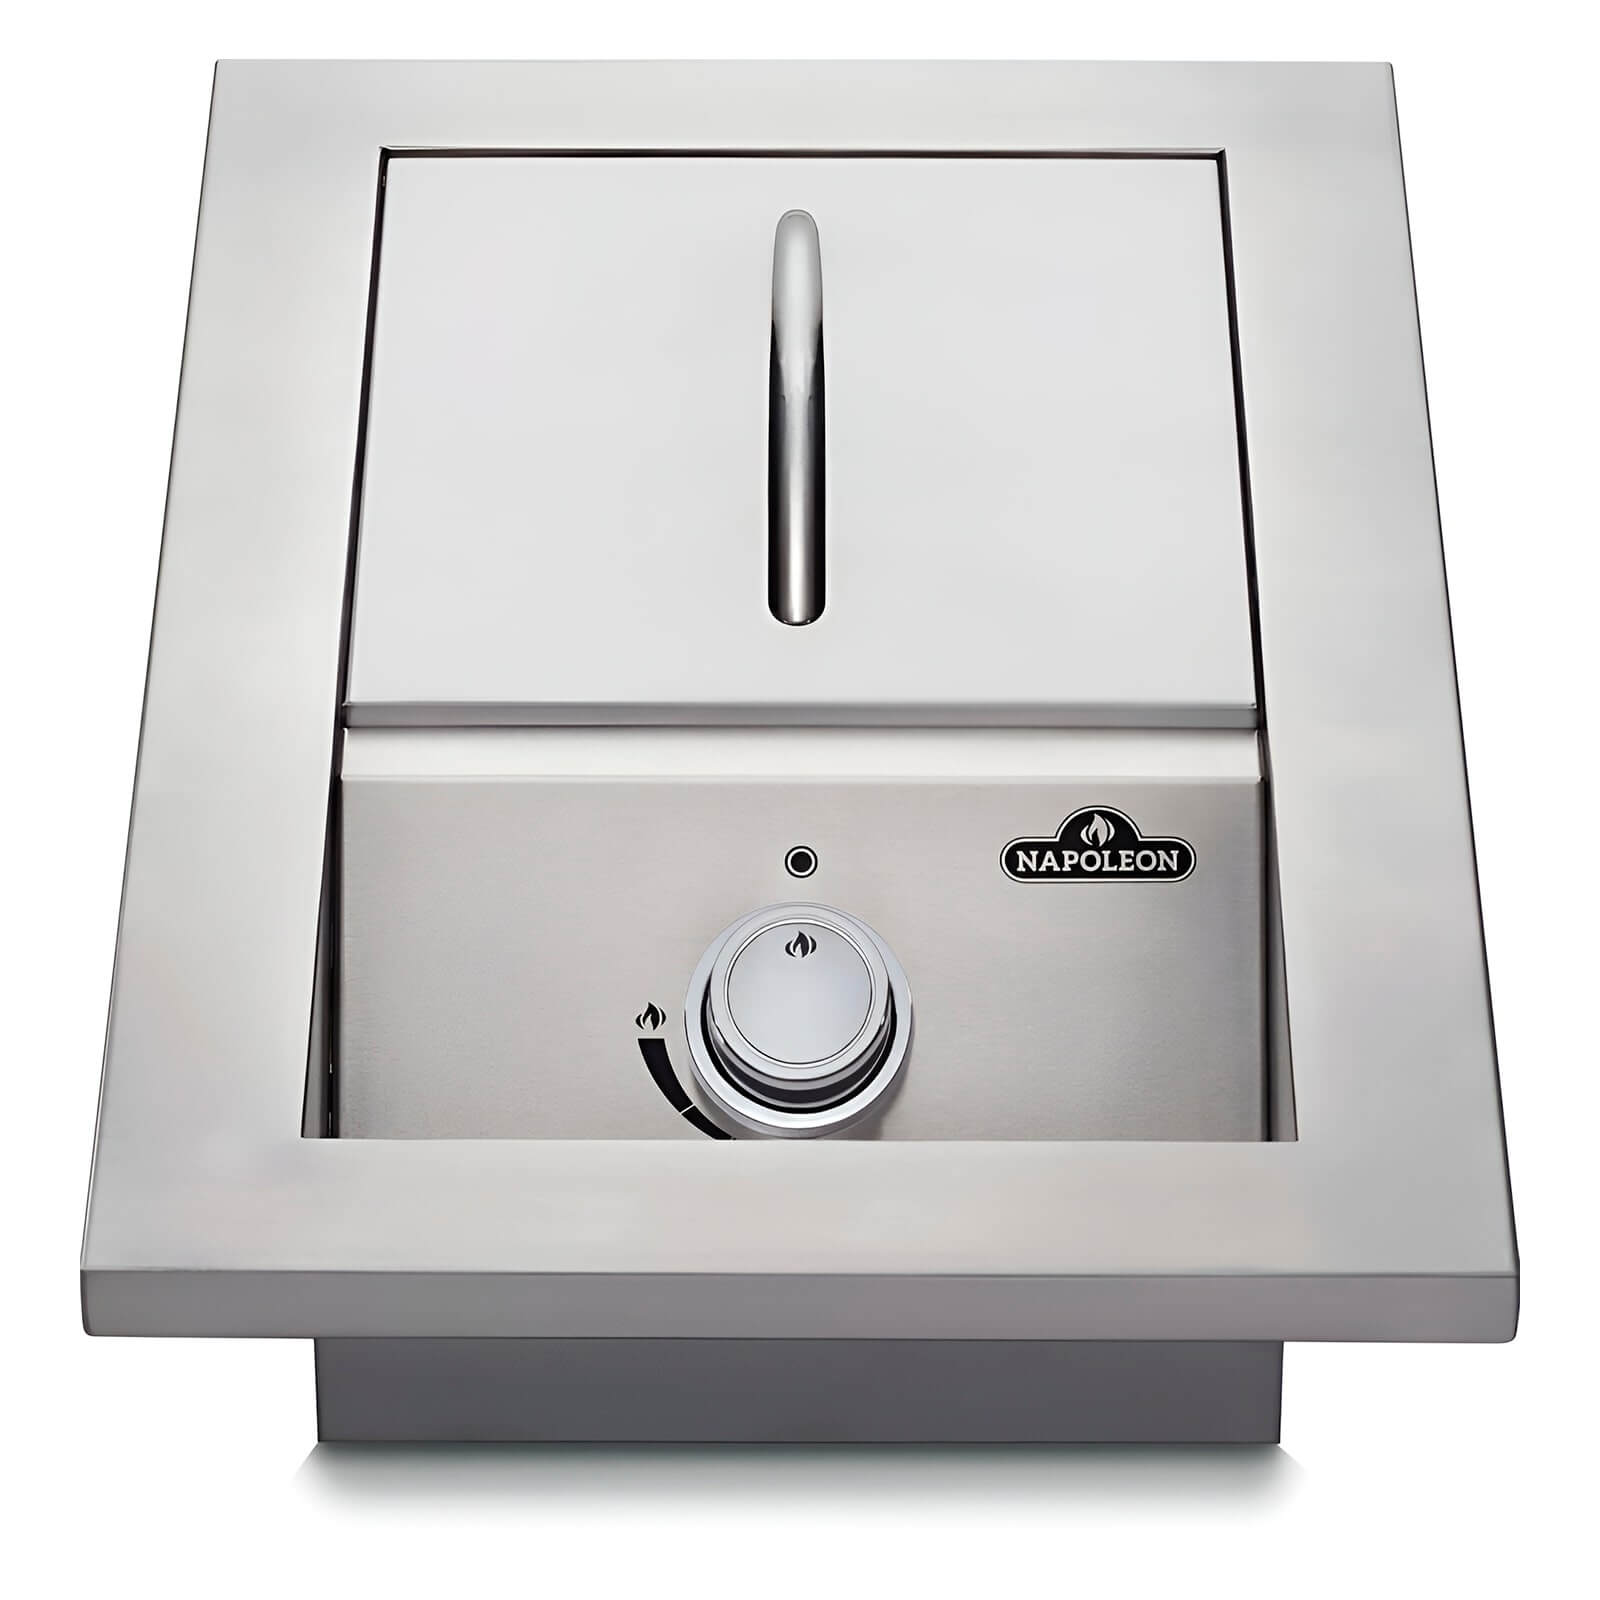
JETFIRE Ignition: Ease and Safety
The innovative JETFIRE™ ignition system of the 500 Series Burner provides an efficient and safe solution for lighting the burner quickly. Through an additional pilot flame, the system ignites the main burner almost instantaneously at the push of a button, eliminating the need for repeated ignitions or hassle with matches and lighters. This system not only improves convenience of use, but also increases safety by minimising exposure to gas and reducing the risk of misfiring. This makes it especially attractive for users who value efficiency and safety in their outdoor cooking.
Compact Design with Simple Installation
The recessed design of the 500 Series Burner allows for seamless integration into outdoor kitchen worktops, provided that non-flammable materials are used for installation. Installation from above is straightforward and simplified, reducing the time and effort required for assembly. In addition, its elegant aesthetics and compatibility with other Napoleon 500 Series built-in appliances allow for a harmonious combination in the kitchen, while maintaining a professional and modern look. This design not only maximises the use of space in outdoor kitchens, but also contributes to a more organised and efficient cooking experience.
Protection against external elements
The stainless steel cover included with the burner provides essential protection against external elements such as moisture, dirt and debris, ensuring that the burner remains in optimum condition for longer. This cover not only protects the burner when not in use, but also enhances the overall aesthetics of the kitchen by maintaining a clean and tidy appearance. In addition, stainless steel’s resistance to corrosion and weathering ensures that the burner maintains its performance and appearance, even after multiple seasons of intensive use.
Wide Gas Connection Compatibility
The 500 Series Burner is designed to operate with propane and butane, offering flexibility in the fuel source used. It includes a pre-installed two-stage pressure regulator system that ensures a safe and standard connection to gas cylinders. The 1/4 inch external left hand thread connection allows integration with 1/4 inch low pressure hoses with 30 mbar pressure regulator, which are available separately, making it easy to configure to each user’s individual needs. With an optional bypass valve, it is also possible to connect both the side burner and the integrated barbecue to a single gas cylinder, although the maximum flow rate of the pressure regulator must be taken into account to avoid loss of performance or problems such as premature freezing of the cylinder and regulator.
Use and Maintenance of the 500 Series Gas Burner: Step by Step Guide
To ensure optimum performance and long life of the 500 Series Gas Burner, it is important to follow proper use and maintenance procedures. Below is a step-by-step guide to maximise the functionality of this side burner in your outdoor kitchen.
Step 1: Proper Burner Installation
- Installation Site Selection: Make sure to install the burner on a non-flammable countertop, such as stone, stainless steel or concrete. This will prevent fire hazards and ensure a safe installation.
- Gas Connection: Before connecting the burner, check that the gas connection is tight and that all fittings such as hoses and regulators are compatible and in good condition. Connect the gas hose to the burner using the 1/4 inch external left hand thread and adjust the pressure regulator to 30 mbar if necessary.
- Leak Test: Before lighting the burner, leak test all connections with a leak detector spray or soapy water. If you see bubbles, tighten the connections before proceeding.
Step 2: Igniting and Using the Burner
- Ignition with JETFIRE™ System: To light the burner, open the gas valve and press the JETFIRE™ ignition button. This system will automatically light a pilot flame which will ignite the main burner. Be sure to maintain a safe distance and make sure there are no obstructions over the burner when lighting.
- Flame Adjustment: Use the adjustment control to adjust the flame intensity according to the type of cooking you are doing. For fast cooking and searing, adjust to a high flame. For simmering or keeping food warm, reduce the flame to a low setting.
- Burner Use: The side burner is ideal for cooking side dishes, sauces, or dishes that require different cooking than the main grill. Use pans, pots or woks compatible with the size and power of the burner (23 cm x 27 cm surface area).
Step 3: Safe Burner Shutoff
- Closing the Gas Valve: After using the burner, first turn the flame off by turning the control knob to the “OFF” position. Then, close the gas valve to completely shut off the gas supply and prevent leakage.
- Cooling: Allow burner and grates to cool completely before covering or cleaning to prevent burns and damage to material.
Step 4: Regular Cleaning and Maintenance
- Grill Cleaning: Once the WAVE™ grills are cool, remove them and clean them with a soft bristle brush to remove food residue. You can wash them with warm water and mild soap for a more thorough cleaning, making sure to rinse thoroughly and dry completely to prevent corrosion.
- Burner Maintenance: Regularly check the burner orifices to make sure they are not clogged with grease or food residue. Use a soft brush or thin wire to clean out any blockages.
- Burner Protection: When not in use, cover the burner with the stainless steel cover to protect it from moisture, dust and dirt. This not only preserves its appearance but also its long-term functionality.
- Check Gas Connections: Regularly check all gas connections to make sure they are tight and leak-free. Replace hoses and regulators if they show signs of wear or damage.
- Component Lubrication: To keep ignition controls and mechanisms in good condition, apply appropriate lubricant to moving contact points according to manufacturer’s recommendations.
Step 5: Storage and Preparation for Seasons
- Long Term Protection: If you are not going to use the burner for an extended period of time, instead of disassembling it, cover it with a protective cover designed specifically for this model. These covers are made of weather-resistant materials that protect the burner from moisture, dust and other adverse environmental elements, keeping it in optimal condition for its next use.
- Pre-Seasonal Check: Before the first firing of the season, perform a complete burner check, including a test ignition and verification of all gas connections and safety components.
Specifications
- Power and Burner:
- Burner type: Cooking ring.
- Power: 3.5 kW.
- Gas type: Propane and butane at 30 mbar.
- Cooking surface and grids:
- Grill surface: 23 cm x 27 cm.
- Grill material: Stainless steel, 7.5 mm, shot-blasted.
- Grid design: WAVE™ stainless steel.
- Ignition:
- System: JETFIRE™ for quick and easy ignition.
- Dimensions and Weight:
- Burner dimensions (W x D x H): 34.29 x 55.88 x 17.53 cm.
- Installation dimensions (W x D x H): 30.5 x 47.6 x 15.2 cm.
- Gas connection:
- System: two-stage pressure regulator with 1/4 inch connection.
- Note: Gas connection not included; hose and regulator to be purchased separately.
- Materials and Construction:
- Lid: Stainless steel.
- Installation: Non-flammable materials only.
- Package Contents:
- 1 x Napoleon 500 Series recessed side burner.
- Additional Notes:
- Simultaneous use: Possible with integrated barbecue by means of optional bypass valve.
- Caution: Check connections for tightness before use.
Grilled Steak with Mushroom Sauce and Side Dishes on the Sideburner Recipe
Enjoy a delicious combination of flavours cooking on your barbecue and making the most of your side burner. This dish includes a succulent grilled steak accompanied by a rich mushroom sauce, cooked on the side burner, and sautéed vegetables to complement the complete outdoor cooking experience.
Ingredients:
For the grilled steak:
- 4 beef steaks (about 2.5 cm thick)
- 2 tablespoons olive oil
- Salt and pepper to taste
- 1 teaspoon garlic powder
- 1 teaspoon fresh thyme (optional)
For the mushroom sauce:
- 2 cups fresh mushrooms, sliced
- 2 tablespoons butter
- 1 clove garlic, minced
- 1/2 cup beef stock
- 1/2 cup whipping cream
- 1 teaspoon Dijon mustard
- Salt and pepper to taste
- 1 teaspoon chopped fresh parsley for garnish
For the sautéed vegetables:
- 1 red pepper, cut into strips.
- 1 courgette, sliced
- 1 red onion, sliced
- 1 tablespoon olive oil
- Salt and pepper to taste
Directions:
Step 1: Prepare the Grilled Steak
- Marinate the steaks: Pat the steaks dry with kitchen paper and rub with olive oil, salt, pepper, garlic powder and fresh thyme if desired. Let stand at room temperature for about 20 minutes to absorb the flavours.
- Preheat the Grill: Turn the barbecue grill on high. Make sure the grates are clean and lightly oiled to prevent the steak from sticking.
- Cooking the Steaks: Place the steaks on the grill and cook over direct heat. For medium rare, cook steaks for 4-5 minutes per side or until desired doneness is reached. Remove the steaks from the grill and let them rest covered with foil while you prepare the sauce.
Step 2: Prepare Mushroom Sauce on the Side Burner
- Light the Side Burner: Turn on the side burner of your outdoor cooker to medium-high heat and place a large skillet.
- Sauté the Mushrooms: Add the butter to the pan and allow it to melt. Add the sliced mushrooms and sauté for 5-7 minutes until golden brown and tender. Add minced garlic and cook for an additional minute until fragrant.
- Add Liquids and Seasoning: Pour the beef stock and whipping cream into the pan with the mushrooms. Add Dijon mustard, salt and pepper to taste. Cook the mixture over medium heat, stirring occasionally, until the sauce reduces and thickens, about 5-7 minutes. Adjust seasoning if necessary and stir in the chopped parsley before serving.
Step 3: Cook the Sautéed Vegetables on the Side Burner
- Sauté the vegetables: In a separate pan on the side burner, heat the olive oil over medium-high heat. Add the peppers, courgette and onion. Sauté the vegetables for 5-6 minutes until crisp-tender. Season with salt and pepper to taste.
Step 4: Serve and Enjoy
- Assemble Plate: Place a grilled steak on each plate and pour a generous portion of the mushroom sauce over each steak. Serve with the sautéed vegetables on the side.
- Garnish and Serve: Garnish with a little more chopped fresh parsley and serve immediately.


