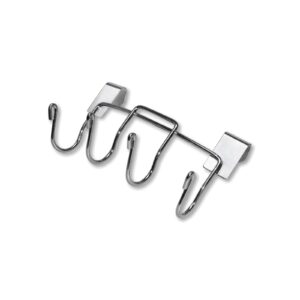
The Napoleon Chicken Leg Grill Rack is the accessory that turns any grill into an efficient convection oven: it lifts the pieces, keeps them vertical and frees up the grill to cook side dishes at the same time. Made of stainless steel and built to last, it is equally useful on gas barbecues, charcoal barbecues or even domestic ovens. Its folding design and lid-tray multiply the possibilities without the hassle.
🔧 Materials and construction
The set is made of high-quality stainless steel, which makes it corrosion-resistant, thermally stable and easy to clean even after long grilling sessions. It is dishwasher safe, making daily maintenance a breeze. The folding structure adds sturdiness without sacrificing portability or cabinet space.
✨Outstanding features
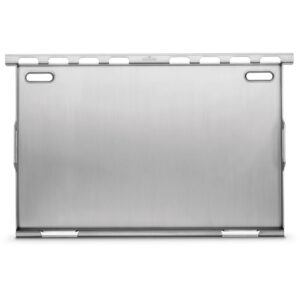
The rack holds up to 12 legs or wings in an upright position, ensuring even heat exposure on all sides. The top lid doubles as a tray: it acts as a drip pan to keep the grill clean or as a griddle for sautéing vegetables, warming up omelettes or finishing off a side dish while the chicken is cooking.
🚀 Performance and efficiency
By cooking vertically, air circulates around each piece and fat drips away from direct heat, promoting crispy skin and juicy meat with fewer flare-ups. This architecture reduces the need for constant turning and improves repeatability of results, ideal for large, time-controlled batches.
🖤 Design and aesthetics
The clean metal finish and folding geometry convey a professional and practical aesthetic in equal measure. The compact format makes it easy to store in any kitchen cabinet or transport in an accessory bag.
🔗 Compatibilities and accessories
Works on most gas or charcoal barbecues and also in conventional ovens, as it does not require specific parts and does not add excessive volume. The removable top tray can be used on its own or together with the stand, extending its role as a “2 in 1” accessory.
🍗 Cooking styles it enhances
It is perfect for direct/indirect barbecues, low & slow cooking for gentle smoking and outdoor cooking when you want to prepare main course and side dish simultaneously. In home cooking, the rack fits into standard trays for very clean roasting results.
🛡️ Safety and ease of use
By keeping the pieces stable and upright, flipping and handling over high heat is minimised. The juice tray reduces drips and flare-ups, and the stainless steel prevents coatings that require special care. Dishwasher safe means less contact with hot grease and safer cleaning.
🧳 Uses outside the BBQ
In addition to legs and wings, the rack functions as a glazing station for lacquering at the end of cooking, and the tray serves as a griddle for vegetables, flatbreads or grilled cheeses.
Use and maintenance
To maximise the useful life of your rack and maintain consistent performance with every use, follow this simple routine: prepare the accessory before use, work with the appropriate heat setting, and clean/store correctly after each use. These steps not only improve safety and hygiene, they also preserve the stainless steel finish and the geometry of the support so that the pieces always remain stable.
Start-up
- Wash the set before first use with warm water and mild detergent.
- Unfold the rack and check its stability on the grill or in the oven.
- Preheat and lightly grease the tray if you are using it as a griddle.
During cooking
- Place the pieces so that they do not touch each other to allow air to circulate.
- Use indirect heat for even cooking; direct heat only for final browning.
- Use heat-resistant gloves to handle the pieces and tray.
Cleaning
- Leave to cool for 10–15 minutes. Remove large debris with a plastic spatula or nylon brush.
- Suitable for dishwashers; for stubborn dirt, soak the tray for 15 minutes.
Storage
- Fold the rack and store it horizontally to protect its shape.
- Avoid knocks that could deform the fastening holes.
🍗 Recipe for crispy BBQ chicken thighs with roasted vegetables on a baking tray
Below you will find a
step-by-step recipe designed to get the most out of your grill: crispy skin, juicy meat and a side dish that cooks at the same time on the top tray. I include instructions for
gas,
charcoal and
oven, as well as approximate times and texture tips so you can adjust to your equipment.
Yield: 12 thighs
Total time: 10 min prep + 50–65 min cooking + 5 min rest
Level: Easy
Ingredients
- 12 chicken thighs (similar size)
- 2 teaspoons fine salt
- 1 teaspoon ground black pepper
- 2 teaspoons garlic powder
- 2 teaspoons sweet or smoked paprika
- 1 teaspoon ground cumin
- 2 teaspoons brown sugar (optional, helps with browning)
- 2–3 tablespoons olive oil
- 120–150 ml of your favourite BBQ sauce (for glazing at the end)
- 1 courgette, cut into half-moons, 1 red pepper, cut into strips, 1 red onion, cut into wedges
- Optional: a few sprigs of thyme or rosemary
Preparation
- Prepare the seasoning. Mix together the salt, pepper, garlic, paprika, cumin and brown sugar.
- Dry and season. Dry the thighs thoroughly with kitchen paper, brush with oil and sprinkle the seasoning on all sides.
- Assemble the grill. Place the thighs on the grill with the skin facing outwards; make sure they do not touch each other to allow air to circulate.
Heat settings
- Gas: Preheat the barbecue to 180–200 °C on indirect heat (side burners on, centre burner off).
- Charcoal: Prepare a two-zone grill; embers on one side and a clear zone on the other. Adjust the ventilation to maintain 180–200 °C under the lid.
- Oven: Preheat to 190 °C with top/bottom heat or gentle convection.
Cooking – Phase 1 (main cooking, 35–45 min)
- Place the rack in the indirect zone and place the tray on top as a drip tray.
- Add the courgette, pepper and onion to the tray with a drizzle of oil and salt. If using herbs, place them on top of the vegetables.
- Cook with the lid closed until the thighs reach 70–72 °C in the centre (use a thermometer if possible). Turn the vegetable tray halfway through for even cooking.
Cooking – Phase 2 (glazing and finishing, 10–15 min)
- Brush the thighs with BBQ sauce and raise the temperature to 200–210 °C or move them briefly to the direct zone to brown without flare-ups.
- Cook until the internal temperature reaches 75 °C and the skin is golden and crispy. The vegetables should be tender and slightly caramelised.
Resting and serving
- Leave to rest for 5 minutes. Serve the thighs with the vegetables from the tray and extra BBQ sauce to taste.
- Desired texture: tight, crispy skin; clear juices; al dente vegetables with golden edges.
Master griller tips
- Uniformity: if there are smaller thighs, place them in the centre of the grill (warmer area).
- Optional smoking: add a small handful of wood chips (hickory/apple) on top of the charcoal or in a smoker box for a subtle flavour.
- For extra crispiness: dry the skin thoroughly and avoid excess sauce until the end.
- Food safety: minimum internal temperature of 75 °C.
🥦 Vegetarian variation (suitable for the same tray): BBQ cauliflower “wings” with crispy chickpeas
Idea: We use the
top tray as a griddle to achieve a crispy coating and sticky BBQ glaze, emulating the “wing” experience.
Ingredients
- 1 cauliflower, cut into medium-sized florets
- 1 tin of cooked chickpeas, drained and dried
- 2 tablespoons of olive oil
- 1 teaspoon of paprika, 1/2 teaspoon of garlic powder, salt and pepper
- 120 ml of BBQ sauce (or a mixture of BBQ sauce and honey if you prefer a glossier finish)
Steps
- Preheat the grill or oven to 200 °C (indirect).
- Season the cauliflower and chickpeas with oil, paprika, garlic, salt and pepper.
- Spread on the top tray in a single layer. Cook for 20–25 minutes, stirring halfway through until the edges are golden brown.
- Glaze with the BBQ sauce and cook for another 5–8 minutes until sticky and shiny.
- Serve with lemon yoghurt or a tahini and herb cream.
Note: If you want to make a
mixed dish (chicken + vegetarian), cook the thighs first; remove and increase the heat. Place the cauliflower on the tray while the grill rests. This will prevent cross-contamination.